Start creating these delicious pops by mixing up the cake batter and baking as directed on the box. Allow the cake to cool completely before moving on to Step 2. We added additional yellow food coloring to our cake batter to get a bright yellow color to match Wonder Woman’s color palette.

Once the cake has completely cooled, use a Treat Pop Container to create the perfect sized cake circles for inside the pops. Carefully twist straight down into the cake to cut out as many circles as you need. Each Treat Pop Container will need 3 cake circles.

Now that the cake circles are cut out, place them to the side and get ready to start mixing up some colorful pudding! Set out two small bowls and empty pre-made pudding into each. If you need a significant amount of pops, it may be more cost effective to by the box and mix up a larger amount.

Add red and blue food coloring to each bowl and mix until the desired colors are achieved.

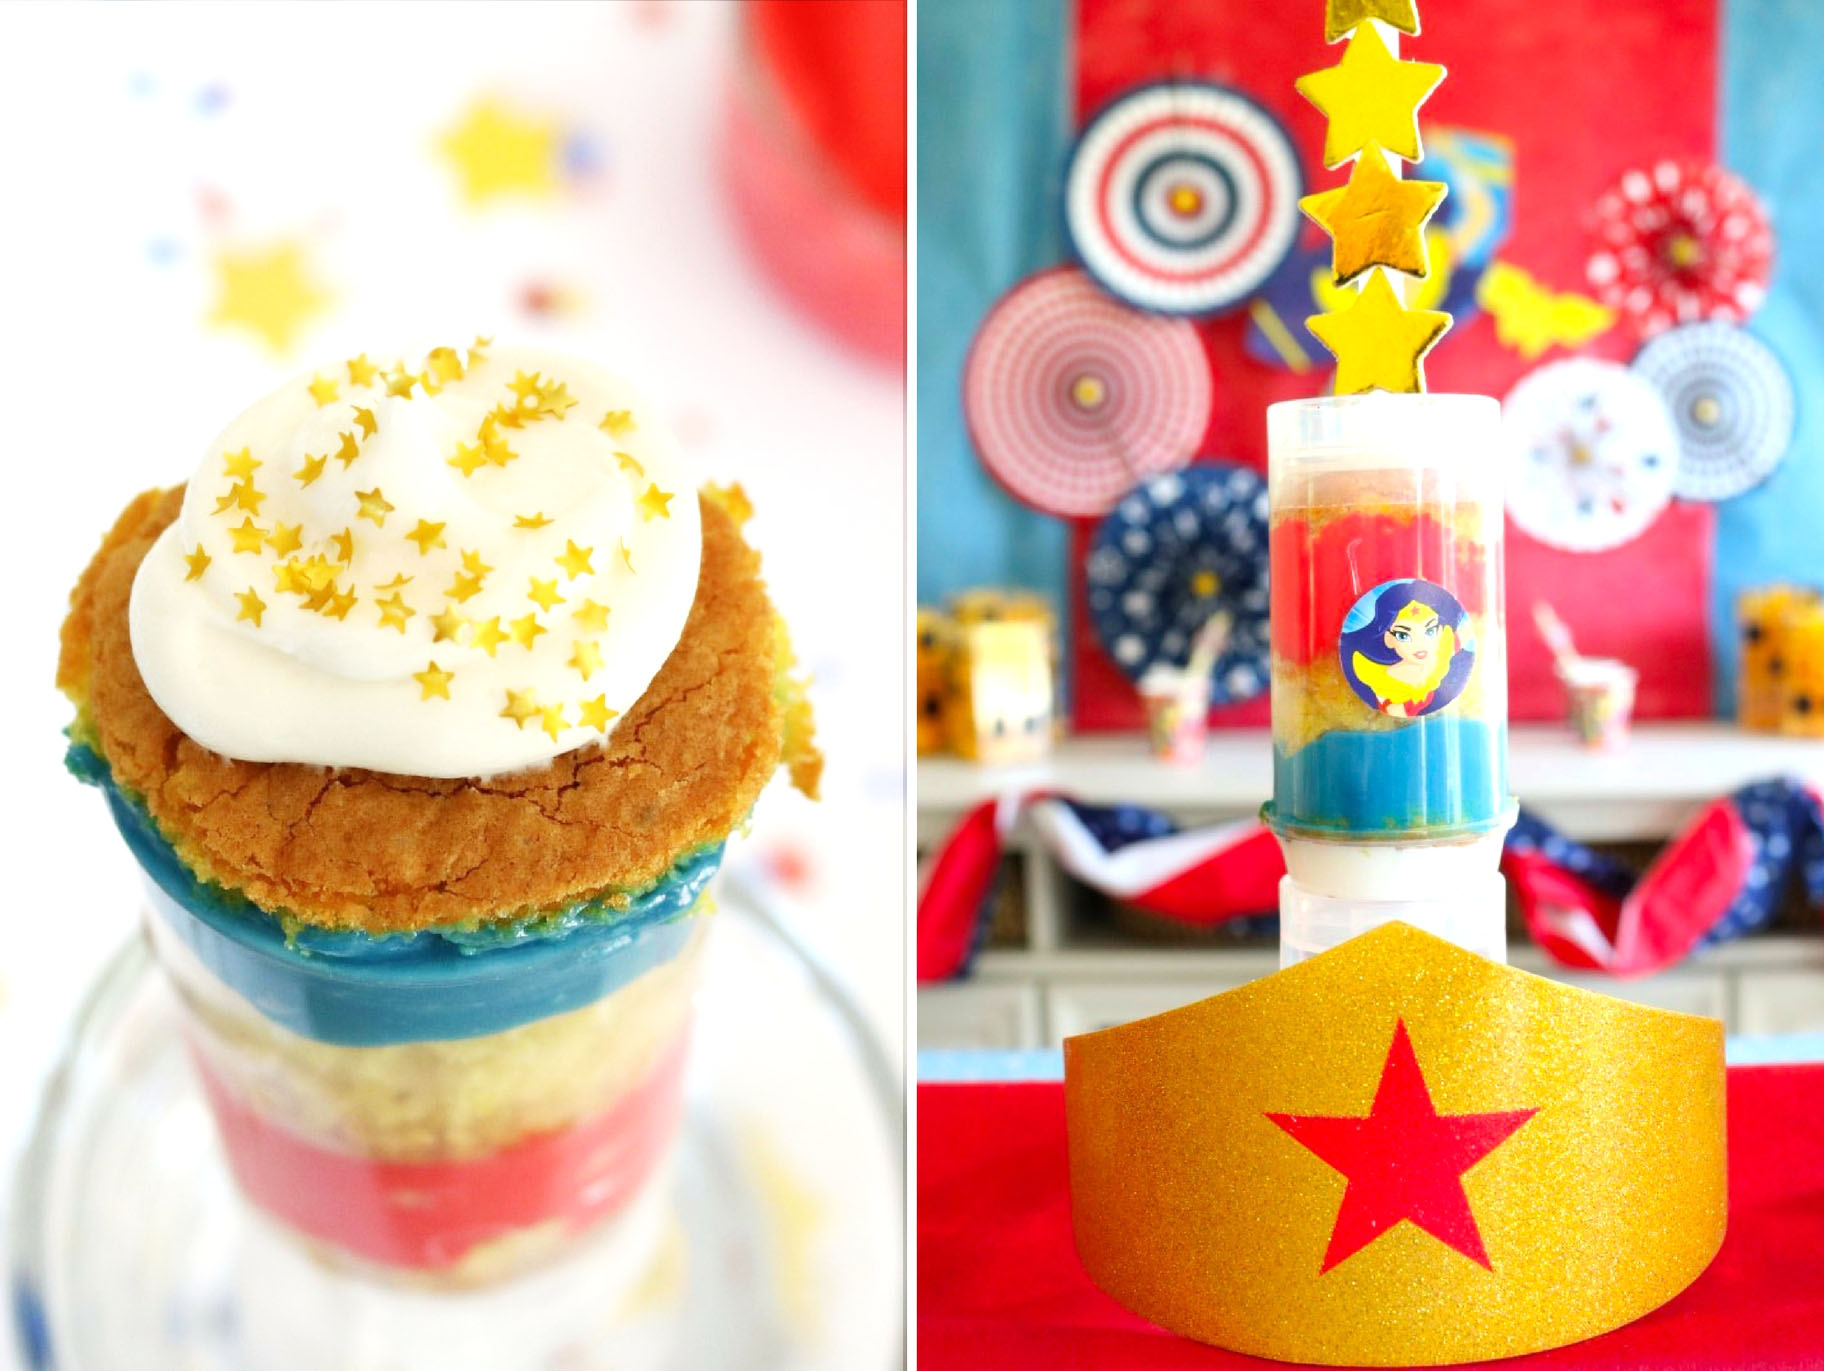
Start by placing the bottom cake circle into the Treat Pop Container. Then, begin adding the pudding directly on top. Repeat this process with varying colors and additional layers of cake until the Treat Pop Container is full.

Add a dollop of cake frosting on top and add some star sprinkles to the top, replacing the lid when complete.

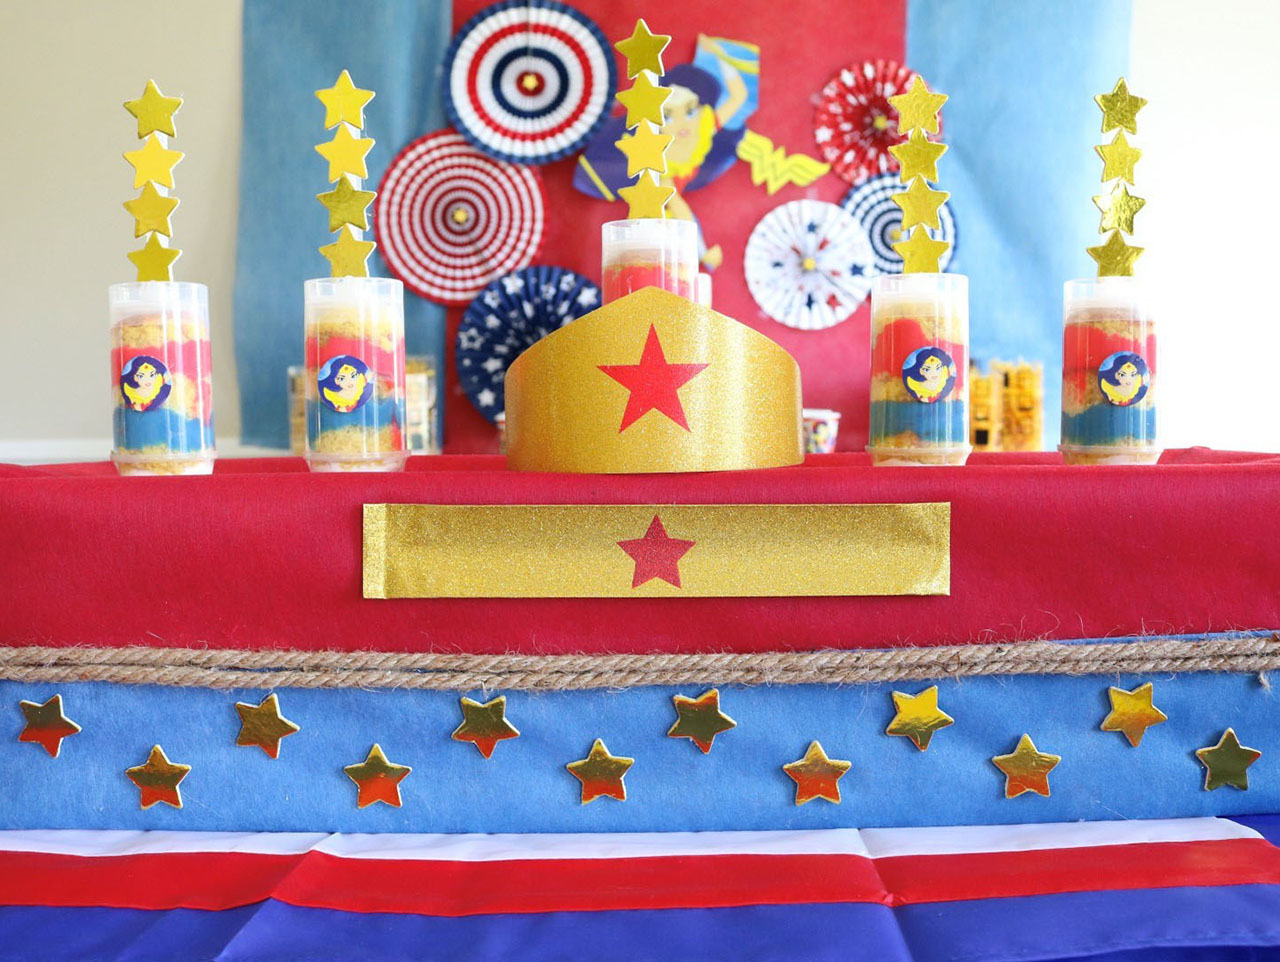
Add a custom Wonder Woman look to your Treat Pop Containers by using a bit of hot glue to adhere a piece of DC SuperHero Girls™ Confetti to the front of each pop container and a few Adhesive Wooden Gold Stars to the handle.

Lastly, display your Wonder Woman Pudding Cake Pops on top of your Wonder Woman Superhero Centerpiece at your Wonder Woman Party, and enjoy this tasty treat!

Looking for more Wonder Woman Party inspiration? Be sure to check out our Wonder Woman Party, DIY Wonder Woman Favor Boxes and DIY Superhero Centerpiece Ideas!

Start creating these delicious pops by mixing up the cake batter and baking as directed on the box. Allow the cake to cool completely before moving on to Step 2. We added additional yellow food coloring to our cake batter to get a bright yellow color to match Wonder Woman’s color palette.

Once the cake has completely cooled, use a Treat Pop Container to create the perfect sized cake circles for inside the pops. Carefully twist straight down into the cake to cut out as many circles as you need. Each Treat Pop Container will need 3 cake circles.

Now that the cake circles are cut out, place them to the side and get ready to start mixing up some colorful pudding! Set out two small bowls and empty pre-made pudding into each. If you need a significant amount of pops, it may be more cost effective to by the box and mix up a larger amount.

Add red and blue food coloring to each bowl and mix until the desired colors are achieved.

Start by placing the bottom cake circle into the Treat Pop Container. Then, begin adding the pudding directly on top. Repeat this process with varying colors and additional layers of cake until the Treat Pop Container is full.

Add a dollop of cake frosting on top and add some star sprinkles to the top, replacing the lid when complete.

Add a custom Wonder Woman look to your Treat Pop Containers by using a bit of hot glue to adhere a piece of DC SuperHero Girls™ Confetti to the front of each pop container and a few Adhesive Wooden Gold Stars to the handle.

Lastly, display your Wonder Woman Pudding Cake Pops on top of your Wonder Woman Superhero Centerpiece at your Wonder Woman Party, and enjoy this tasty treat!

Looking for more Wonder Woman Party inspiration? Be sure to check out our Wonder Woman Party, DIY Wonder Woman Favor Boxes and DIY Superhero Centerpiece Ideas!


