Using the DIY wood circle stand ups begin painting your "moon" by mixing a small amount of white and gray acrylic paint to achieve a lighter gray color. Using a flat tipped paintbrush, cover the entire surface of the circle from a DIY wood circle stand up with the light gray paint. Apply two to three layers to ensure the wood is evenly covered. Paint both sides. While one side is still slightly wet, immediately move on to step two.
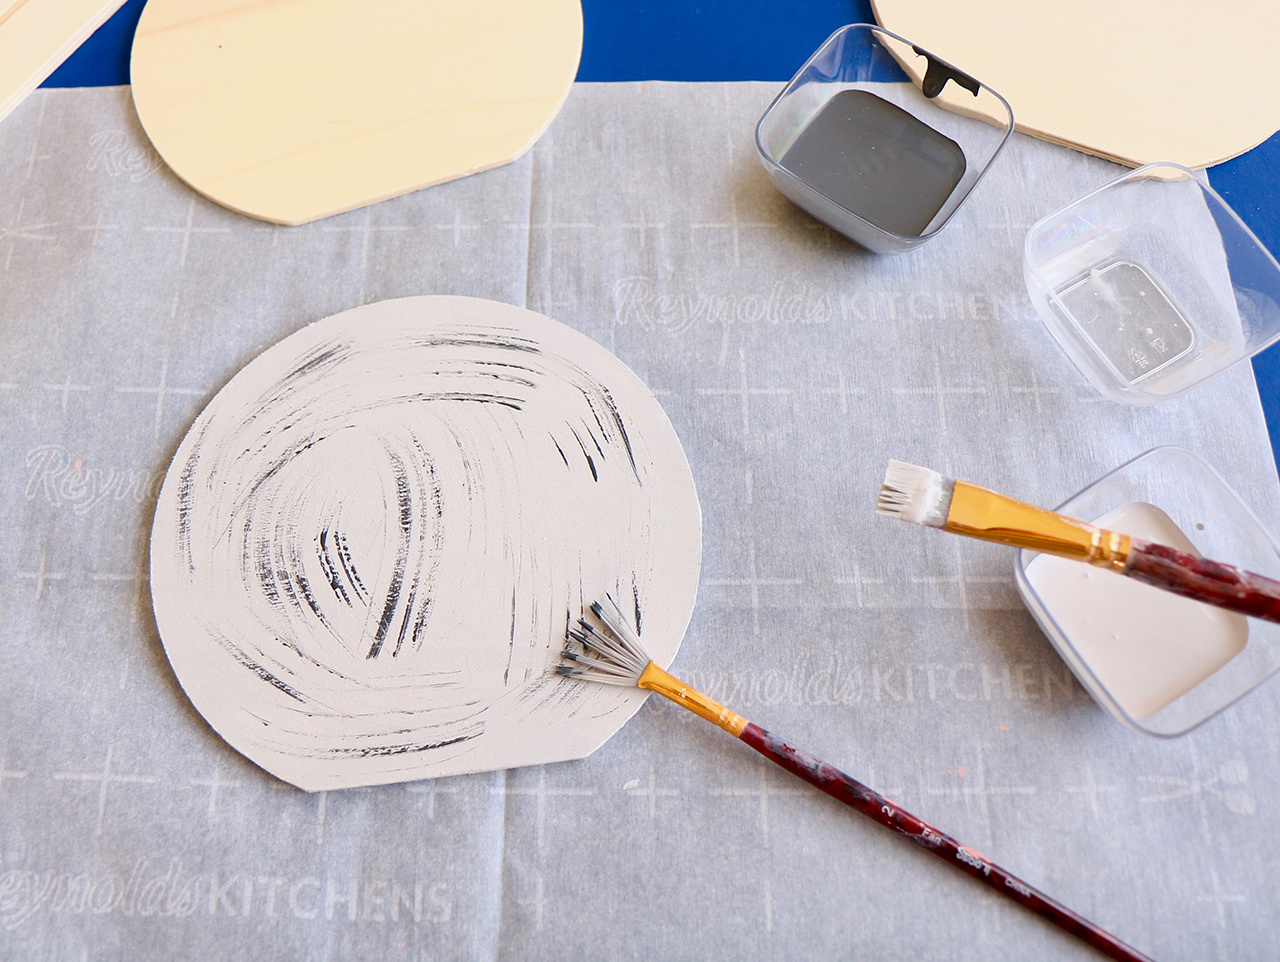

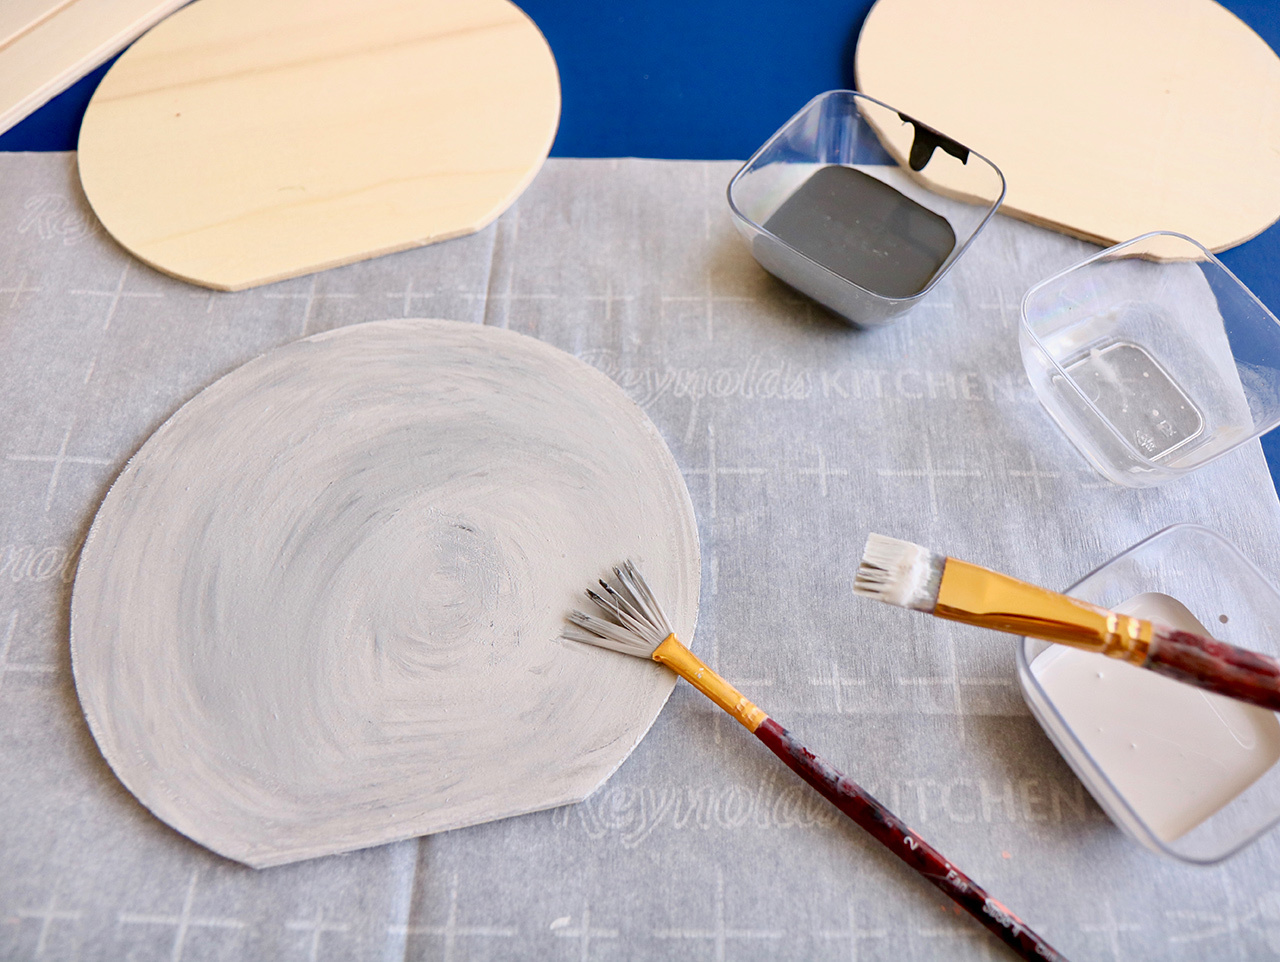
Next, mix a bit of black paint with the gray paint for a charcoal gray. Using a fan brush, apply a few light strokes of the gray randomly atop the first layer of paint. This works best if the light gray paint is still slightly wet. Work in a curved, circular motion with the brush to blend. Keep a small dish of water on hand to dip your brush into to keep the paint wet and easier to manipulate. Add more light gray and charcoal gray paints as needed to achieve the desired effect.
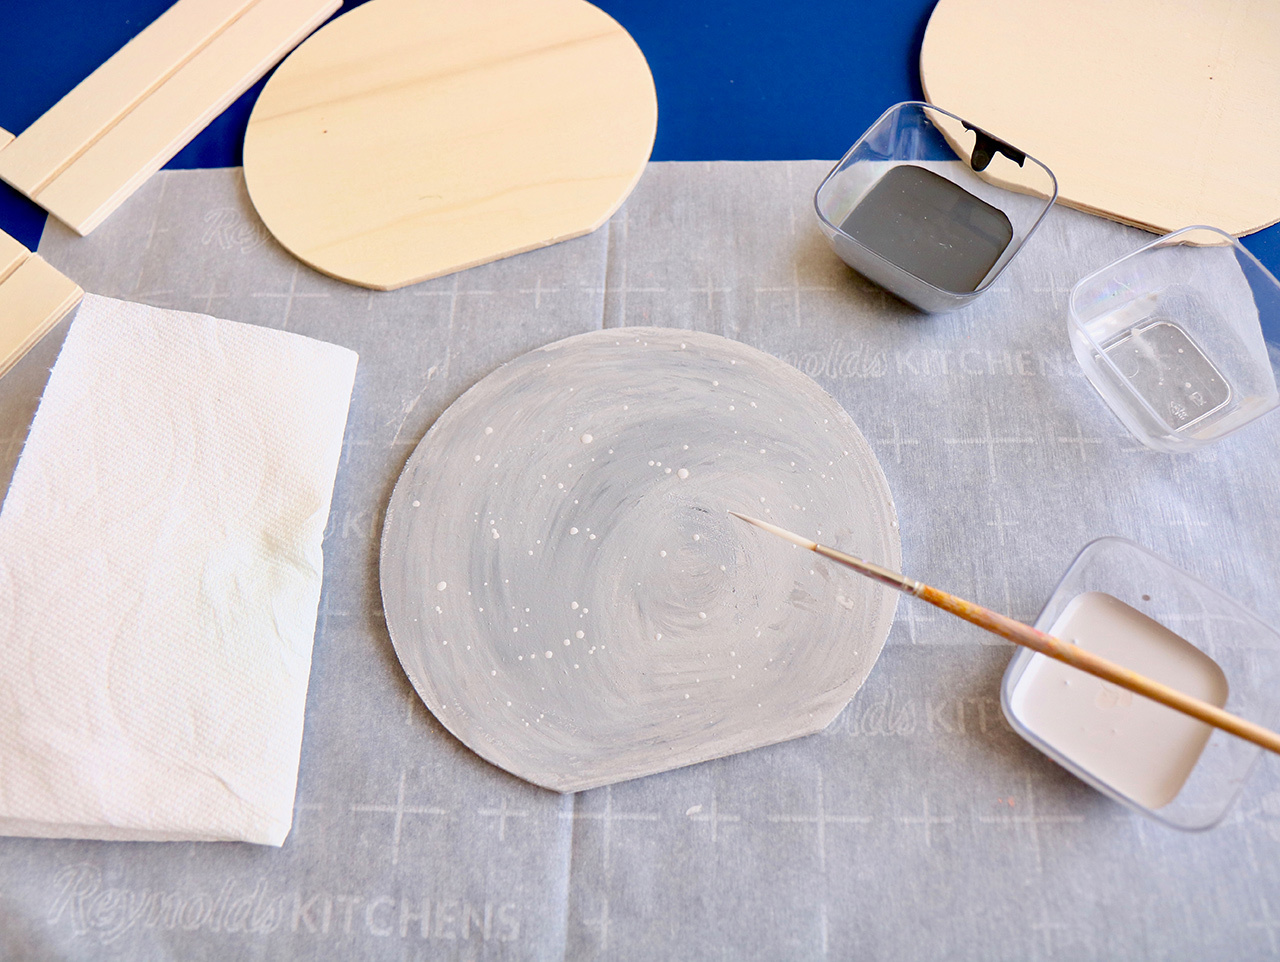


Next, use a long skinny tipped brush to lightly splatter drops of light gray paint onto the painted surface to add "craters" to the moon. I found that dipping my brush into the paint, and then into the water for a second, helped to achieve a good splatter effect. Once you have your craters splattered, use a paper towel or a light cloth to gently press onto the "craters" to flatten them out a bit. Set the newly created moons aside to dry.
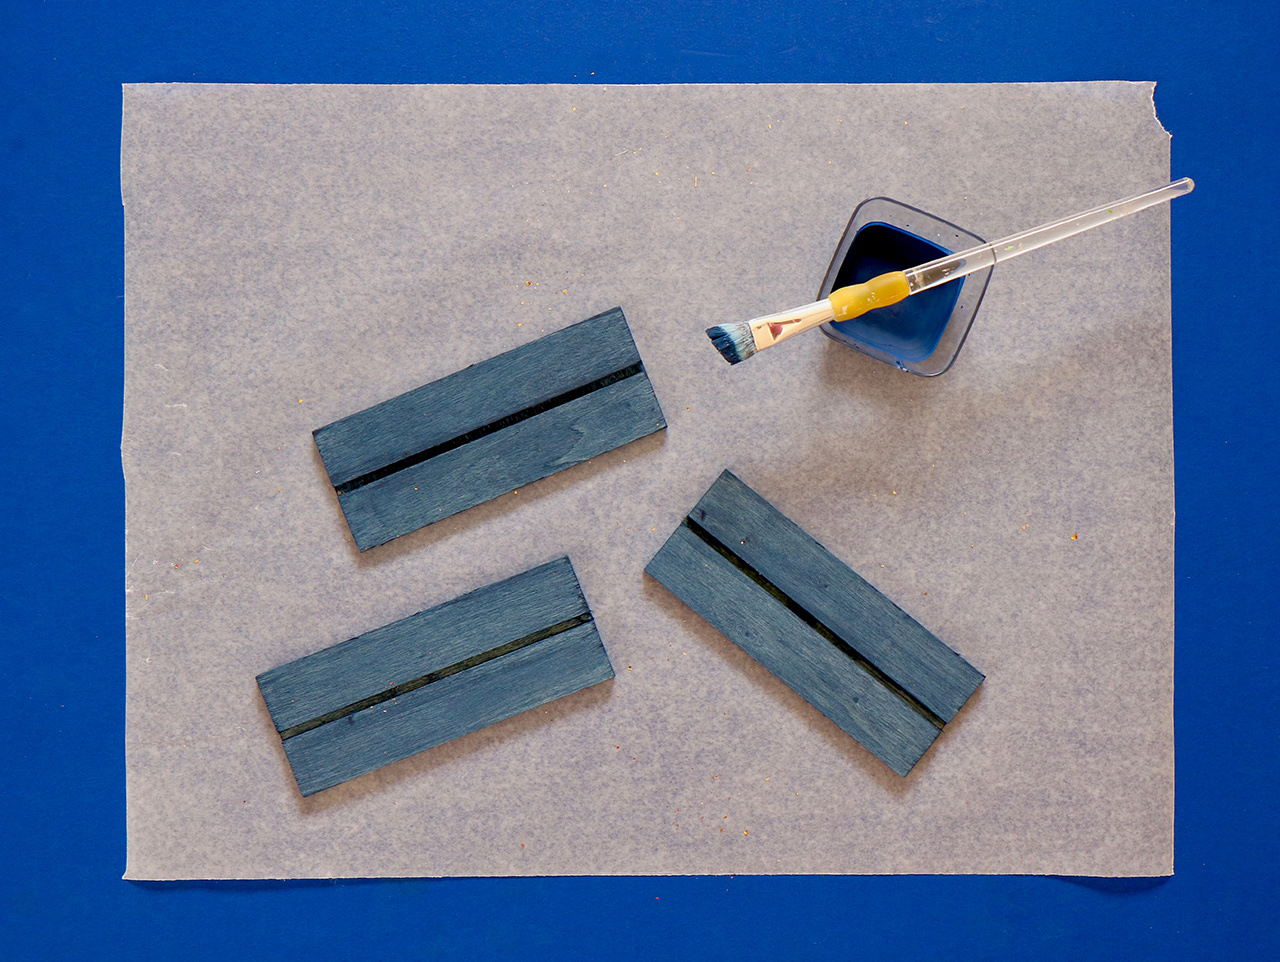
Now paint the flat bases for the circle stand ups a dark blue color. This may take a few coats to fully cover. Set them aside to dry.
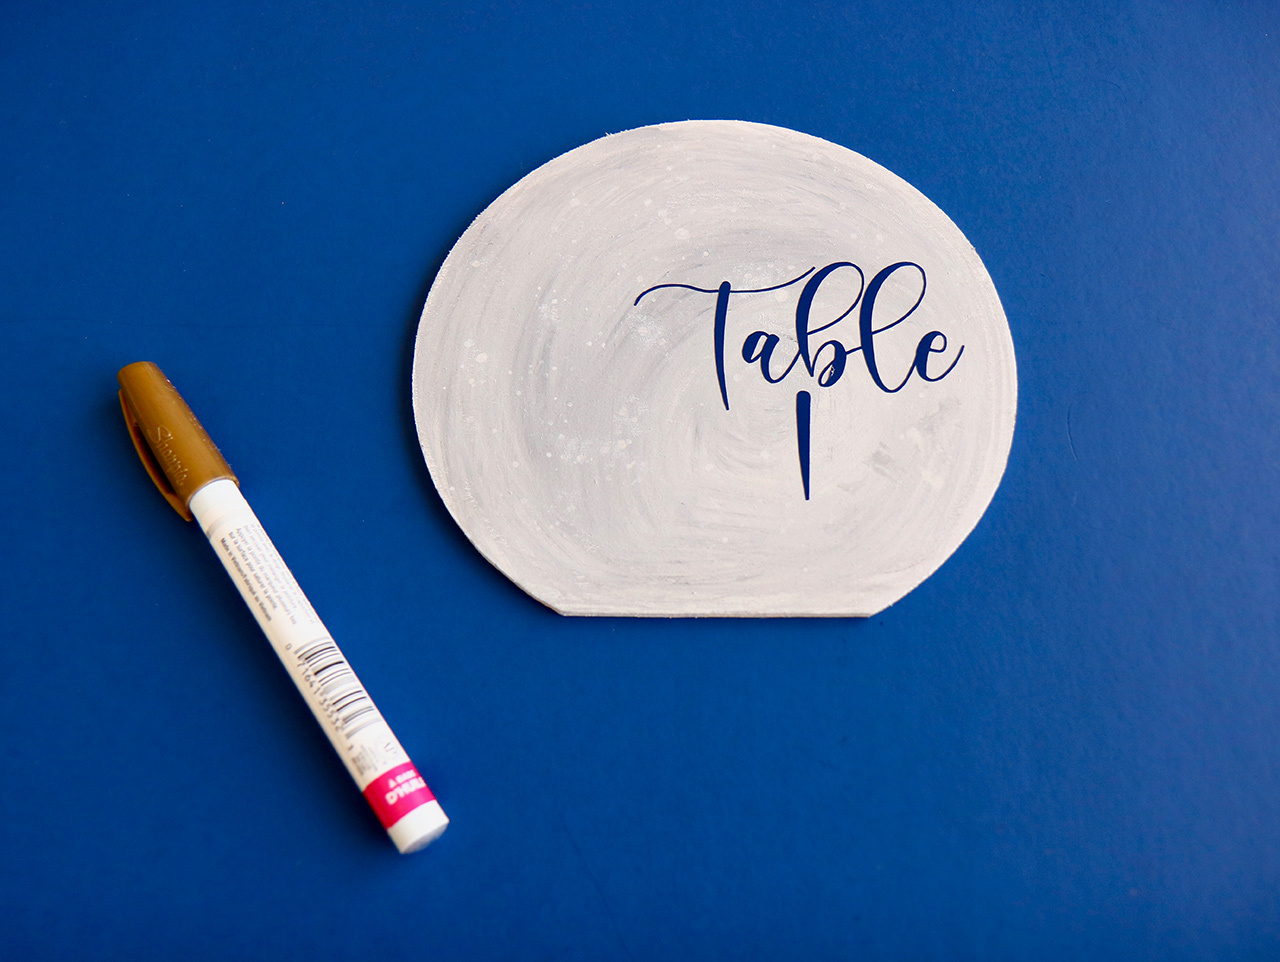
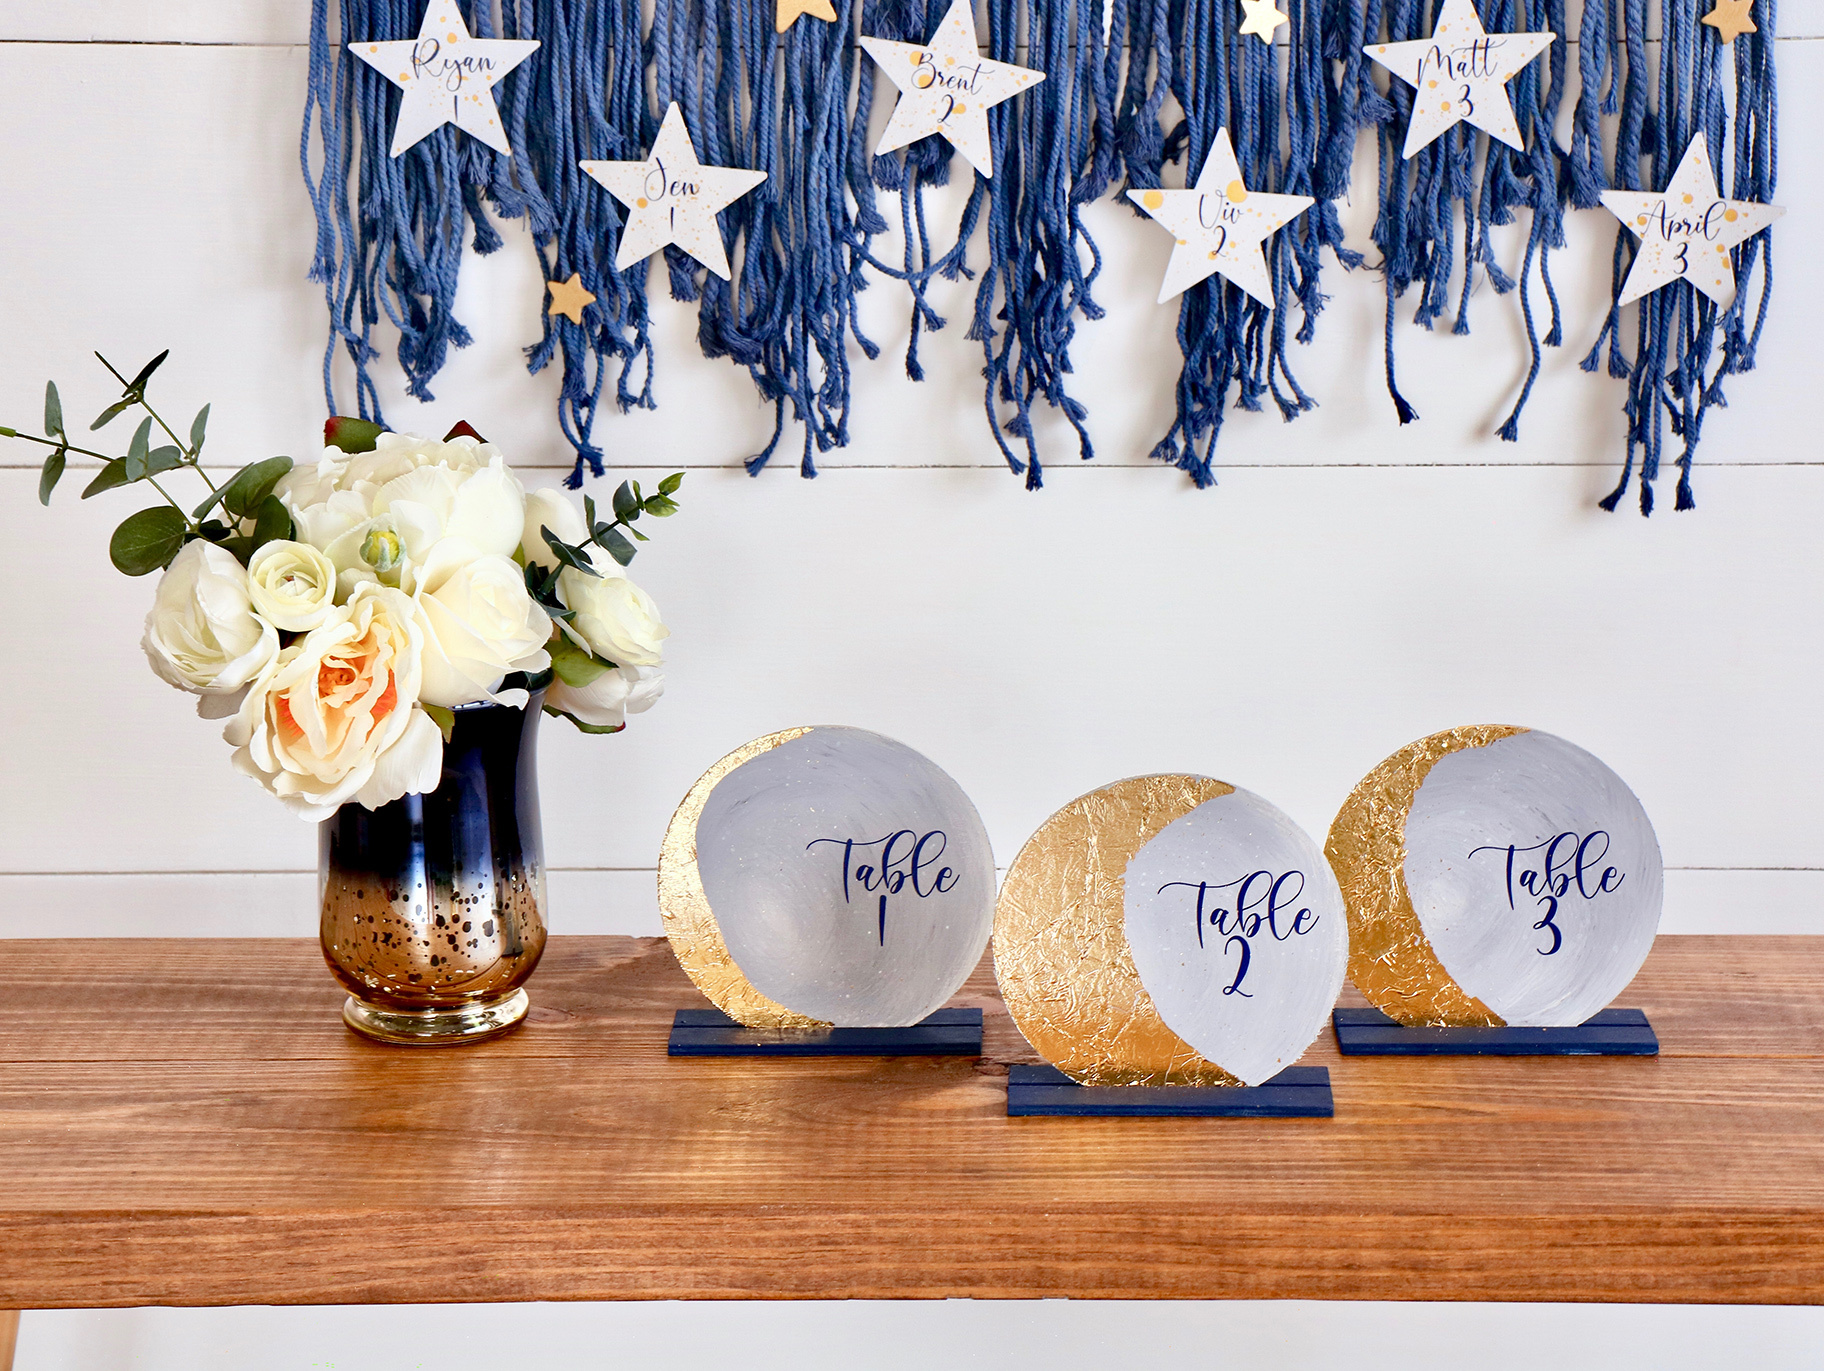
Once the moons have dried, add your table numbers. If you have nice handwriting you can write them directly onto the surface using a paint marker or Sharpie®. I used my cutting machine to cut the table numbers onto blue vinyl. With either method you choose, be sure to place the numbers on the right side of the moons as we will embellish the left sides in the next step.
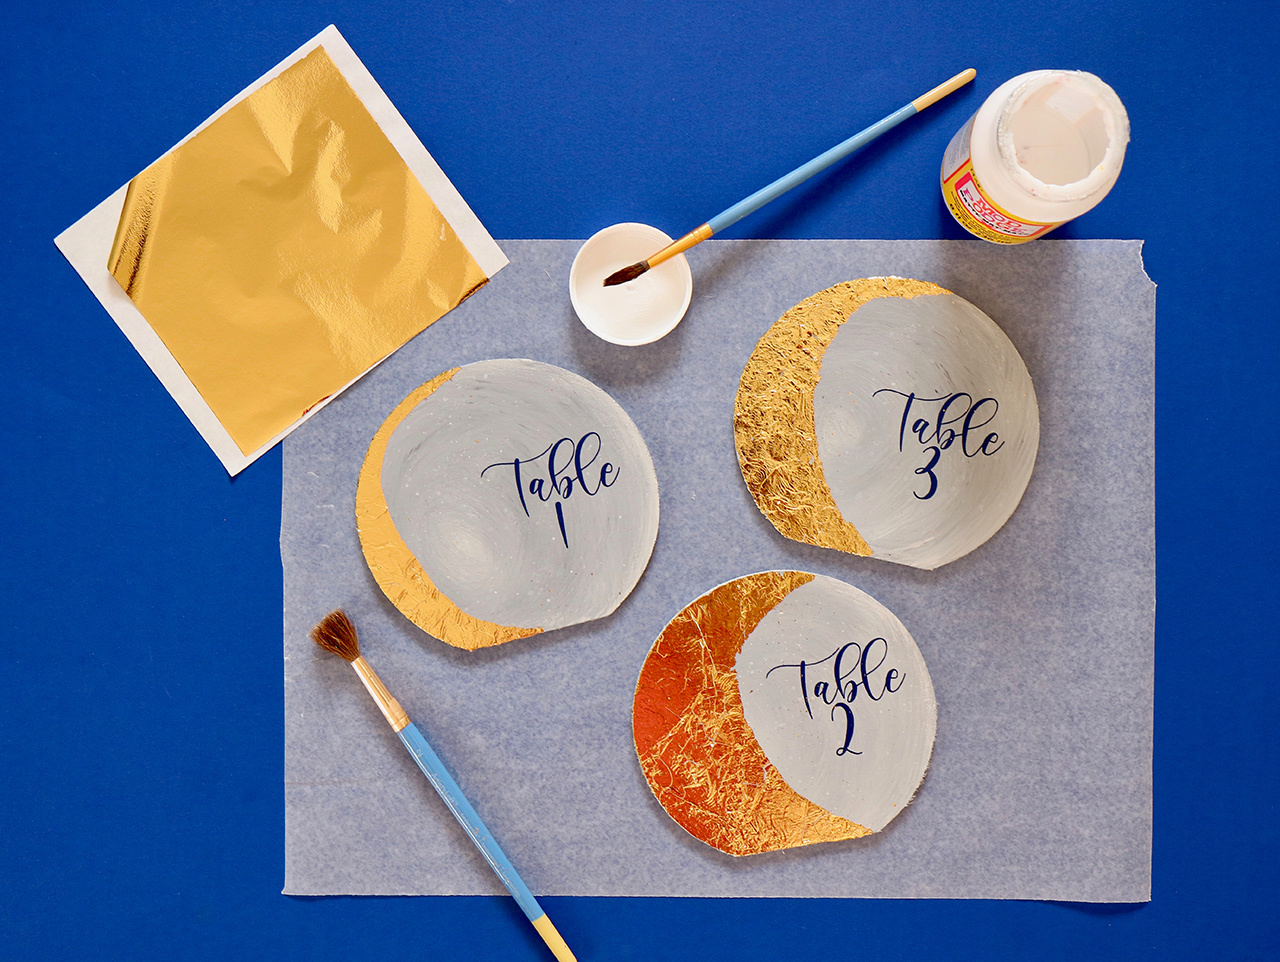
Download and print the free printable phases of the moon found here as a guide for this step. Once you have chosen a moon phase, use a watercolor paintbrush to apply a thin layer of Mod Podge® to the left side of the moon. Next, gently apply a full sheet of gold foil directly on top of the Mod Podge®. Let it set a few minutes to dry, and then using a dry watercolor paintbrush lightly brush off the excess foil. Touch up any spots that didn't cover following these same steps.
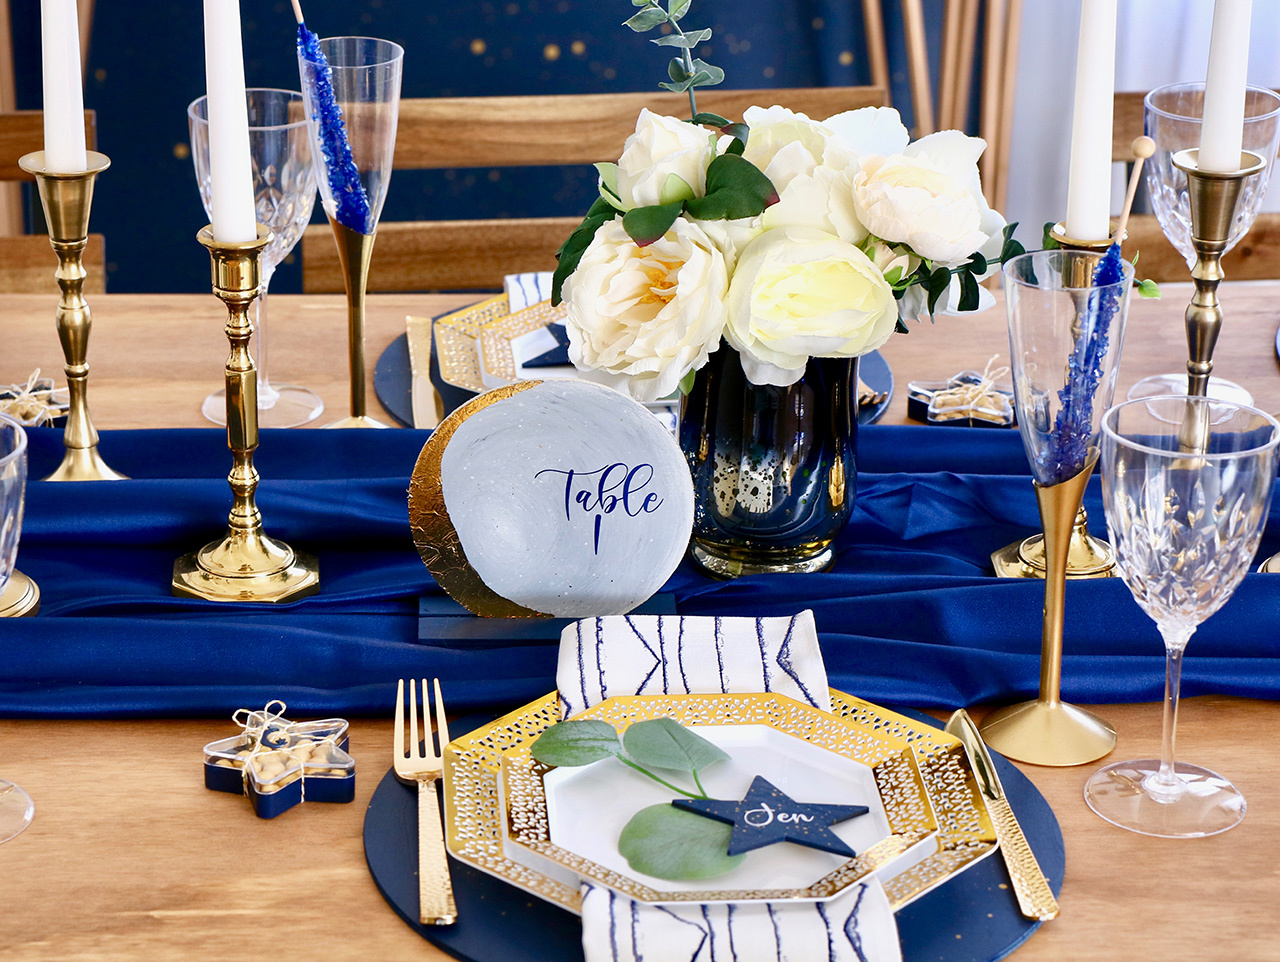
Finally, add your phases of the moon table numbers to the blue bases so they stand up and place them on each table during your Starry Night Wedding!
For more romantic celestial themed wedding ideas be sure to check out the full Starry Night Wedding, the steps to create your own bohemian inspired Starry Night Seating Chart and the ethereal Dreamy Floral Moon Backdrop DIY.

Using the DIY wood circle stand ups begin painting your "moon" by mixing a small amount of white and gray acrylic paint to achieve a lighter gray color. Using a flat tipped paintbrush, cover the entire surface of the circle from a DIY wood circle stand up with the light gray paint. Apply two to three layers to ensure the wood is evenly covered. Paint both sides. While one side is still slightly wet, immediately move on to step two.


Next, mix a bit of black paint with the gray paint for a charcoal gray. Using a fan brush, apply a few light strokes of the gray randomly atop the first layer of paint. This works best if the light gray paint is still slightly wet. Work in a curved, circular motion with the brush to blend. Keep a small dish of water on hand to dip your brush into to keep the paint wet and easier to manipulate. Add more light gray and charcoal gray paints as needed to achieve the desired effect.


Next, use a long skinny tipped brush to lightly splatter drops of light gray paint onto the painted surface to add "craters" to the moon. I found that dipping my brush into the paint, and then into the water for a second, helped to achieve a good splatter effect. Once you have your craters splattered, use a paper towel or a light cloth to gently press onto the "craters" to flatten them out a bit. Set the newly created moons aside to dry.

Now paint the flat bases for the circle stand ups a dark blue color. This may take a few coats to fully cover. Set them aside to dry.

Once the moons have dried, add your table numbers. If you have nice handwriting you can write them directly onto the surface using a paint marker or Sharpie®. I used my cutting machine to cut the table numbers onto blue vinyl. With either method you choose, be sure to place the numbers on the right side of the moons as we will embellish the left sides in the next step.

Download and print the free printable phases of the moon found here as a guide for this step. Once you have chosen a moon phase, use a watercolor paintbrush to apply a thin layer of Mod Podge® to the left side of the moon. Next, gently apply a full sheet of gold foil directly on top of the Mod Podge®. Let it set a few minutes to dry, and then using a dry watercolor paintbrush lightly brush off the excess foil. Touch up any spots that didn't cover following these same steps.

Finally, add your phases of the moon table numbers to the blue bases so they stand up and place them on each table during your Starry Night Wedding!
For more romantic celestial themed wedding ideas be sure to check out the full Starry Night Wedding, the steps to create your own bohemian inspired Starry Night Seating Chart and the ethereal Dreamy Floral Moon Backdrop DIY.

