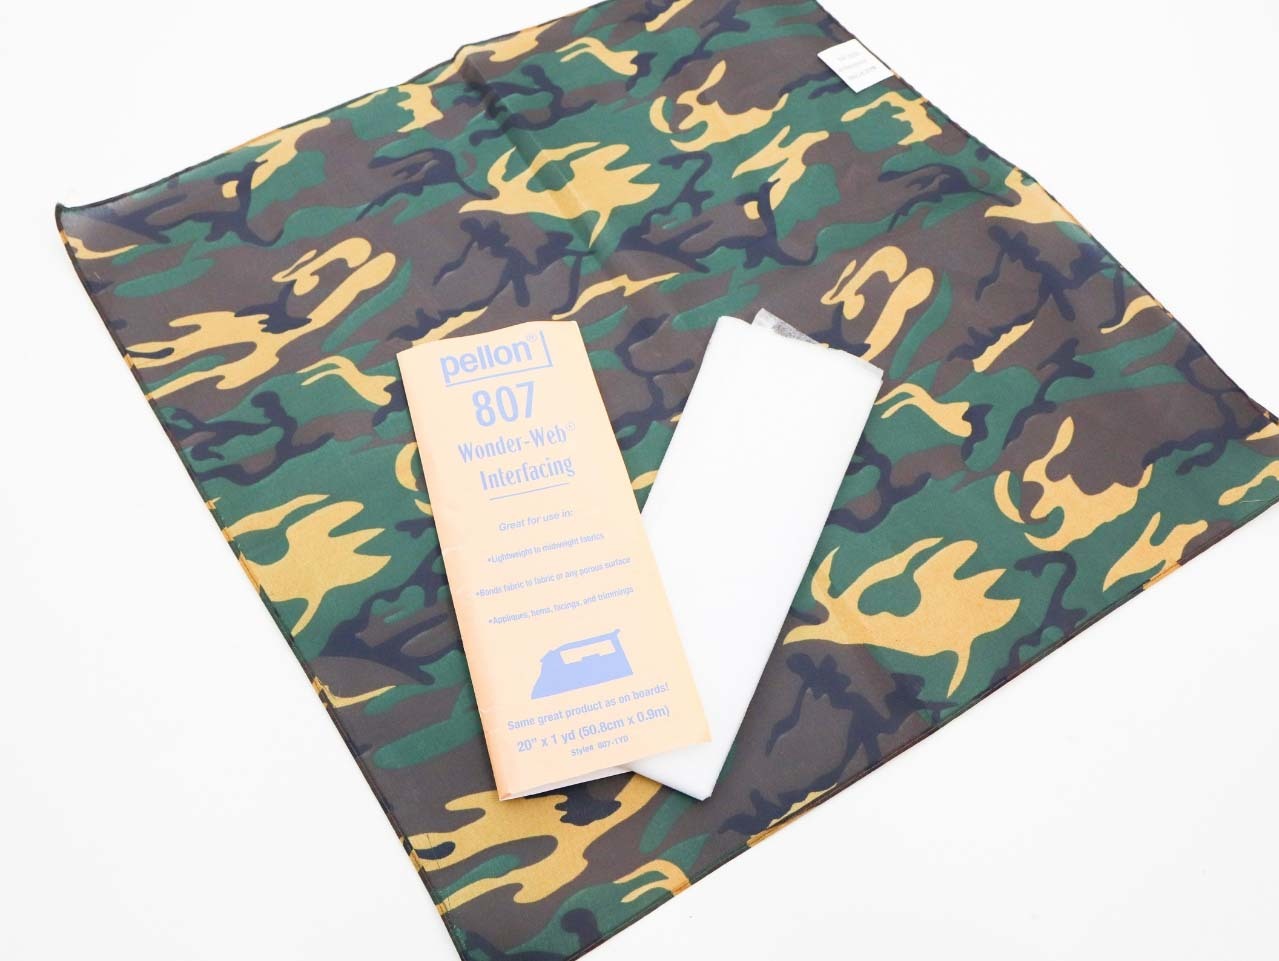
First, apply iron-on wonder-web interfacing onto Camouflage Bandannas as per the instructions provided by the manufacturer.
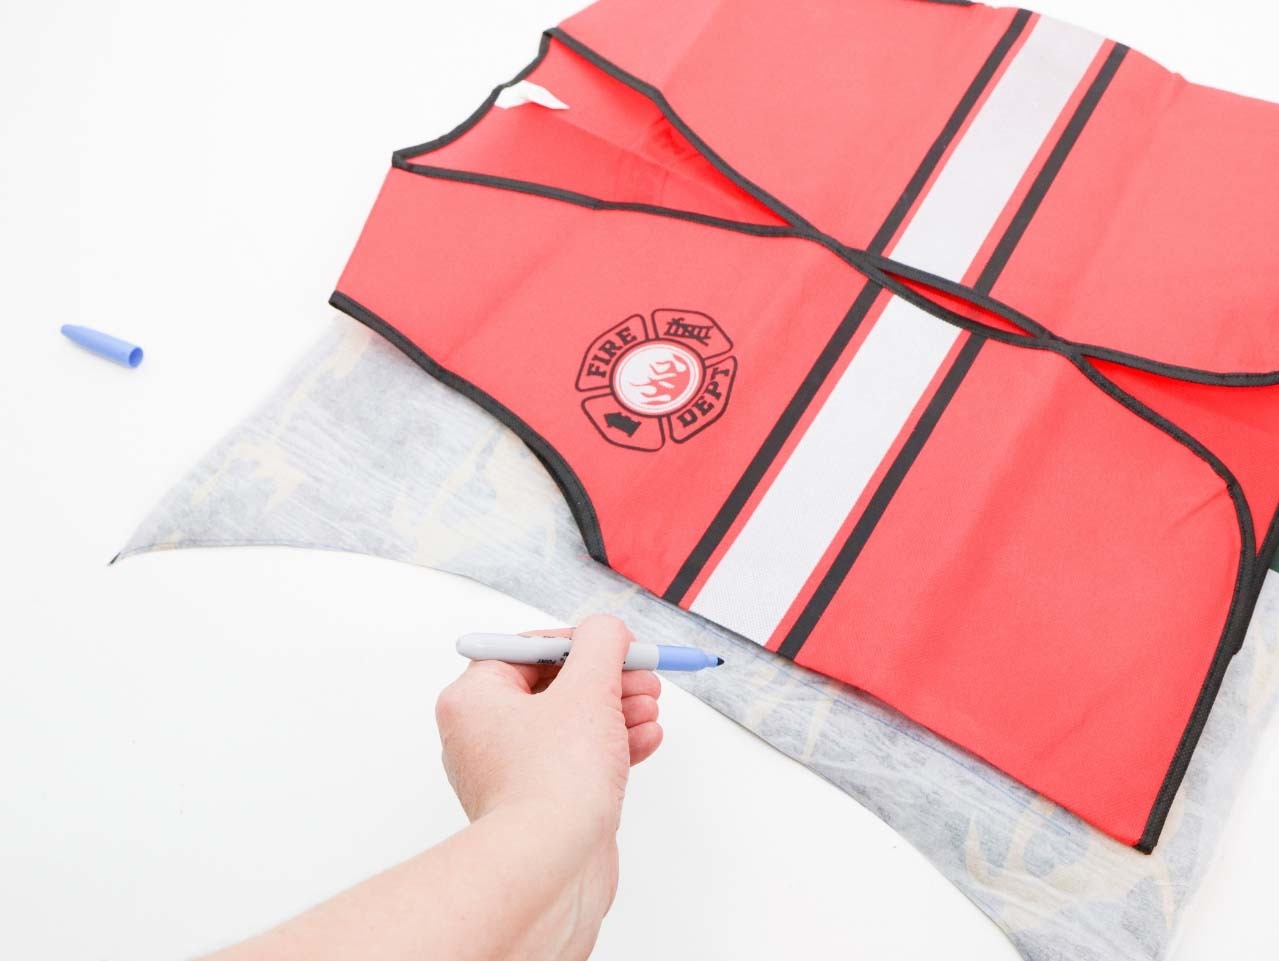


Once the camouflage fabric is ready, trace the outline of a Firefighter Vest onto the interfacing side of fabric. I traced 4 pieces; each front side and 2 pieces for the back of the vest (top and bottom, in order to leave the reflective strip in the middle of the vest). Cut each piece out, remove the top layer of the backing and iron onto the vest following interface manufacturers instructions. Use a damp cloth and follow the timing carefully so as not damage the vest. Trim off any excess fabric.


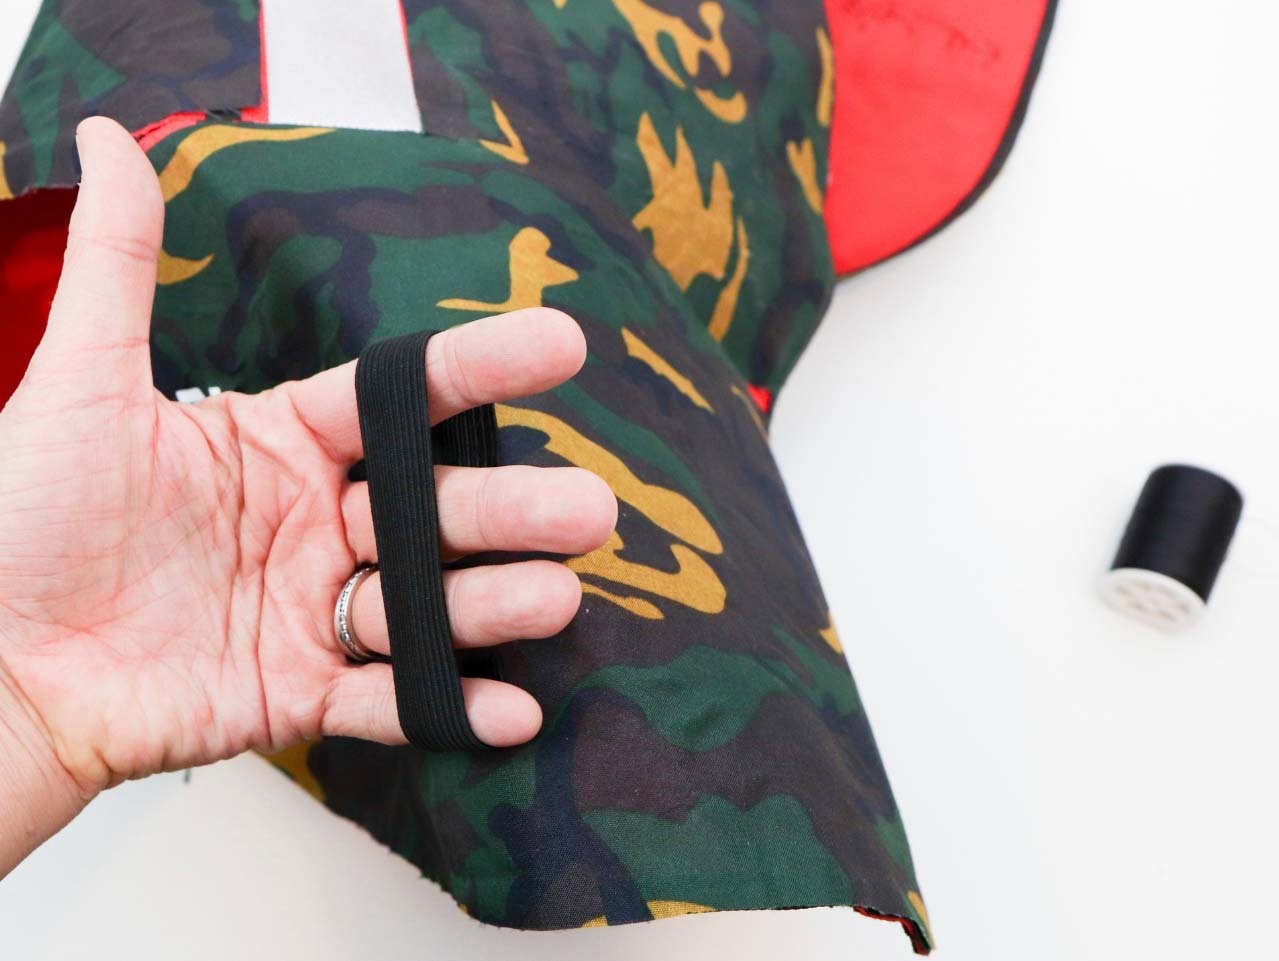
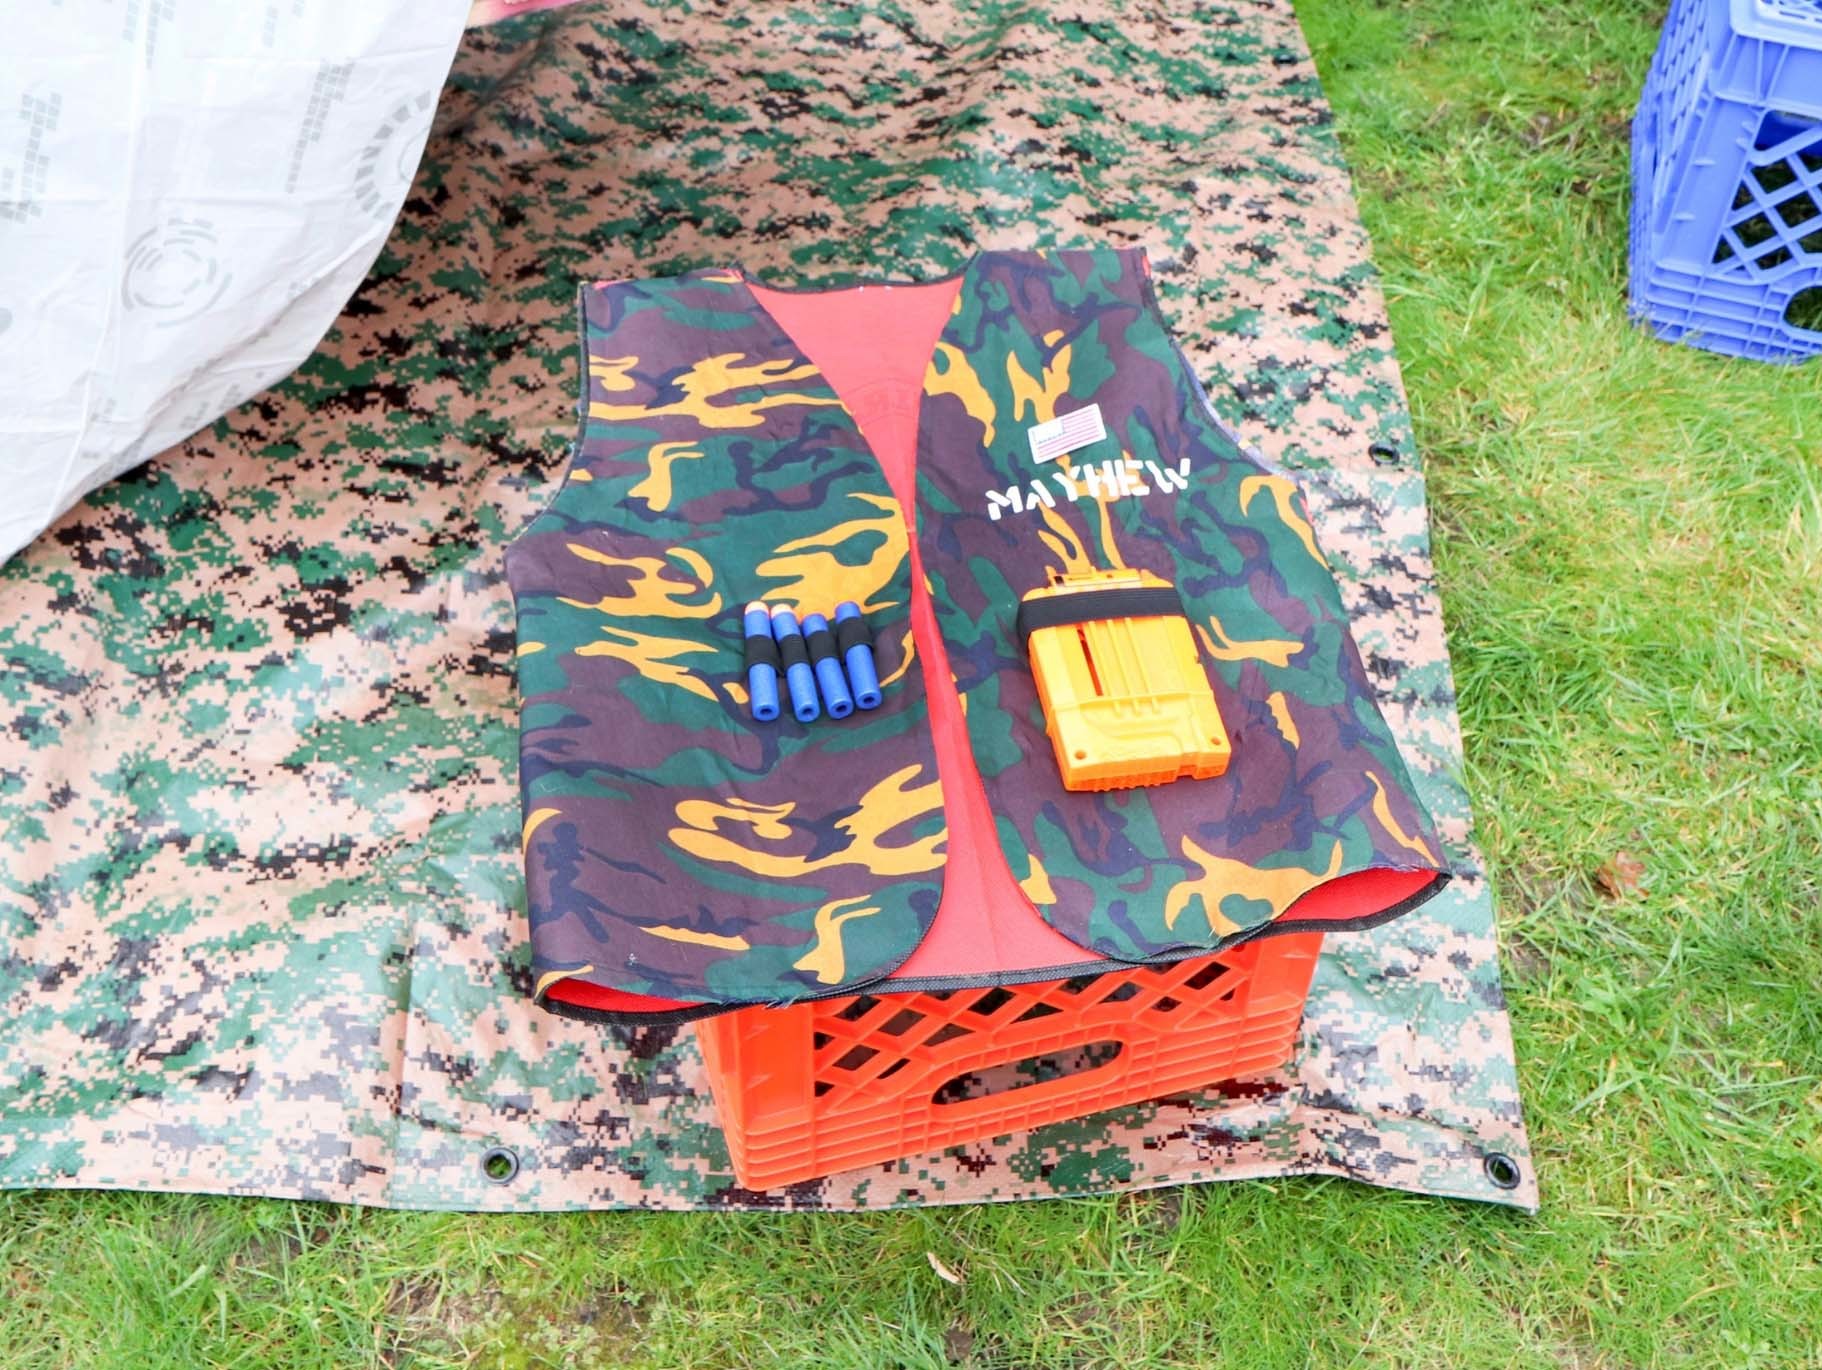
Next, cut a length of elastic to fit a Nerf® reload cartridge case. Sew the elastic into position on the upper front vest.
Tip: Have your child try on the vest to determine the best position.
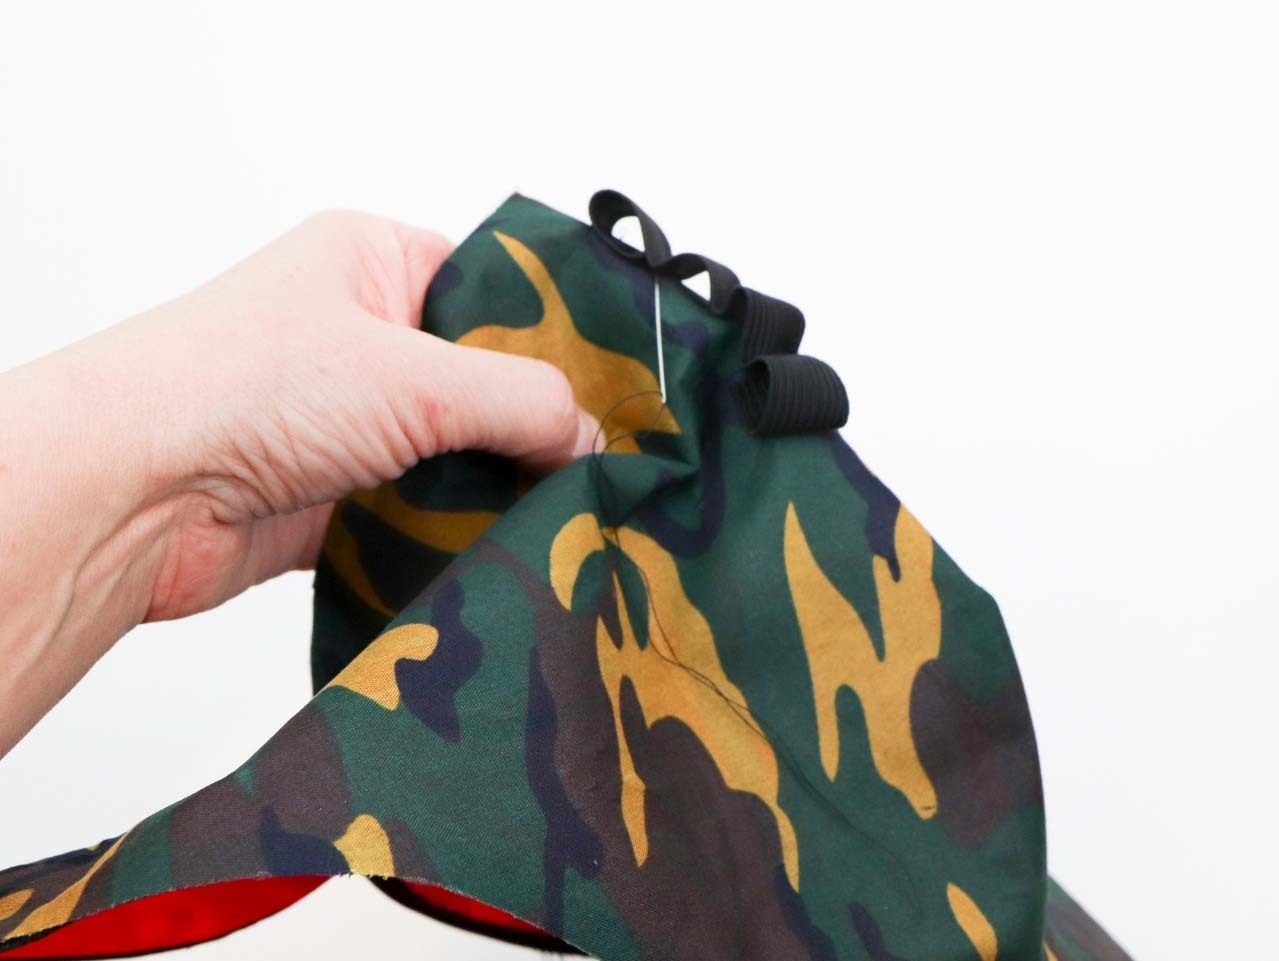
Sew another strip of elastic onto the other side of the vest. This time sew smaller loops into the length of elastic to fit Nerf® bullets. Have a Nerf® bullet to hand to measure the exact width required. Using a stick-on Velcro patch, attach a small US flag patch (alternatively this can be sewn on).
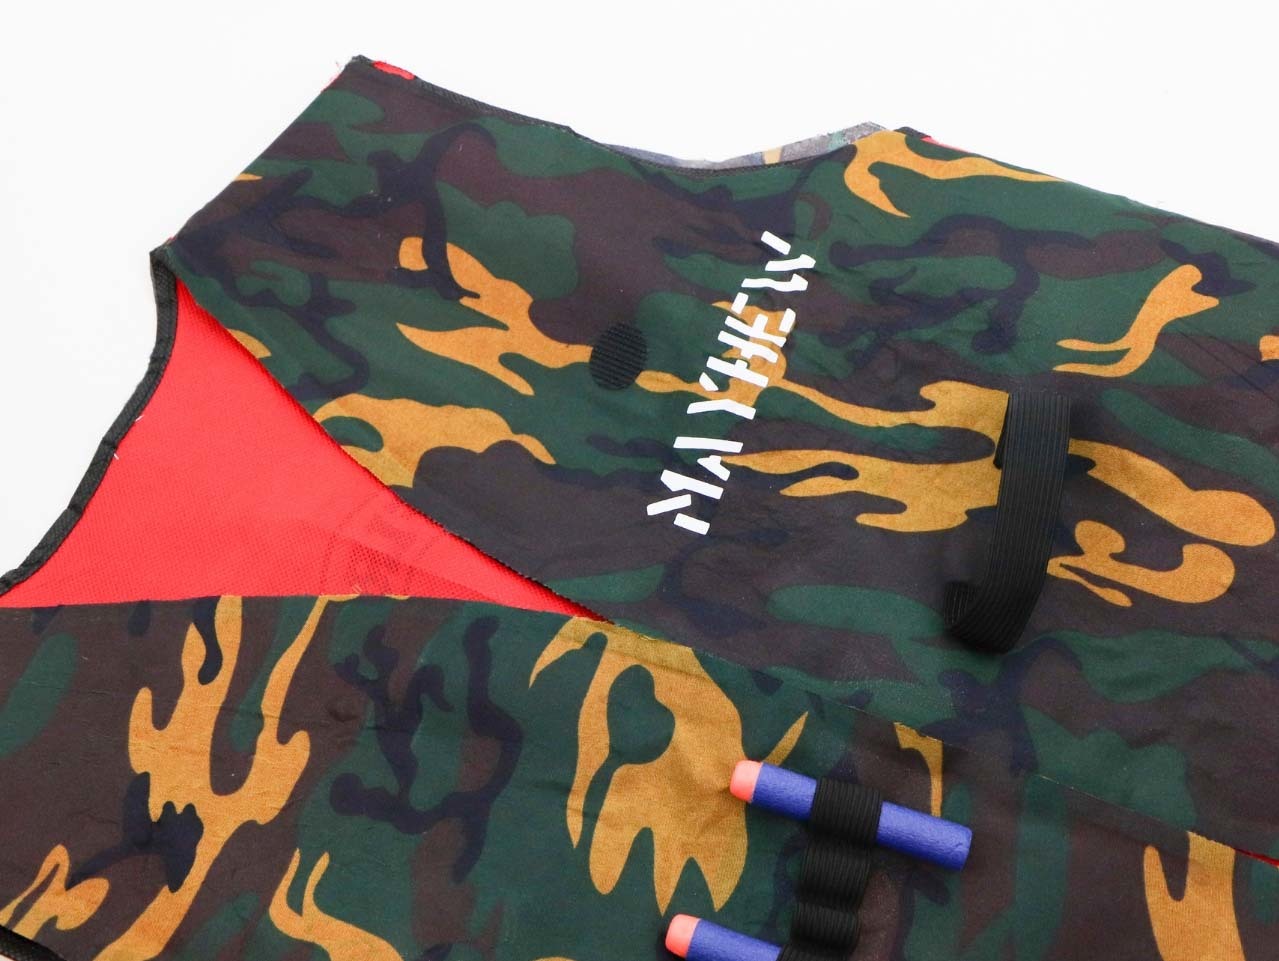


Once the vest is complete, personalize the vest with the party guests' last names. I used my Cricut™ to cut the names using vinyl, alternatively you can use iron-on letters. Repeat this process on a Camouflage Baseball Cap. I also added names to Dog Tag Necklaces using metal letter stamps and a mallet. A Fruit of the Loon All-American T-Shirt® and Nerf® Arm Sleeve completes the battle attire for the kit. The sleeve was a fan favorite in our house!
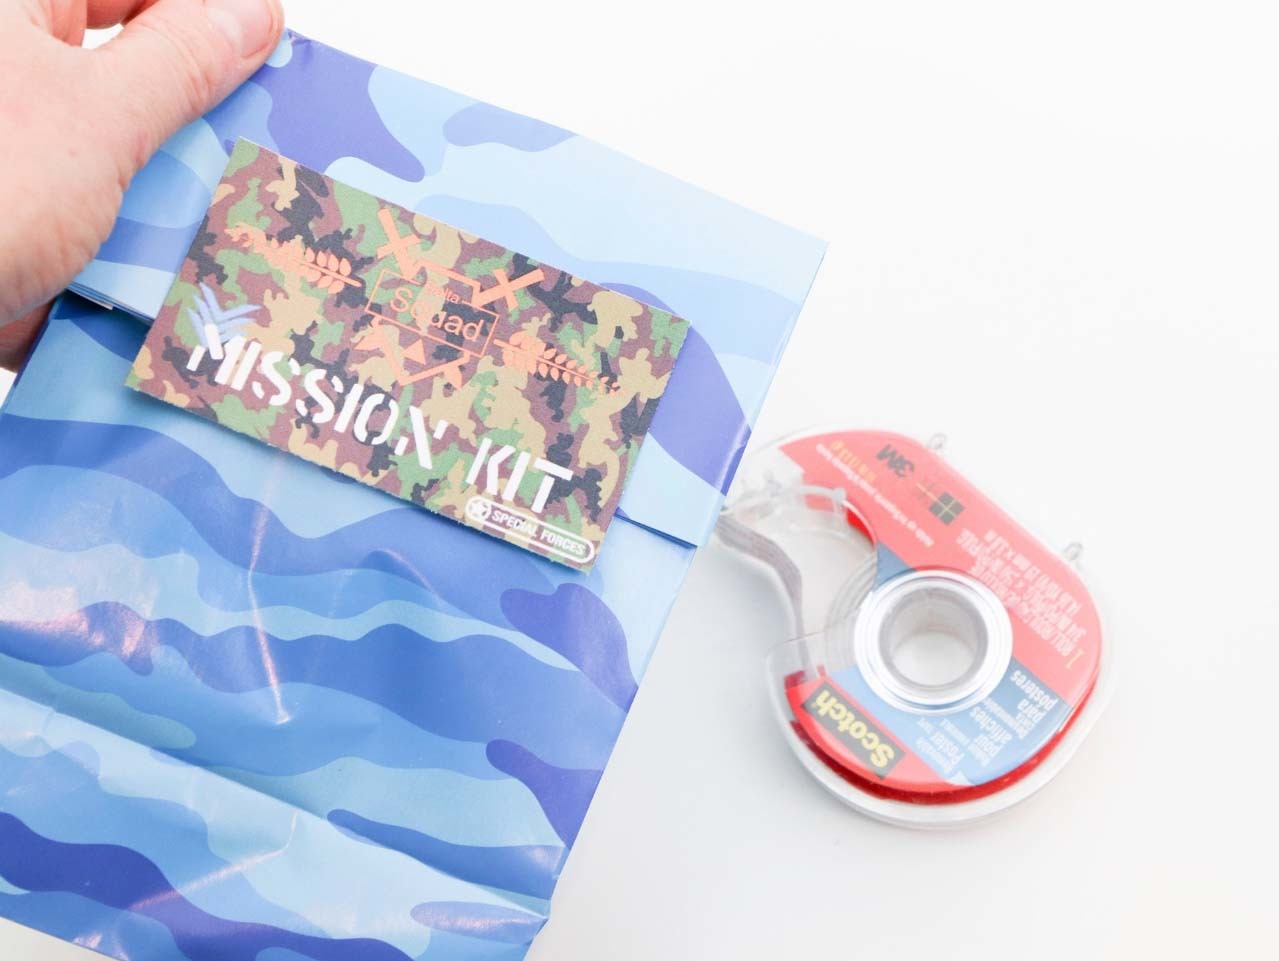

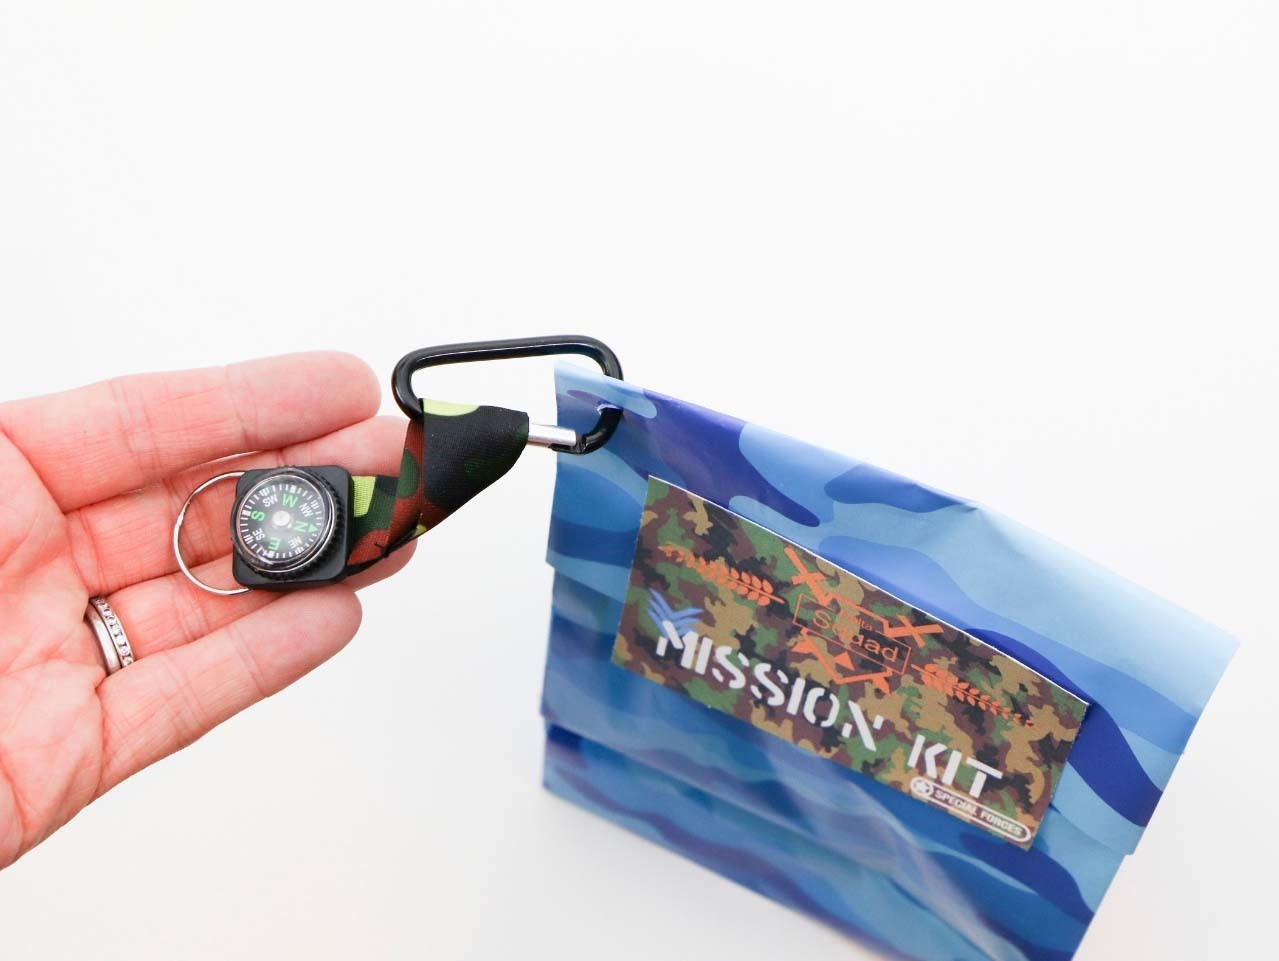
Next, fill the kit bags. Fill Colorful Camoflage Treat Bags with Camoflague Army Sunglasses, Camouflage Binoculars and Nerf® Disc Shooters. Once the bag is filled print out the FREE mission kit labels HERE. Cut out the labels and attach them to the bags with double-sided tape. Use a hole punch to make a hole in the top corner of the bag. Thread a Camouflage Army Belt Clip Toy Compass Carabiner Key chains through the hole.
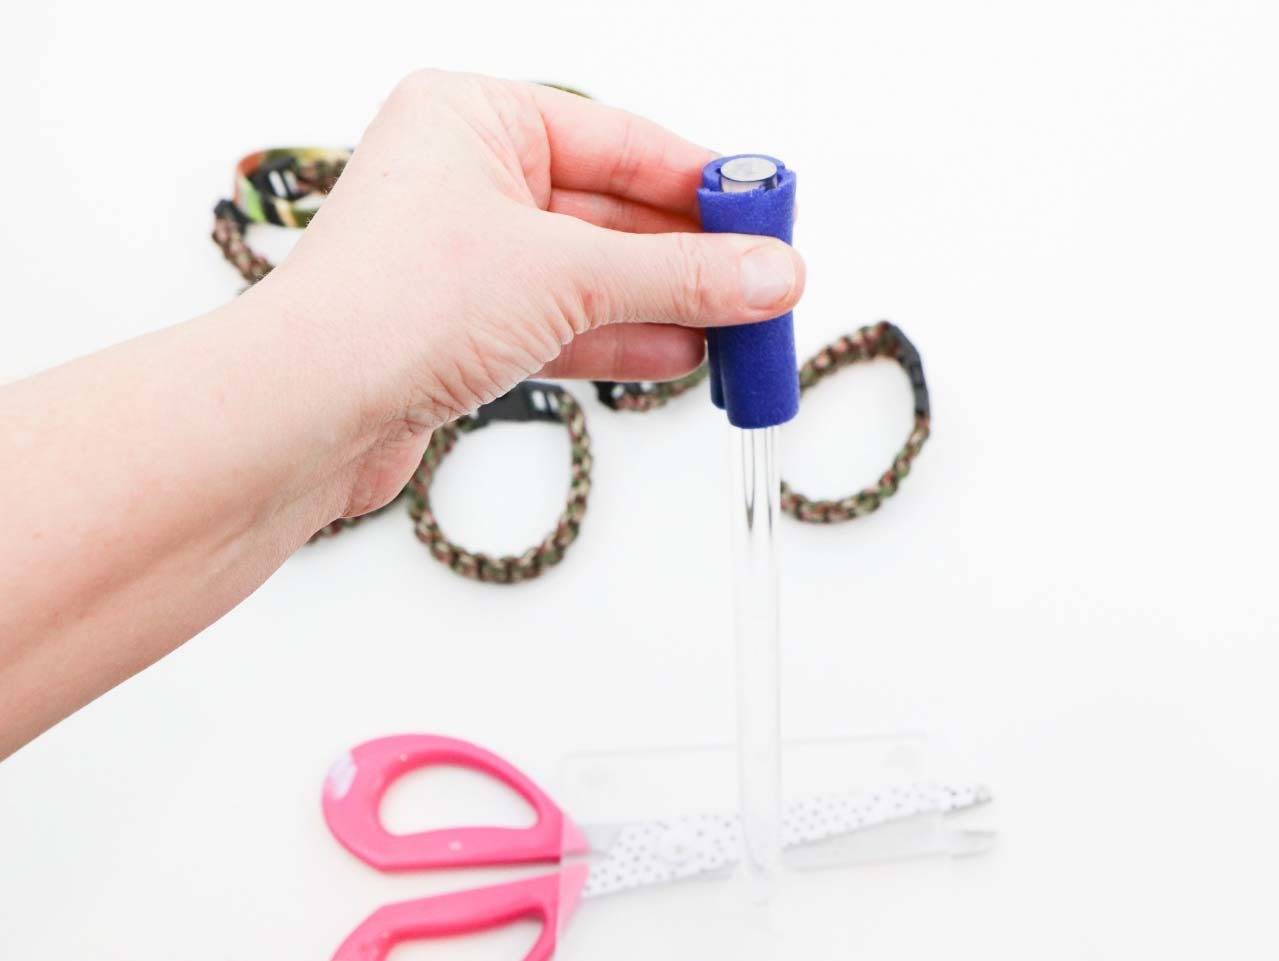


Create a pick-up point for the Camouflage Army Sayings Rubber Bracelets and Large Camouflage Paracord Bracelets using a Clear Donut Serving Stand. First, cut a Nerf® bullet in half and then remove the tip of the Nerf® bullet. Wrap (and glue) the two pieces of the bullet around the top of the stand. Then glue the tip of the bullet onto the top of the stand. Next, put the bracelets onto the stand.


Finally, print out the FREE bottle label printable. Cut these out and use tape to attach to the bottles; hydration labels to water bottles and power boost labels to Powerade or similar. Place the battle gear and mission kit on a table or shelves for the kids to grab before heading into battle. Get ready to RUMBLE!
See the complete Nerf Birthday Party along with delicious Nerf Treat Pops and a DIY Nerf Target Range.

First, apply iron-on wonder-web interfacing onto Camouflage Bandannas as per the instructions provided by the manufacturer.


Once the camouflage fabric is ready, trace the outline of a Firefighter Vest onto the interfacing side of fabric. I traced 4 pieces; each front side and 2 pieces for the back of the vest (top and bottom, in order to leave the reflective strip in the middle of the vest). Cut each piece out, remove the top layer of the backing and iron onto the vest following interface manufacturers instructions. Use a damp cloth and follow the timing carefully so as not damage the vest. Trim off any excess fabric.


Next, cut a length of elastic to fit a Nerf® reload cartridge case. Sew the elastic into position on the upper front vest.
Tip: Have your child try on the vest to determine the best position.

Sew another strip of elastic onto the other side of the vest. This time sew smaller loops into the length of elastic to fit Nerf® bullets. Have a Nerf® bullet to hand to measure the exact width required. Using a stick-on Velcro patch, attach a small US flag patch (alternatively this can be sewn on).


Once the vest is complete, personalize the vest with the party guests' last names. I used my Cricut™ to cut the names using vinyl, alternatively you can use iron-on letters. Repeat this process on a Camouflage Baseball Cap. I also added names to Dog Tag Necklaces using metal letter stamps and a mallet. A Fruit of the Loon All-American T-Shirt® and Nerf® Arm Sleeve completes the battle attire for the kit. The sleeve was a fan favorite in our house!


Next, fill the kit bags. Fill Colorful Camoflage Treat Bags with Camoflague Army Sunglasses, Camouflage Binoculars and Nerf® Disc Shooters. Once the bag is filled print out the FREE mission kit labels HERE. Cut out the labels and attach them to the bags with double-sided tape. Use a hole punch to make a hole in the top corner of the bag. Thread a Camouflage Army Belt Clip Toy Compass Carabiner Key chains through the hole.


Create a pick-up point for the Camouflage Army Sayings Rubber Bracelets and Large Camouflage Paracord Bracelets using a Clear Donut Serving Stand. First, cut a Nerf® bullet in half and then remove the tip of the Nerf® bullet. Wrap (and glue) the two pieces of the bullet around the top of the stand. Then glue the tip of the bullet onto the top of the stand. Next, put the bracelets onto the stand.


Finally, print out the FREE bottle label printable. Cut these out and use tape to attach to the bottles; hydration labels to water bottles and power boost labels to Powerade or similar. Place the battle gear and mission kit on a table or shelves for the kids to grab before heading into battle. Get ready to RUMBLE!
See the complete Nerf Birthday Party along with delicious Nerf Treat Pops and a DIY Nerf Target Range.

