

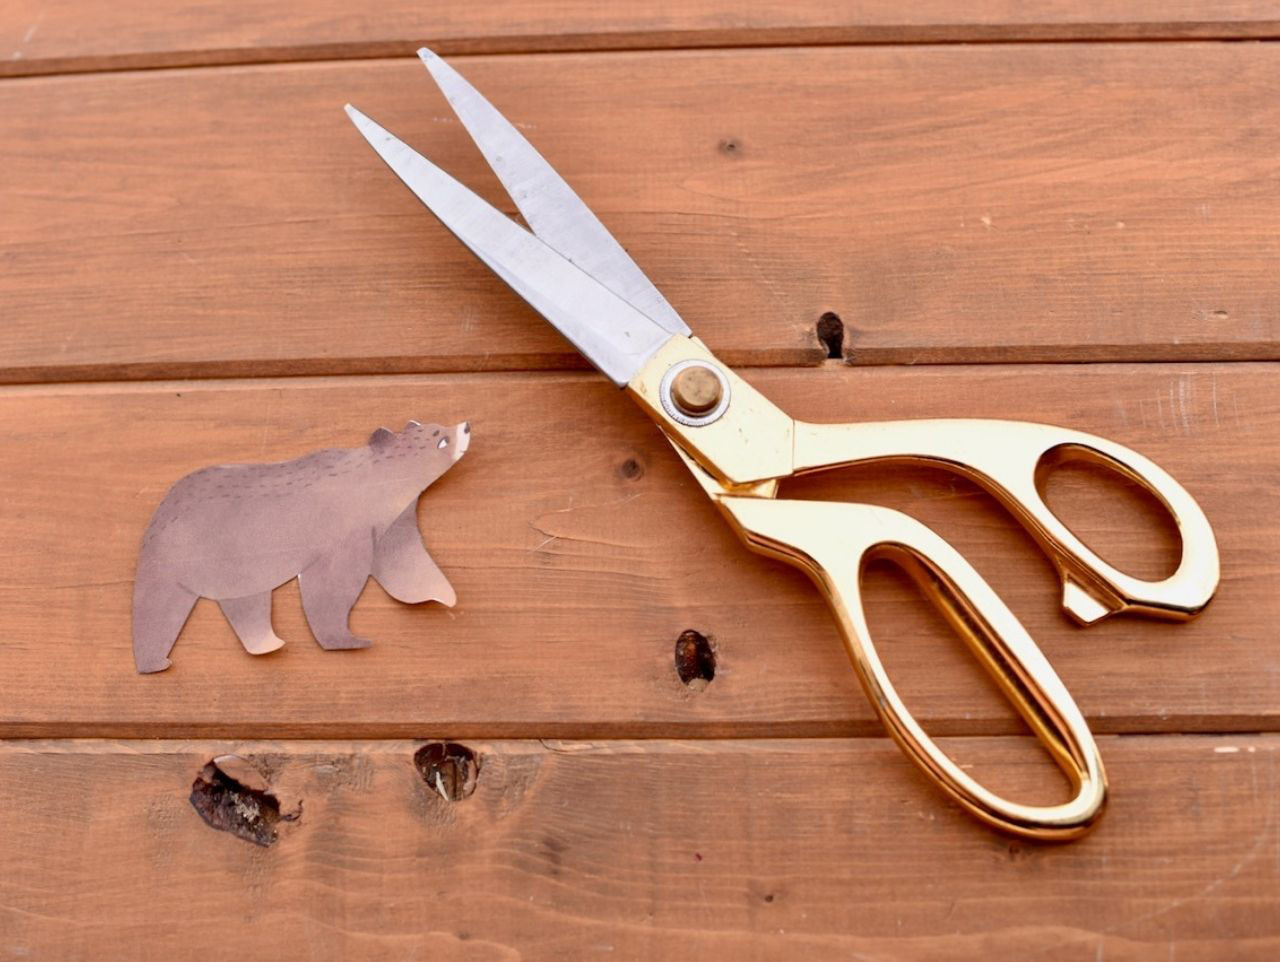
Print out the Free Printable Bear Template and cut out the bear shape with scissors.
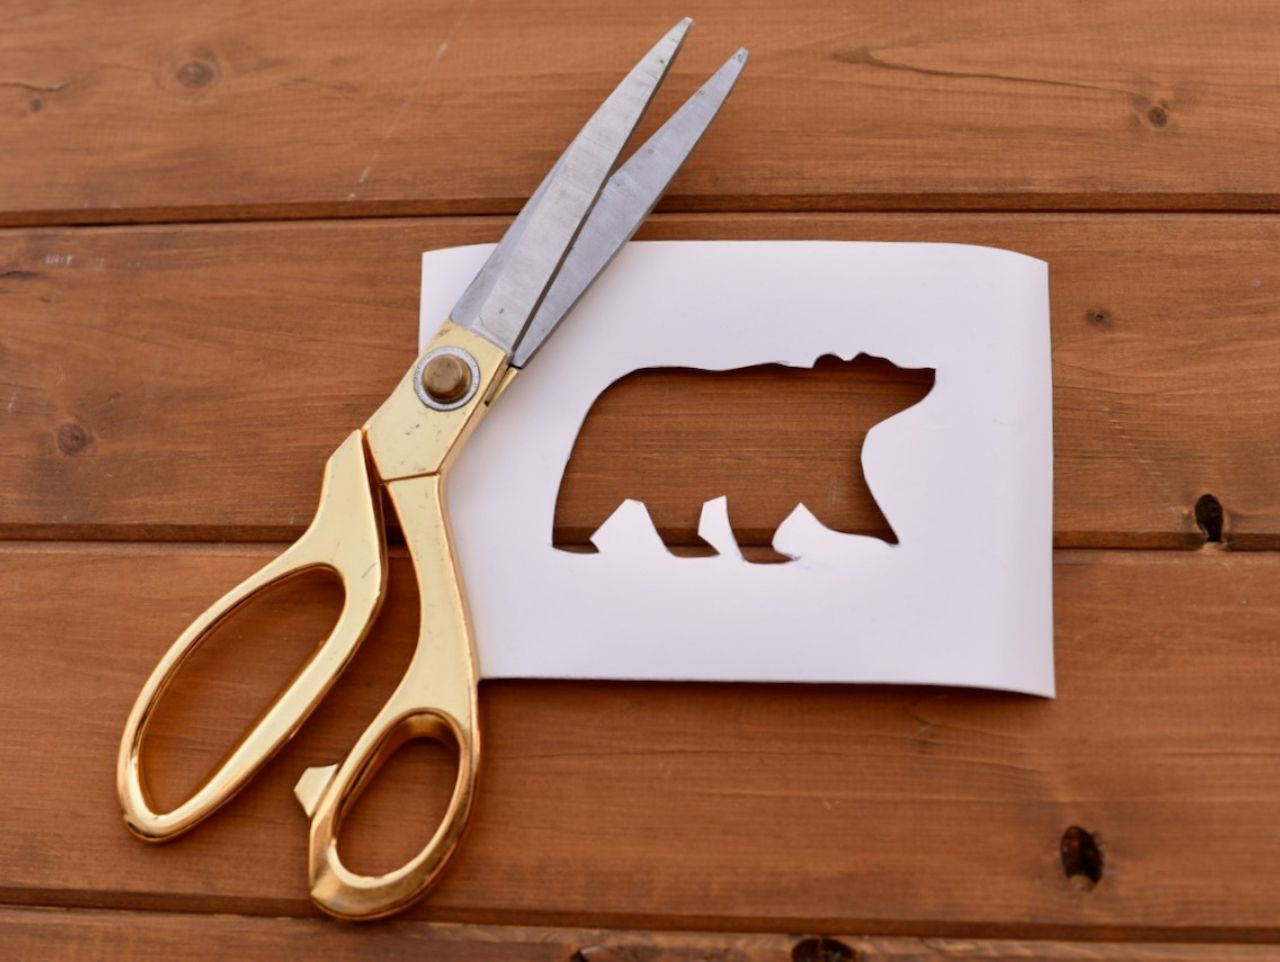
Lay out a baby onesie onto a piece of cardboard. Place a piece of cardboard inside the onesie to protect the back so that the fabric paint doesn't bleed through. Remove the paper backing from the vinyl bear outline. Carefully place the bear outline centered on the onesie exactly where you would like the bear to be.
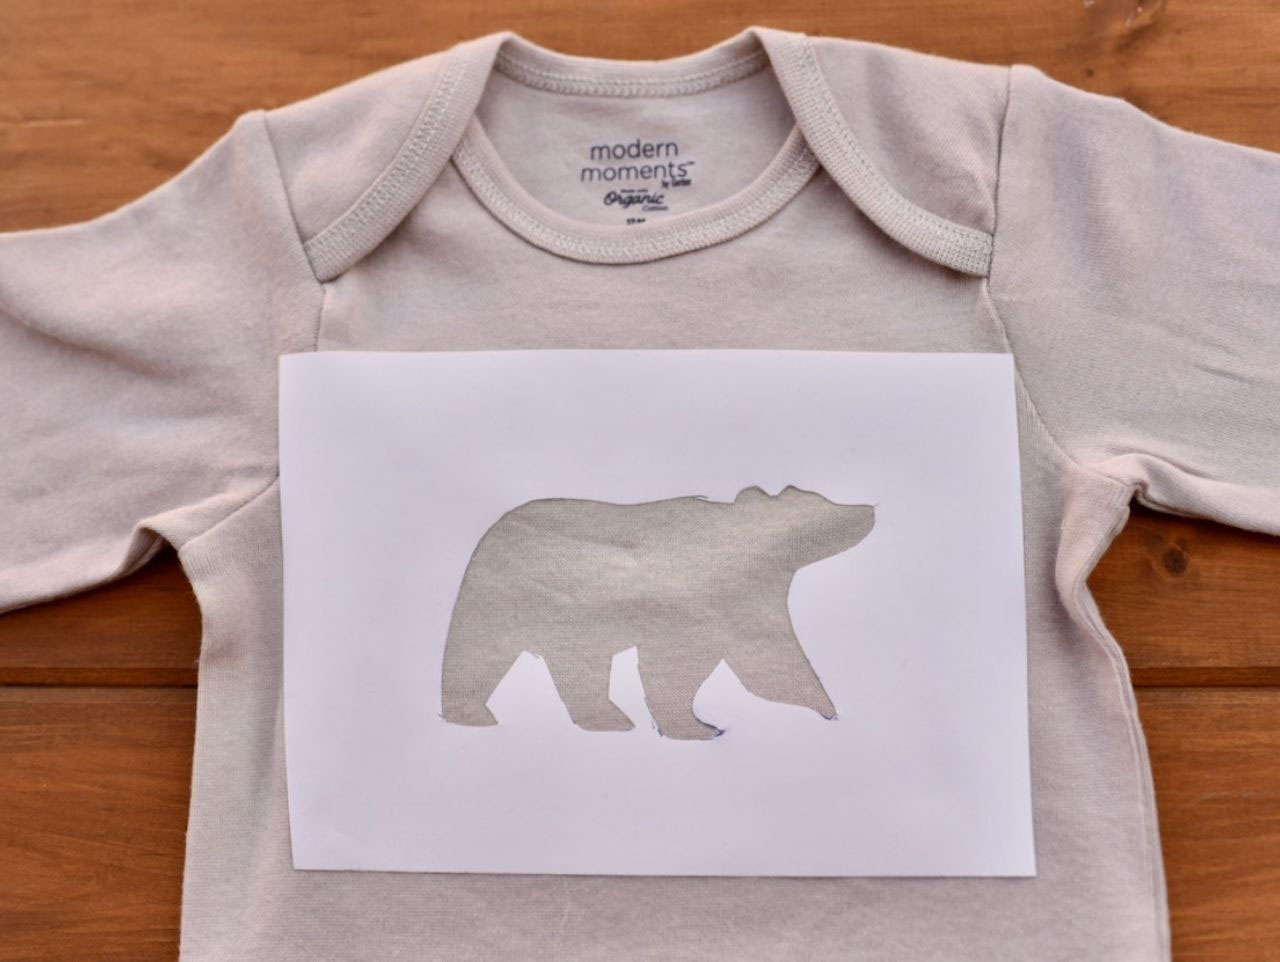
Use a foam brush to pounce a small amount of brown fabric paint onto the shirt. Using just a small amount of paint at a time helps to prevent paint bleed under the stencil. Be sure to use an up and down motion, rather than a side to side painting motion, while you're applying the paint. Make sure the entire bear shape is covered so no white spots are showing, then set aside to dry completely.
To make the ears, first decide how big you'd like the ears and draw a basic ear shape onto a piece of paper. Draw a one inch rectangle underneath the ear touching the base. This will be the portion that wraps around the headband to hold the ears in place. Fold a piece of brown felt in half, then place the bottom of the rectangle/ear shape onto the folded part. Trace around the shape, then cut out. This will give you a front and back ear piece that is attached to each other. Repeat to make the second ear.
Trace a small circle shape you have at home (like a jar lid or cookie cutter or glass base) onto the back of white fur trim. Cut out the trim and glue to the center of the ears.
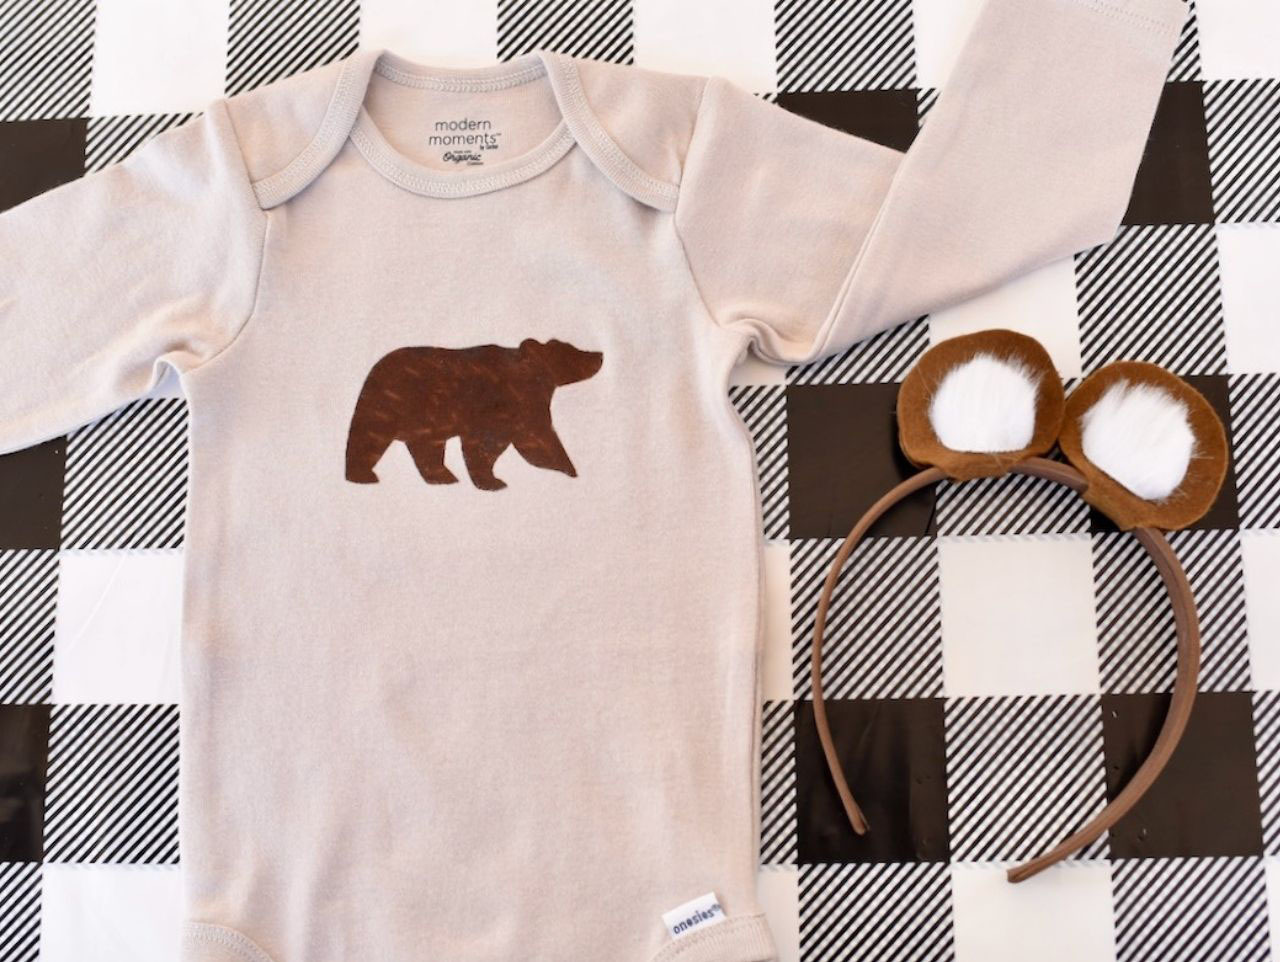
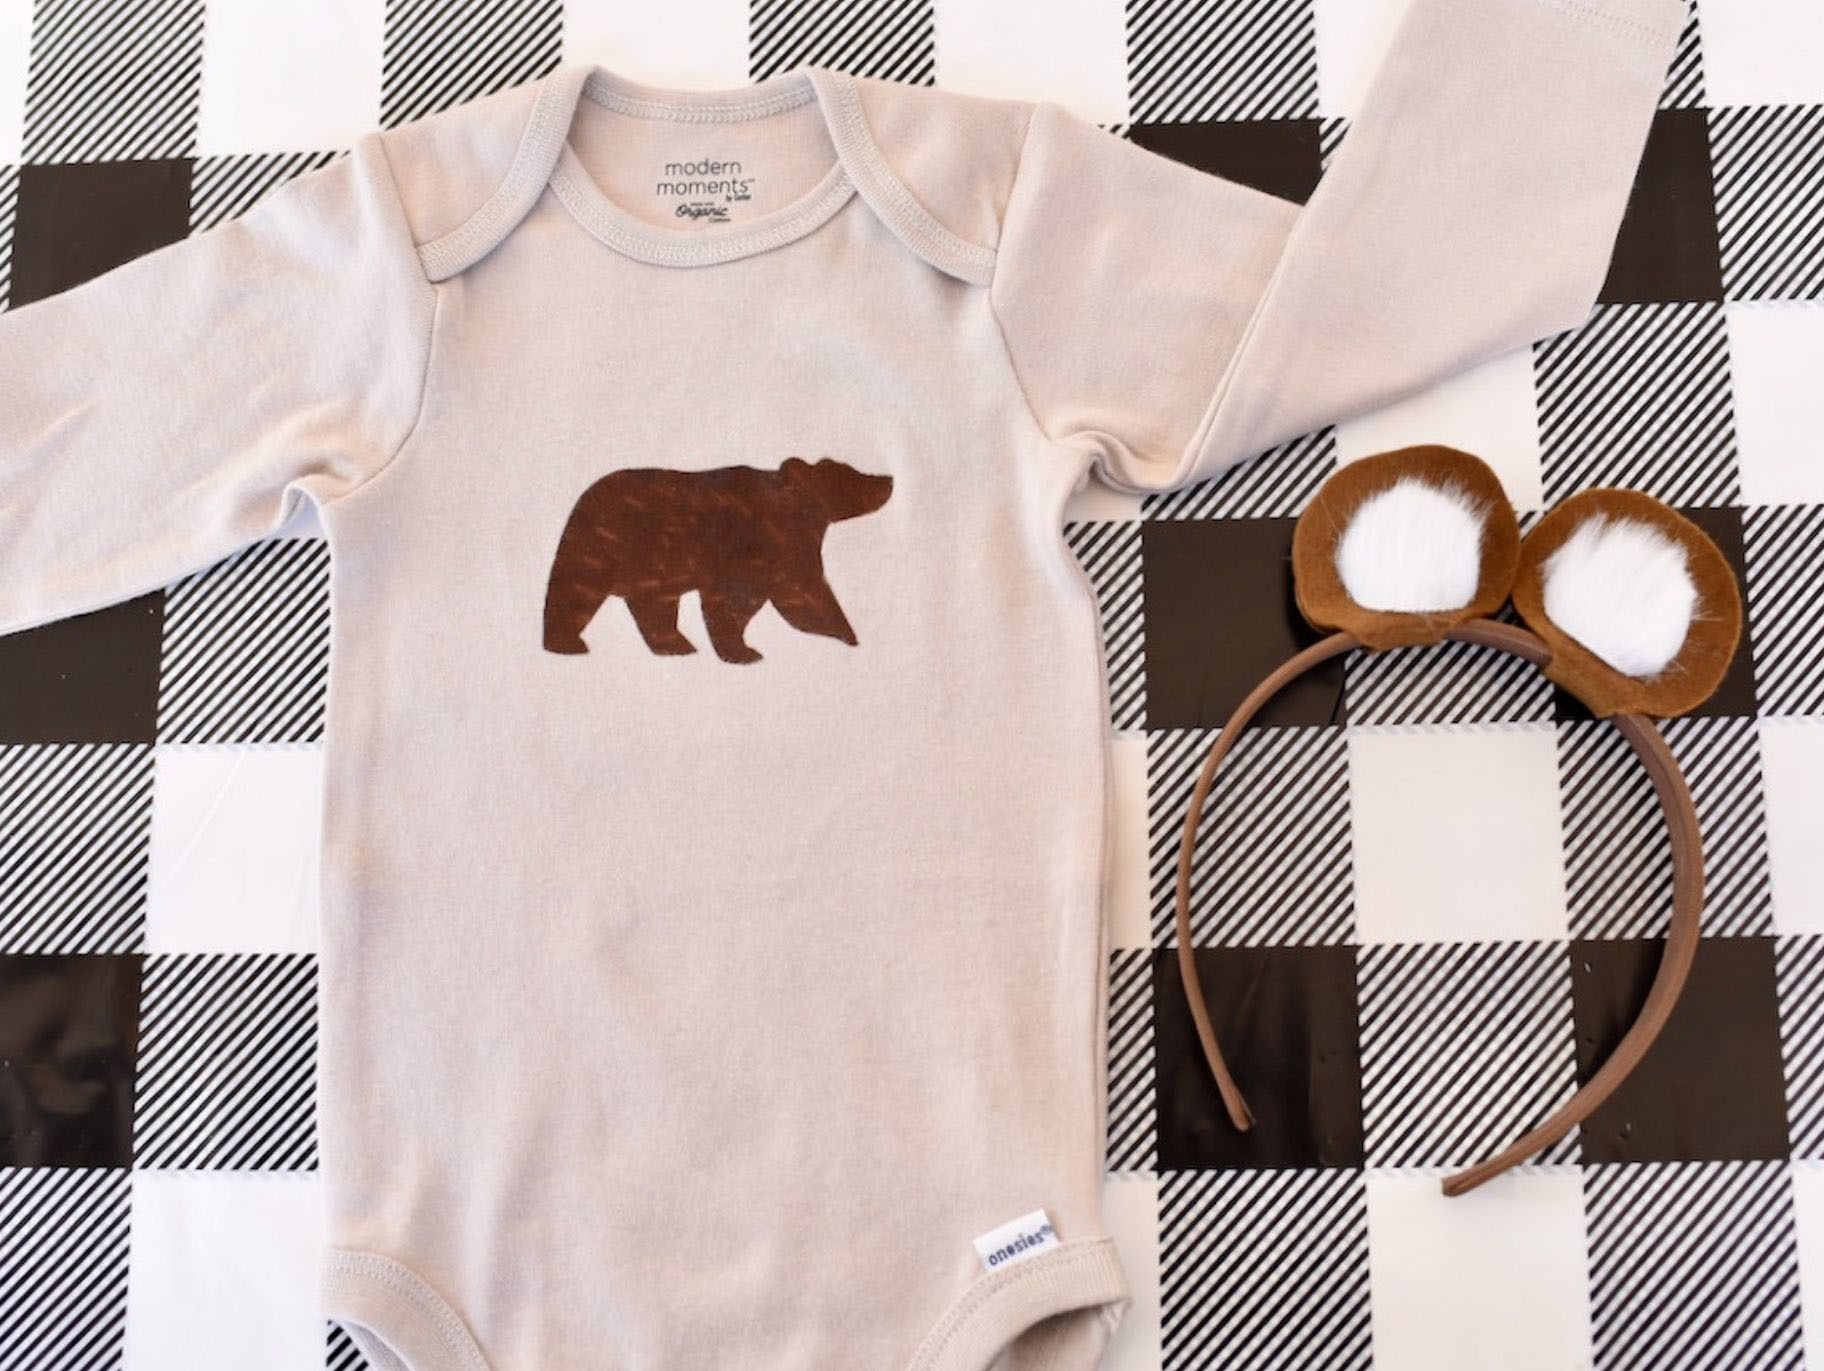
Dress your little cub in his new baby bear shirt and ears for his big day! Be sure to take lots of photos of him in his unbearably cute outfit! Be sure to see the full Baby Bear First Birthday Party including tutorials to make a Don't Feed the Bears Sign and a Happy Birthday Little Bear Sign.
Print out the Free Printable Bear Template and cut out the bear shape with scissors.
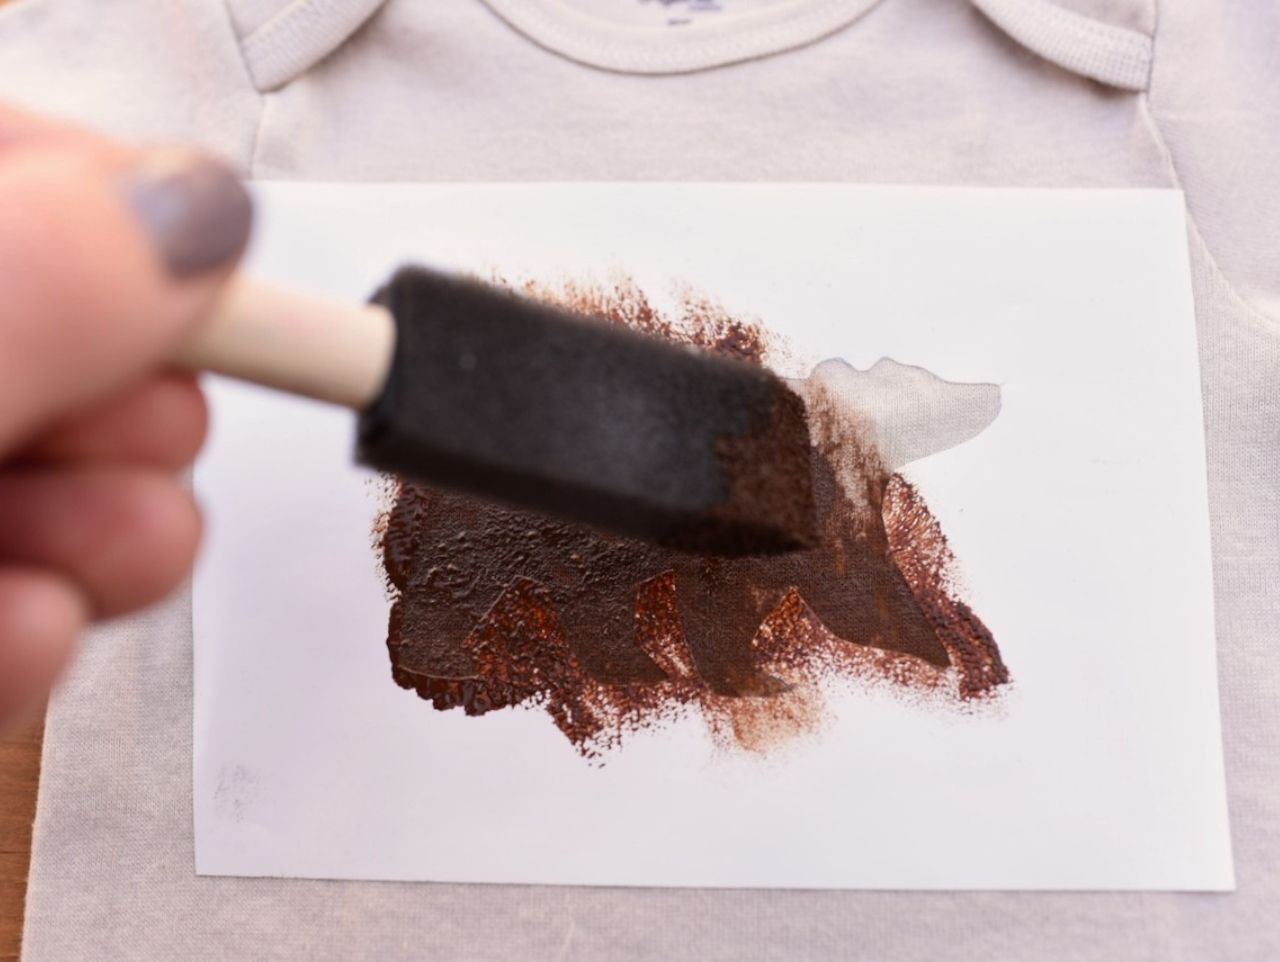
Lay out a baby onesie onto a piece of cardboard. Place a piece of cardboard inside the onesie to protect the back so that the fabric paint doesn't bleed through. Remove the paper backing from the vinyl bear outline. Carefully place the bear outline centered on the onesie exactly where you would like the bear to be.
Use a foam brush to pounce a small amount of brown fabric paint onto the shirt. Using just a small amount of paint at a time helps to prevent paint bleed under the stencil. Be sure to use an up and down motion, rather than a side to side painting motion, while you're applying the paint. Make sure the entire bear shape is covered so no white spots are showing, then set aside to dry completely.
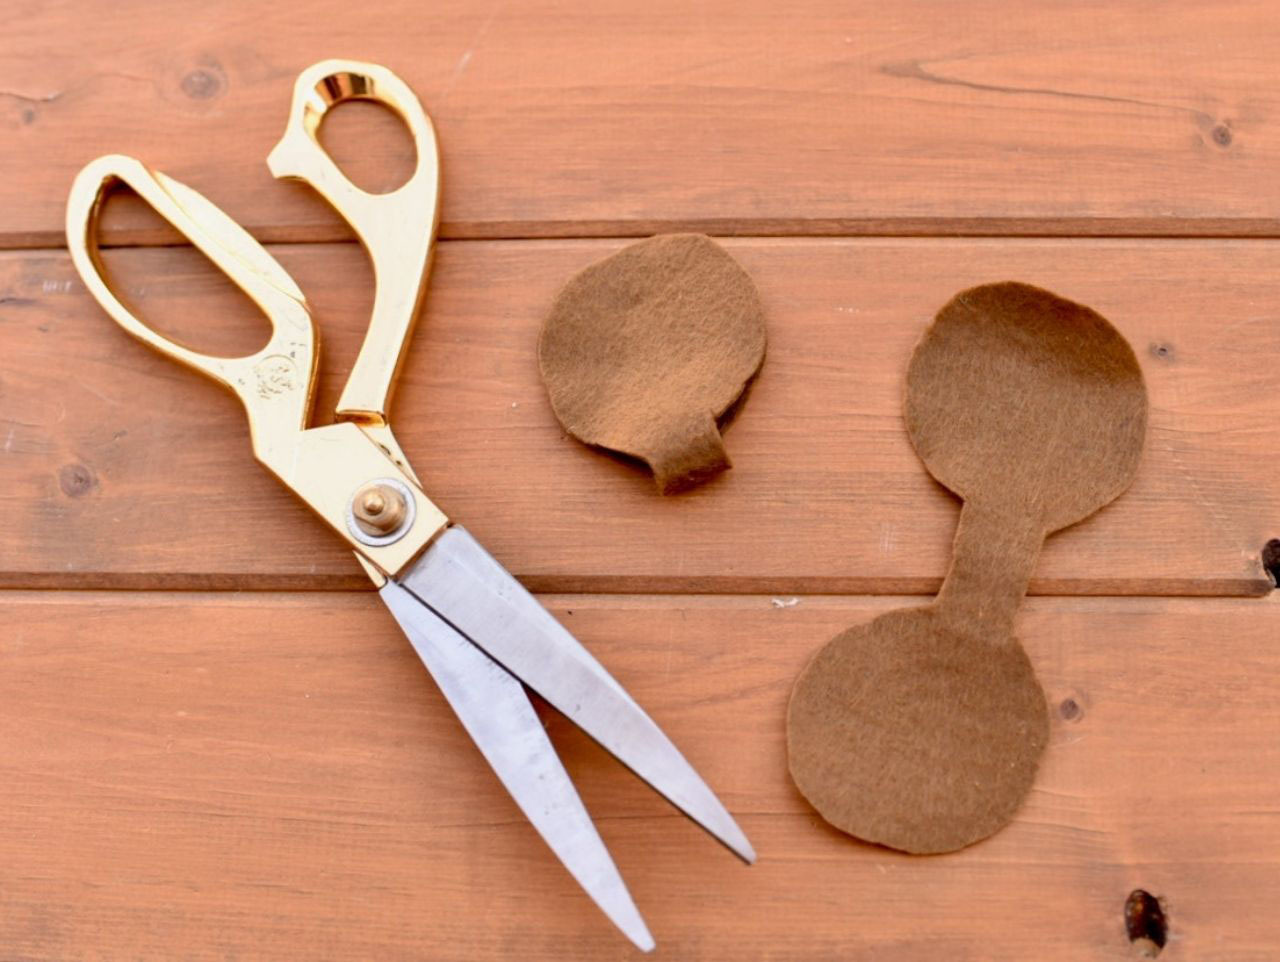
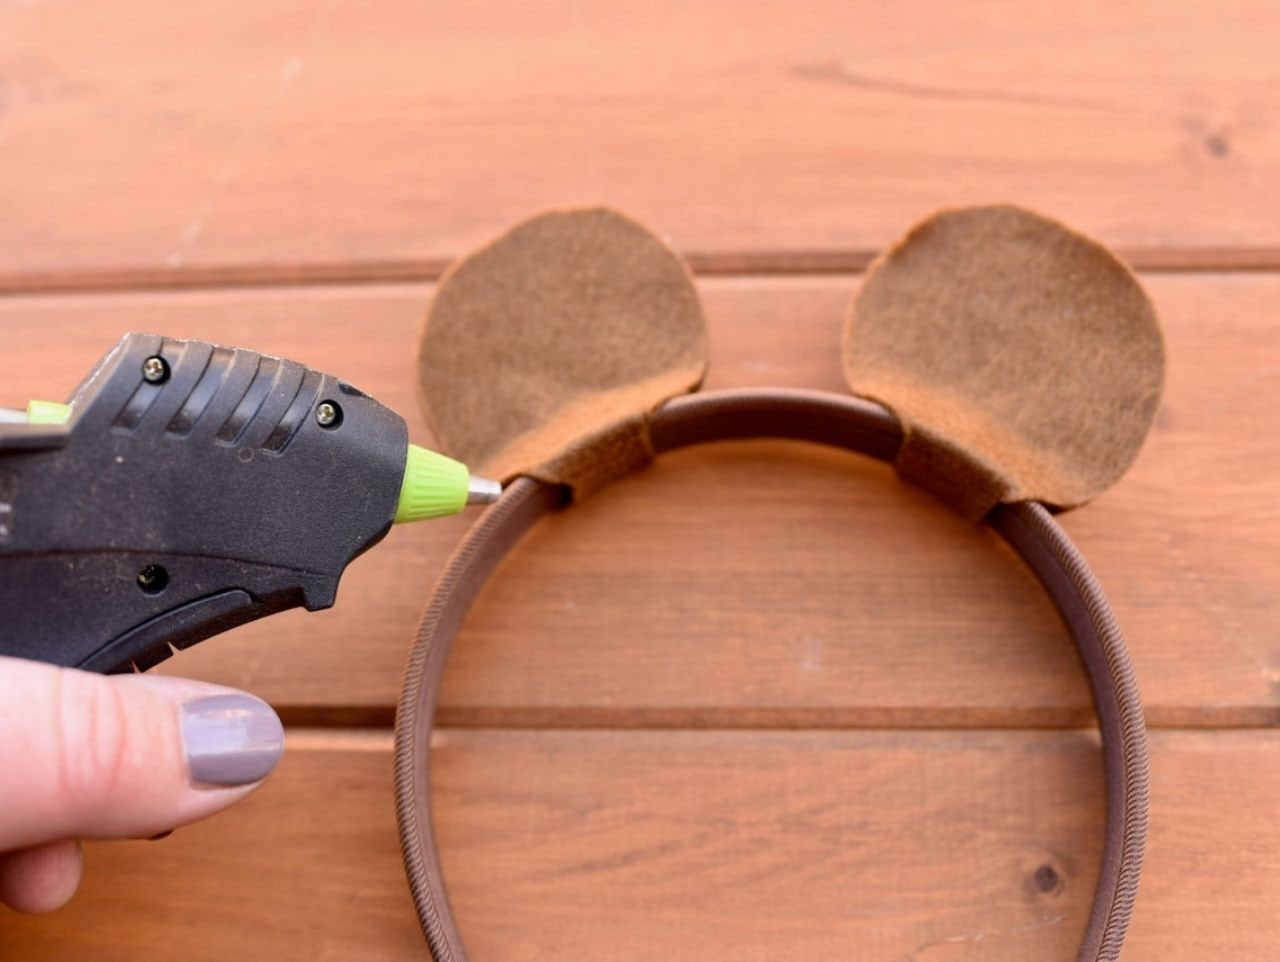
To make the ears, first decide how big you'd like the ears and draw a basic ear shape onto a piece of paper. Draw a one inch rectangle underneath the ear touching the base. This will be the portion that wraps around the headband to hold the ears in place. Fold a piece of brown felt in half, then place the bottom of the rectangle/ear shape onto the folded part. Trace around the shape, then cut out. This will give you a front and back ear piece that is attached to each other. Repeat to make the second ear.
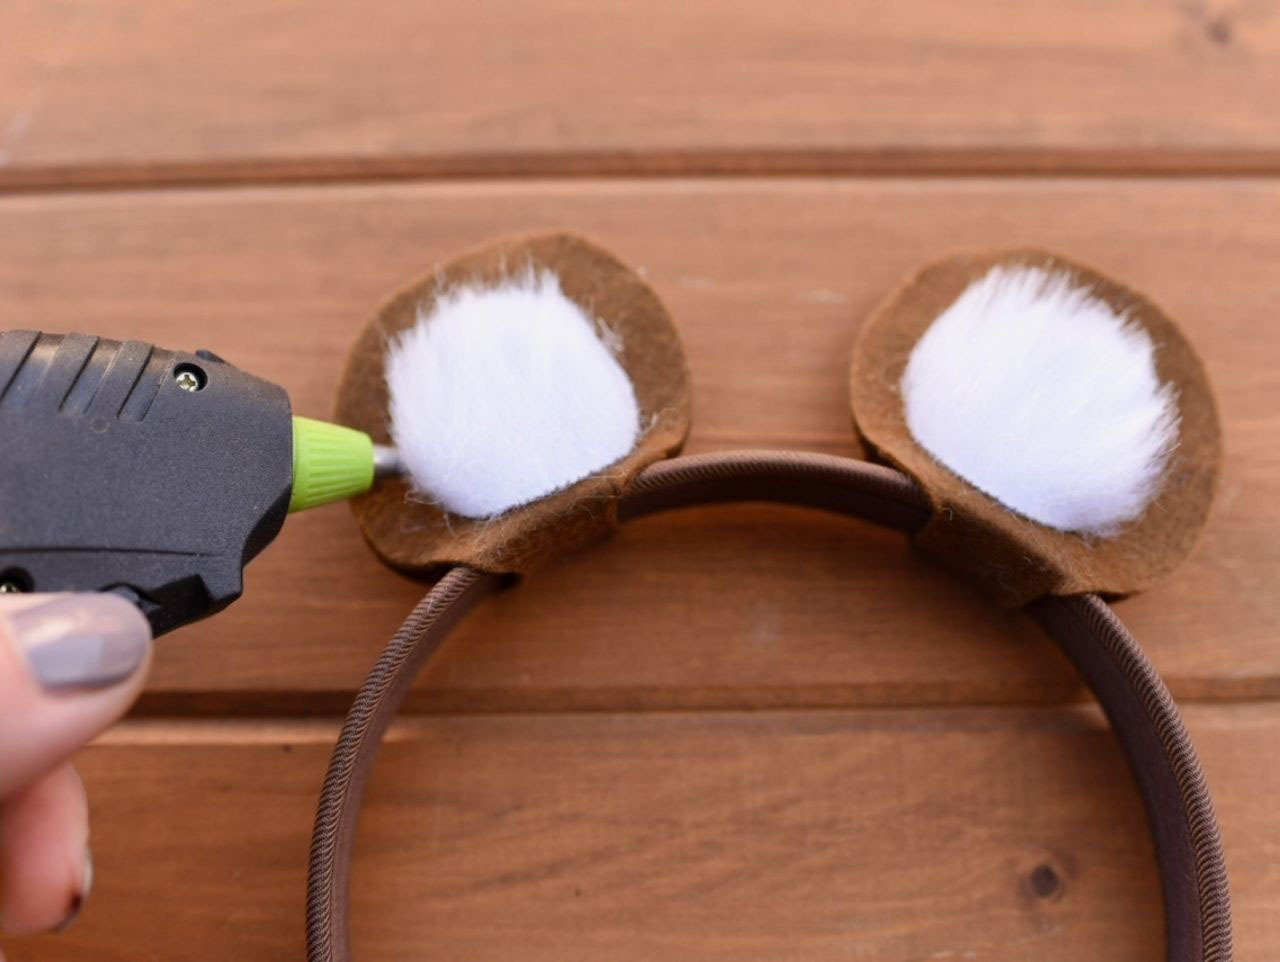
Trace a small circle shape you have at home (like a jar lid or cookie cutter or glass base) onto the back of white fur trim. Cut out the trim and glue to the center of the ears.
Dress your little cub in his new baby bear shirt and ears for his big day! Be sure to take lots of photos of him in his unbearably cute outfit! Be sure to see the full Baby Bear First Birthday Party including tutorials to make a Don't Feed the Bears Sign and a Happy Birthday Little Bear Sign.


