

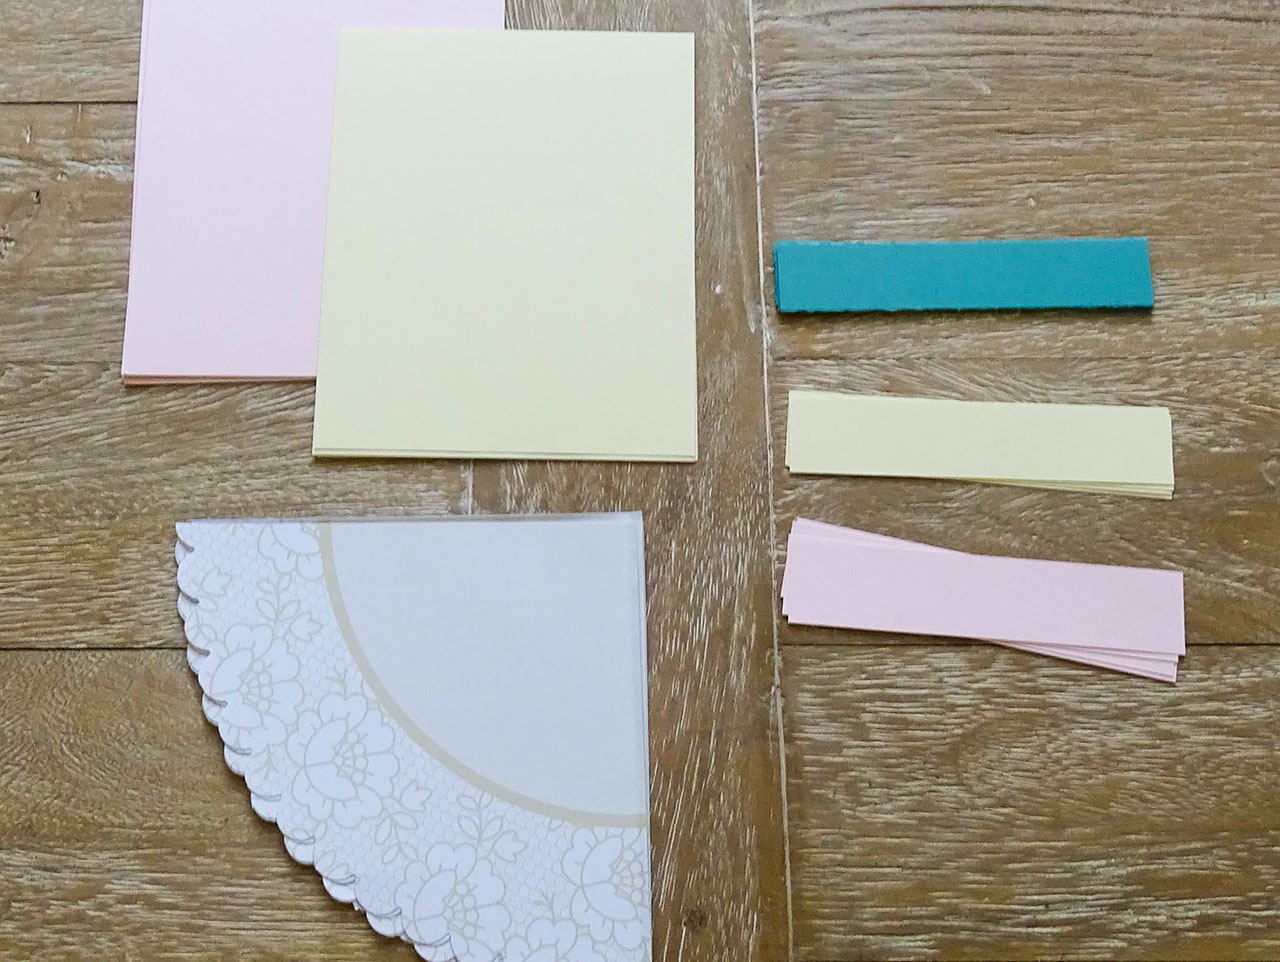
For the background color of each letter, trim five light pink and four ivory cardstock papers to 4″ x 5″. Next, trim border strips of paper to a size of 4″ x 3/4″. You will need nine teal, five ivory, and four light pink. Fold each Shabby Chic Lace Placemat in half, then fold in half again so that you can see where to trim. Cut into four equal quarters and reserve nine of these pieces for the project.
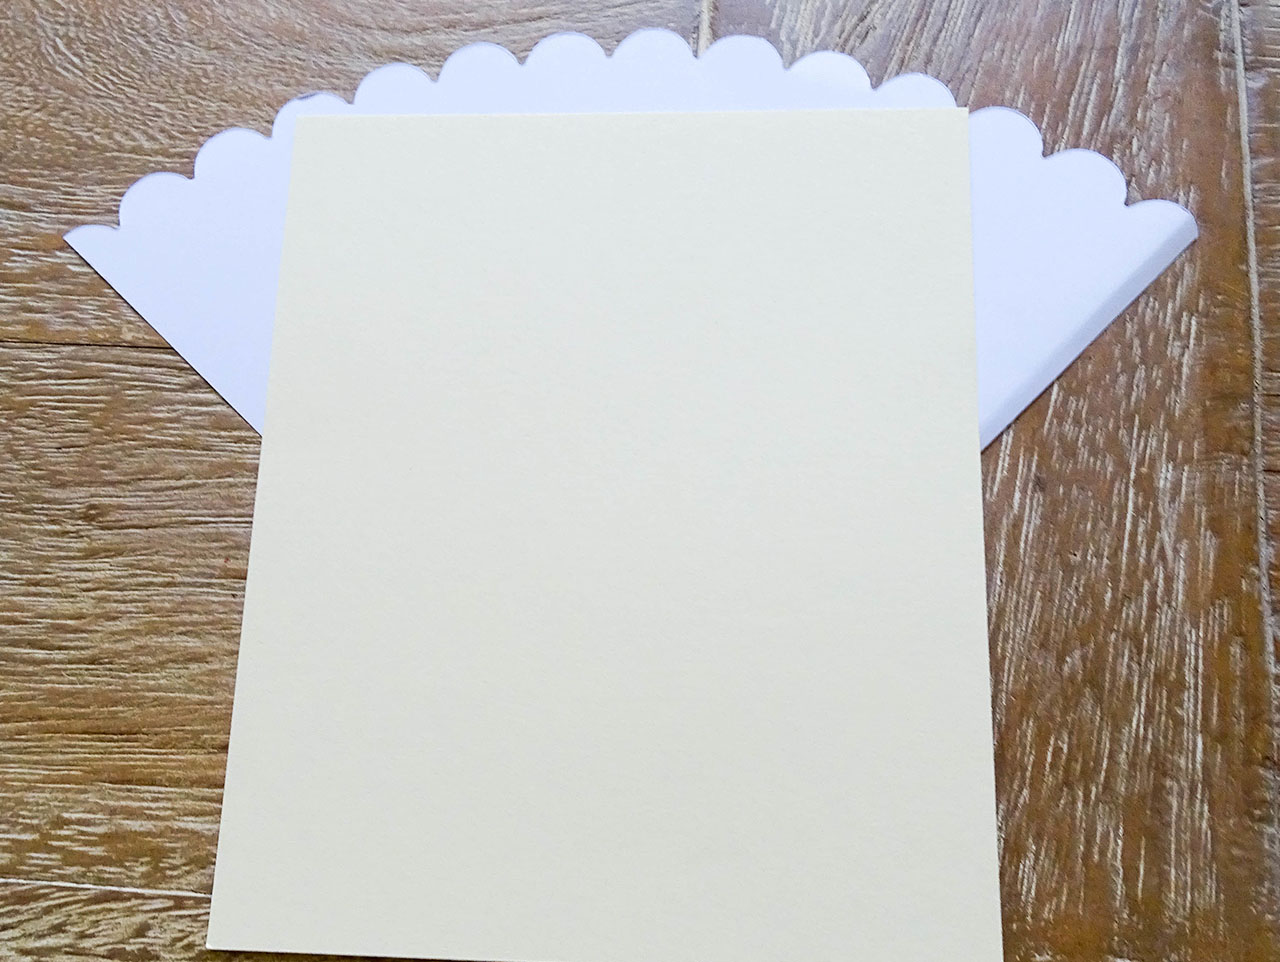
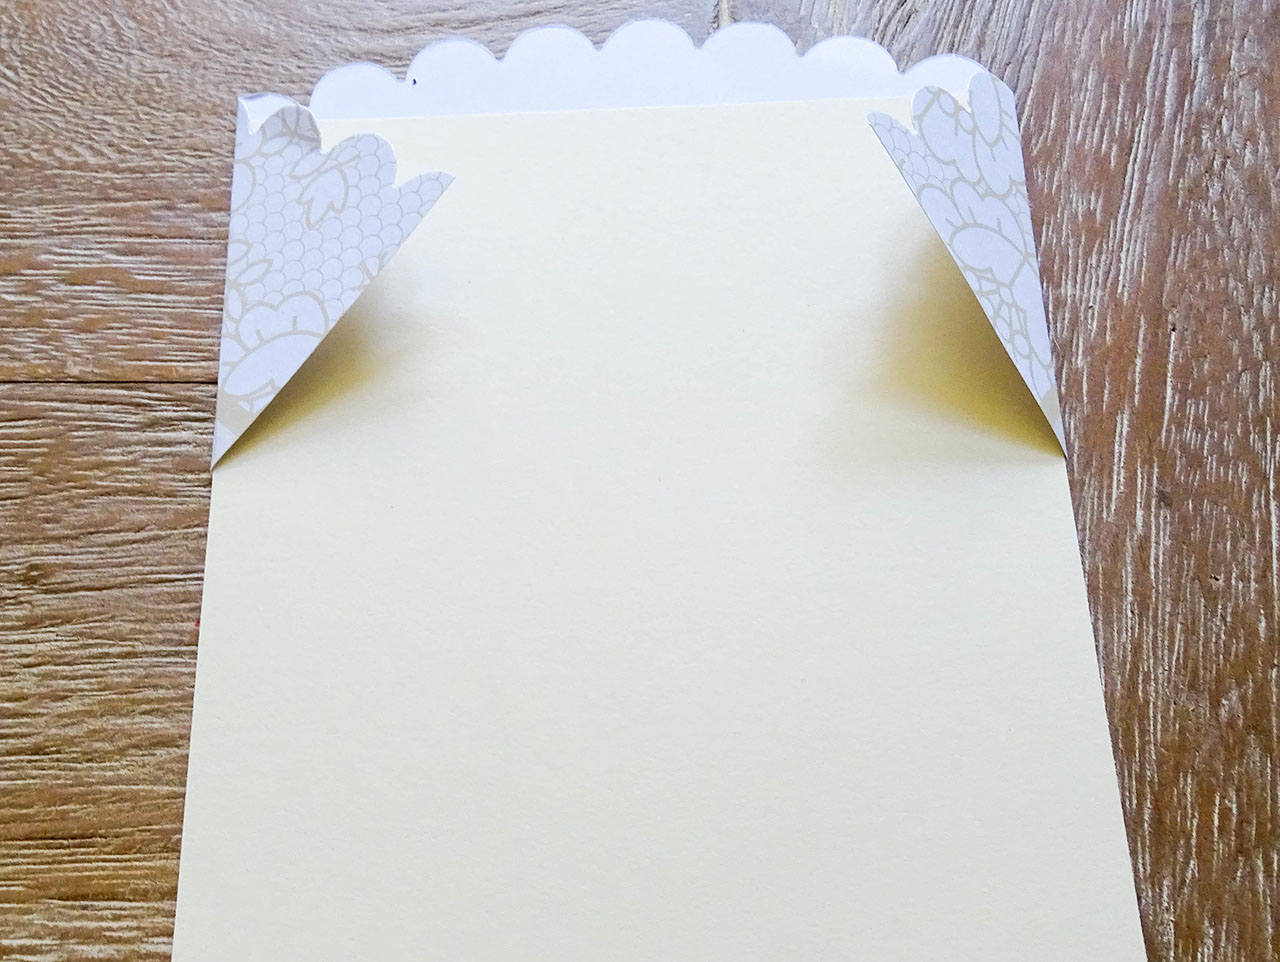
To create the first letter, you will use a pink paper that you’ve trimmed to 4″ x 5″. Center the cut placemat piece on the paper, with the scalloped edge hanging down approximately an inch, and fold the corners back, to align with the sides. Glue in place. Repeat this step on each of the 4″ x 5″ papers. It may help you stay organized to alternate the colors of the background pieces as you go.
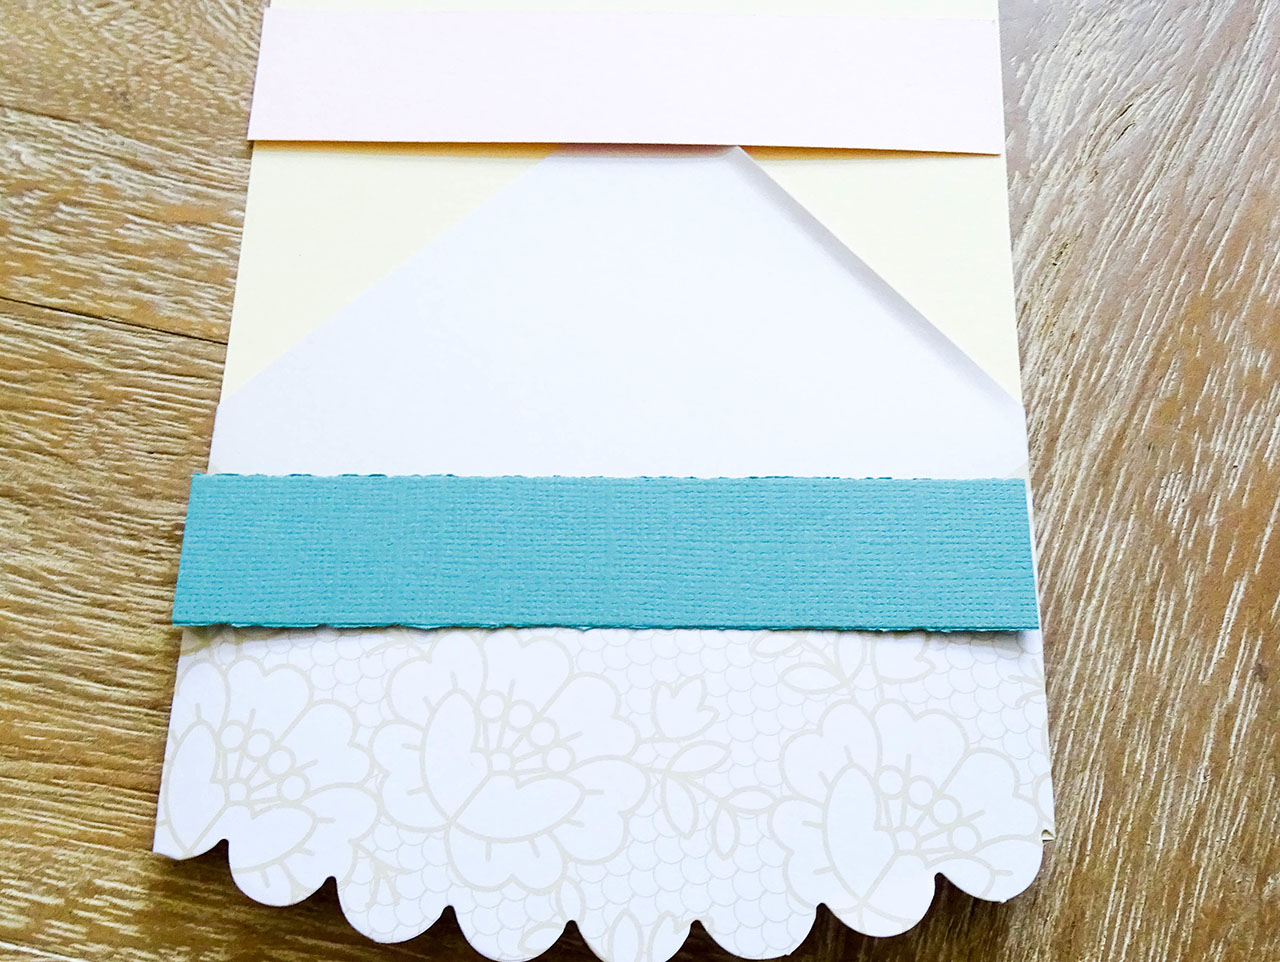
Turning the paper over, you’ll need to take note of whether you’re working with a pink background or an ivory one. If it’s ivory, your top trim piece will be pink. If the piece you are working on is pink, then the top trim piece will be ivory. The bottom trim piece will always be teal. Glue in place as shown.

Fold one burlap circle in half over the top of each piece, and glue in place on the front only. (Note: You will need to leave the back unglued, so that later, you can add the twine to hang the banner.)
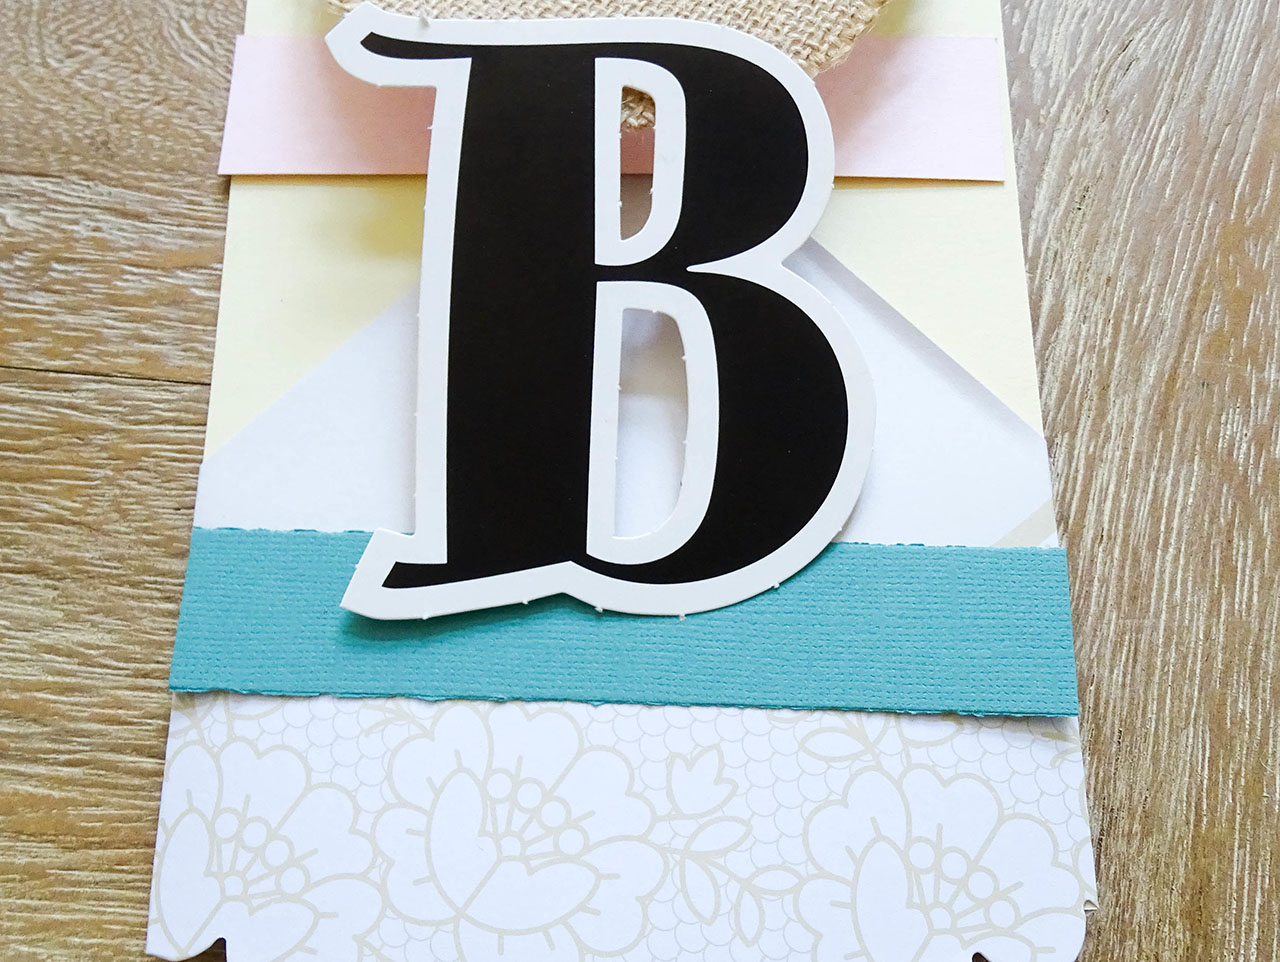
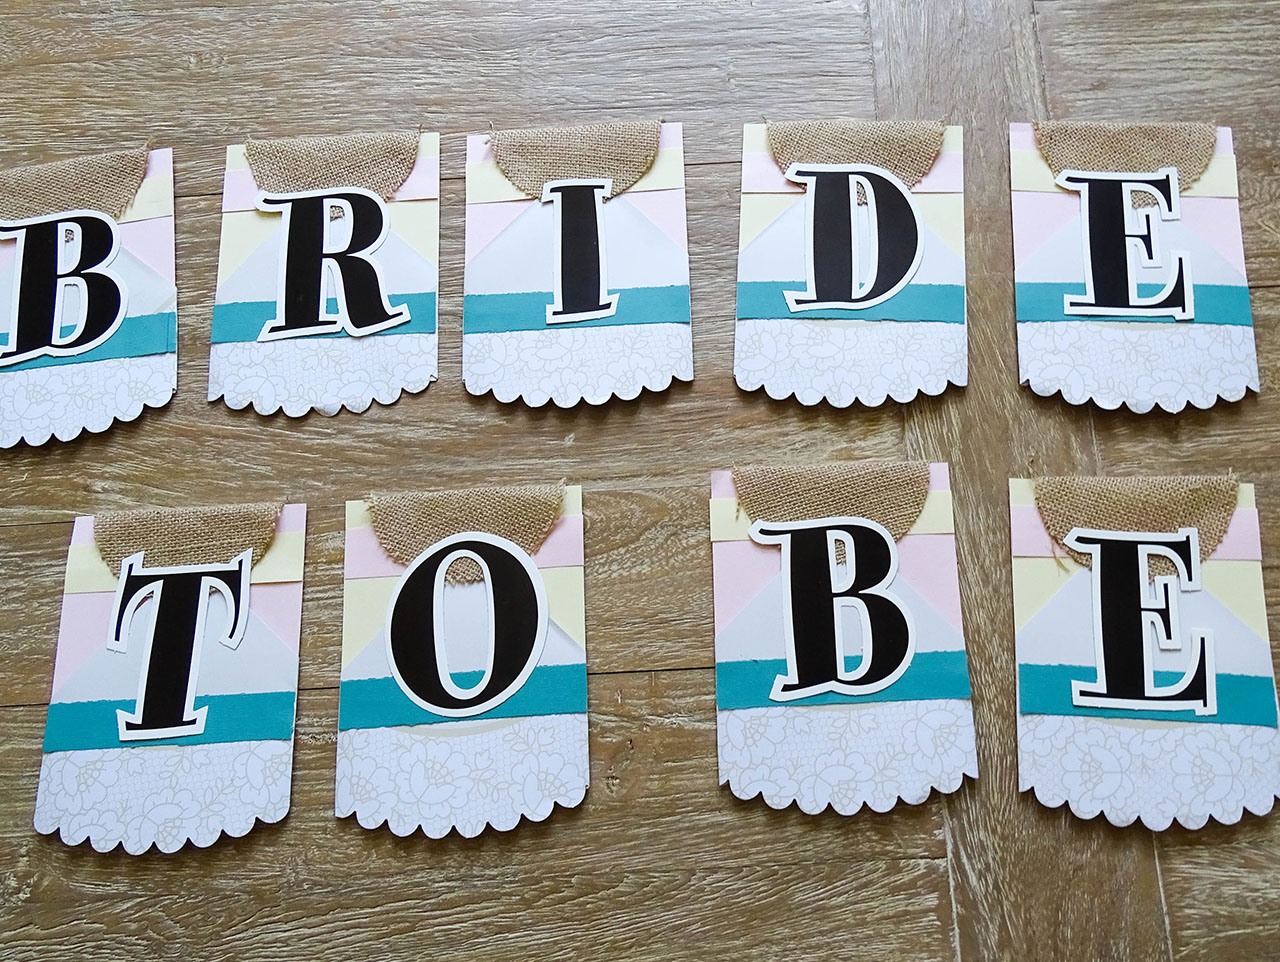
Center the Spumoni uppercase letters on each card. Remember to start with a pink background so that you don’t run out of pieces, and alternate to the background color of the next letter. Glue in place, in order, to spell out the phrase “BRIDE TO BE”.
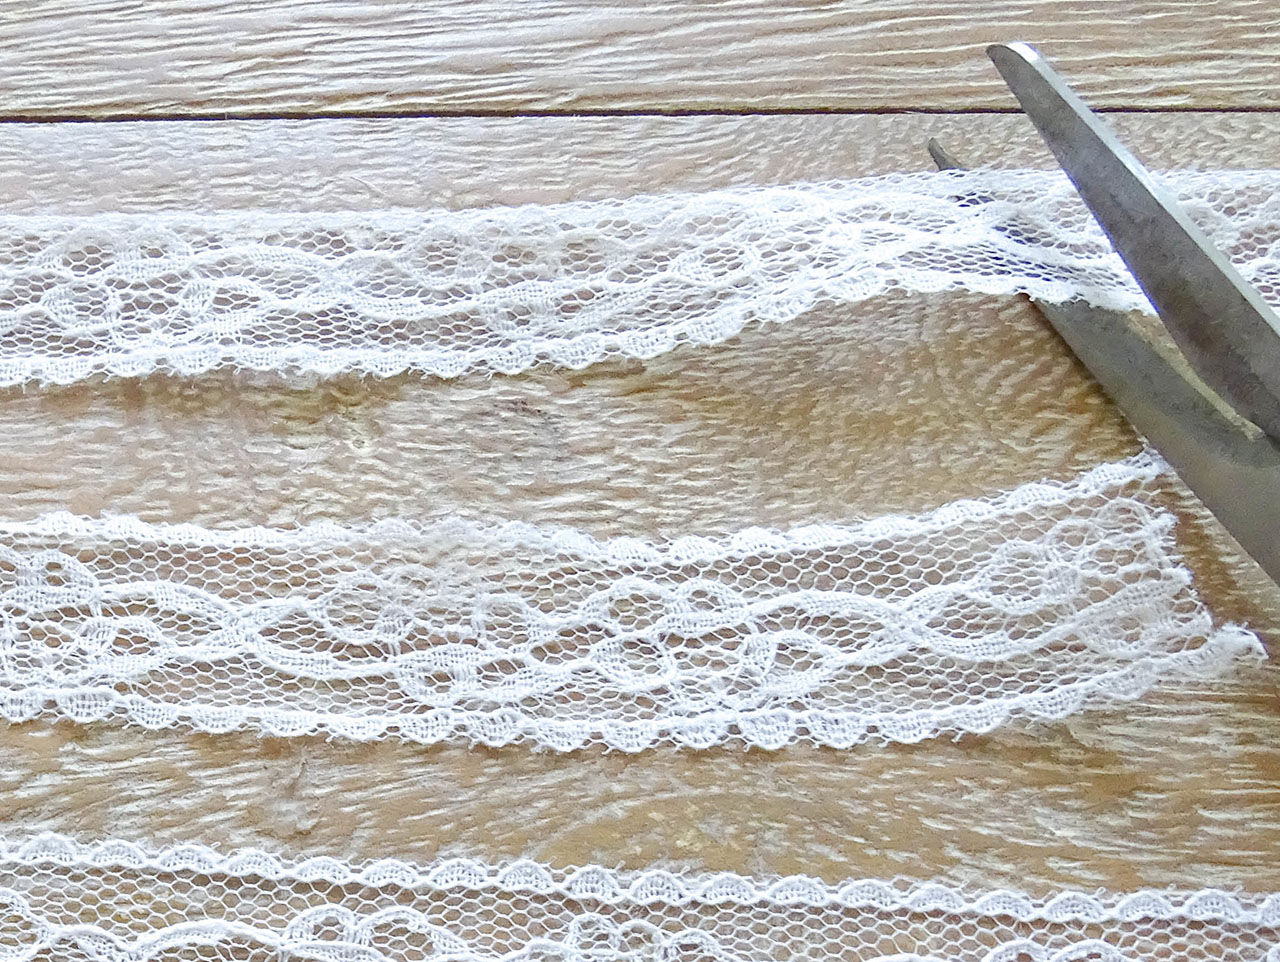
Trim the lace ribbon into nine equal lengths of about 10 inches; and carefully tie each piece into a bow.
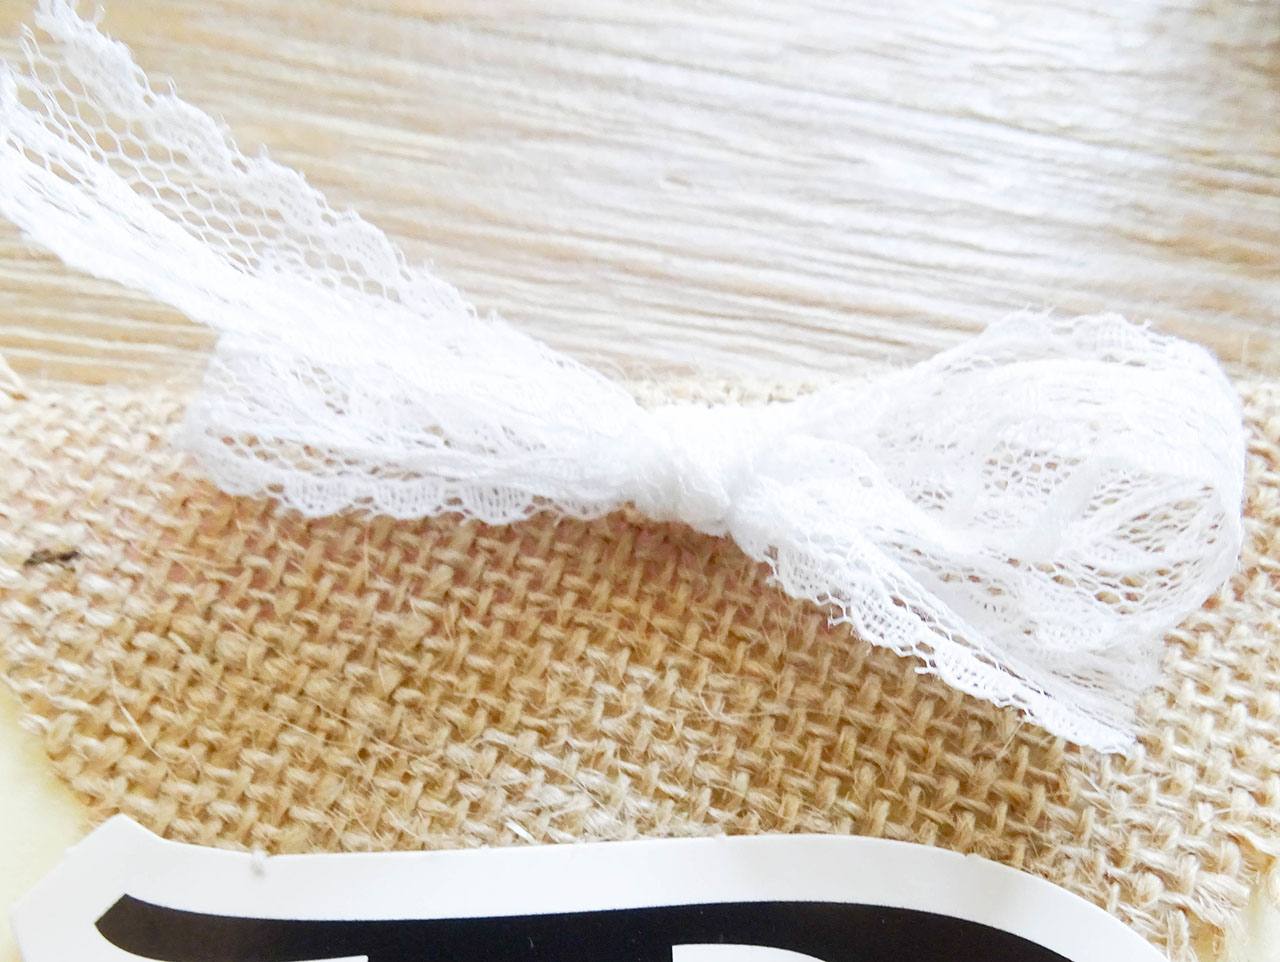
Glue one bow to the top center of each of your banner letters. Add the twine, being sure to space your letters about 1/3″ apart, and glue down the back of the Burlap Circles over the twine to hold in place. Once dry, your banner is ready to hang up!

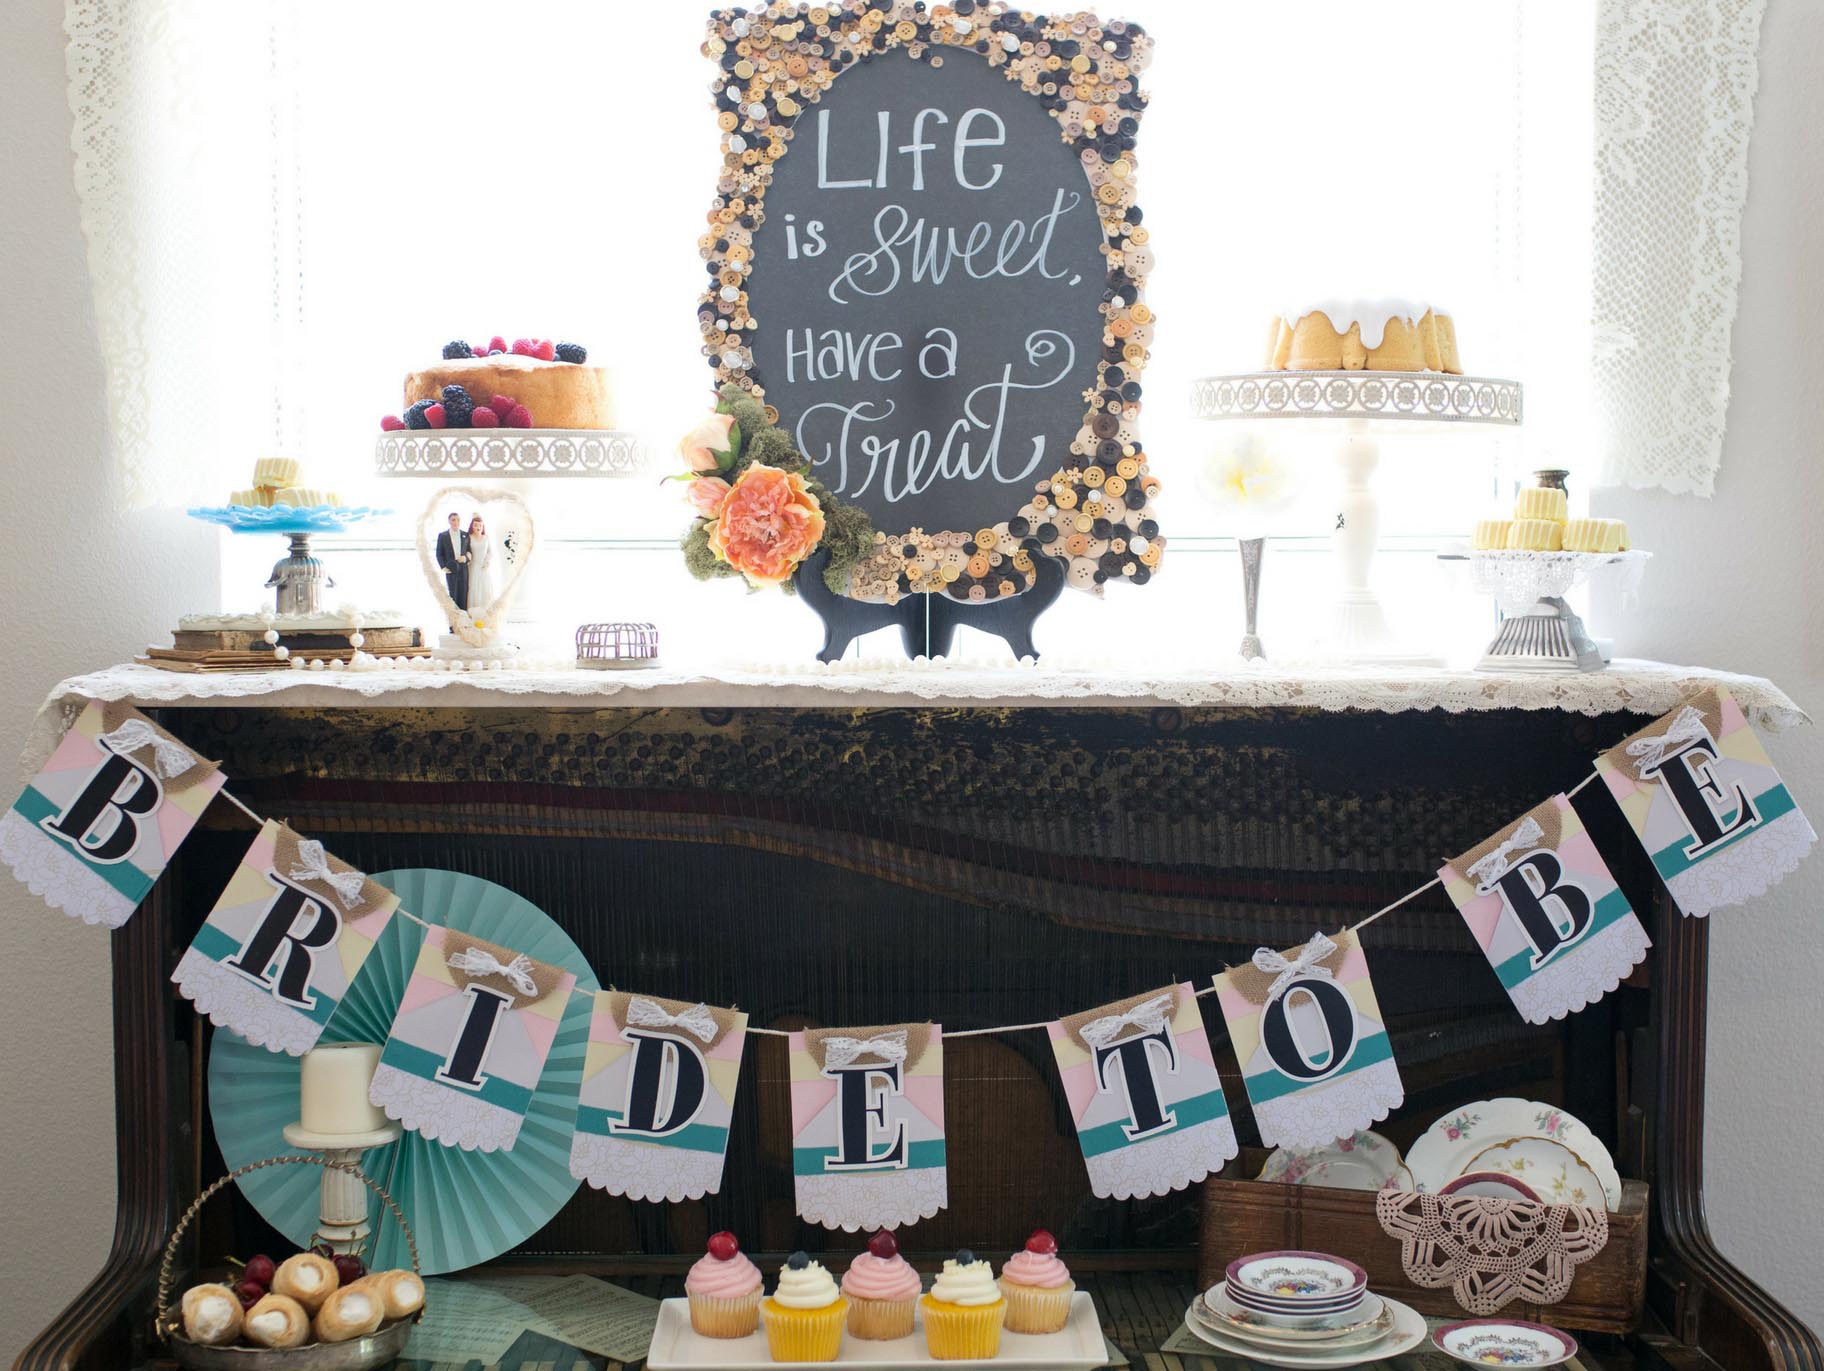
This banner makes a beautiful, handcrafted accent for your Vintage Romantic Bridal Shower. If you want more ideas how to create the perfect shower take a look at my Romantic Style Floral Embellished Parasol, Perfectly Peach-Cherry Jam Party Favors Recipe, Spread the Love Decorated Jam Jars, Vintage Inspired, Button Embellished Chalkboard Frame Tutorial, DIY Vintage Romantic Papercraft Backdrop.
For the background color of each letter, trim five light pink and four ivory cardstock papers to 4″ x 5″. Next, trim border strips of paper to a size of 4″ x 3/4″. You will need nine teal, five ivory, and four light pink. Fold each Shabby Chic Lace Placemat in half, then fold in half again so that you can see where to trim. Cut into four equal quarters and reserve nine of these pieces for the project.
To create the first letter, you will use a pink paper that you’ve trimmed to 4″ x 5″. Center the cut placemat piece on the paper, with the scalloped edge hanging down approximately an inch, and fold the corners back, to align with the sides. Glue in place. Repeat this step on each of the 4″ x 5″ papers. It may help you stay organized to alternate the colors of the background pieces as you go.
Turning the paper over, you’ll need to take note of whether you’re working with a pink background or an ivory one. If it’s ivory, your top trim piece will be pink. If the piece you are working on is pink, then the top trim piece will be ivory. The bottom trim piece will always be teal. Glue in place as shown.
Fold one burlap circle in half over the top of each piece, and glue in place on the front only. (Note: You will need to leave the back unglued, so that later, you can add the twine to hang the banner.)
Center the Spumoni uppercase letters on each card. Remember to start with a pink background so that you don’t run out of pieces, and alternate to the background color of the next letter. Glue in place, in order, to spell out the phrase “BRIDE TO BE”.
Trim the lace ribbon into nine equal lengths of about 10 inches; and carefully tie each piece into a bow.
Glue one bow to the top center of each of your banner letters. Add the twine, being sure to space your letters about 1/3″ apart, and glue down the back of the Burlap Circles over the twine to hold in place. Once dry, your banner is ready to hang up!
This banner makes a beautiful, handcrafted accent for your Vintage Romantic Bridal Shower. If you want more ideas how to create the perfect shower take a look at my Romantic Style Floral Embellished Parasol, Perfectly Peach-Cherry Jam Party Favors Recipe, Spread the Love Decorated Jam Jars, Vintage Inspired, Button Embellished Chalkboard Frame Tutorial, DIY Vintage Romantic Papercraft Backdrop.


