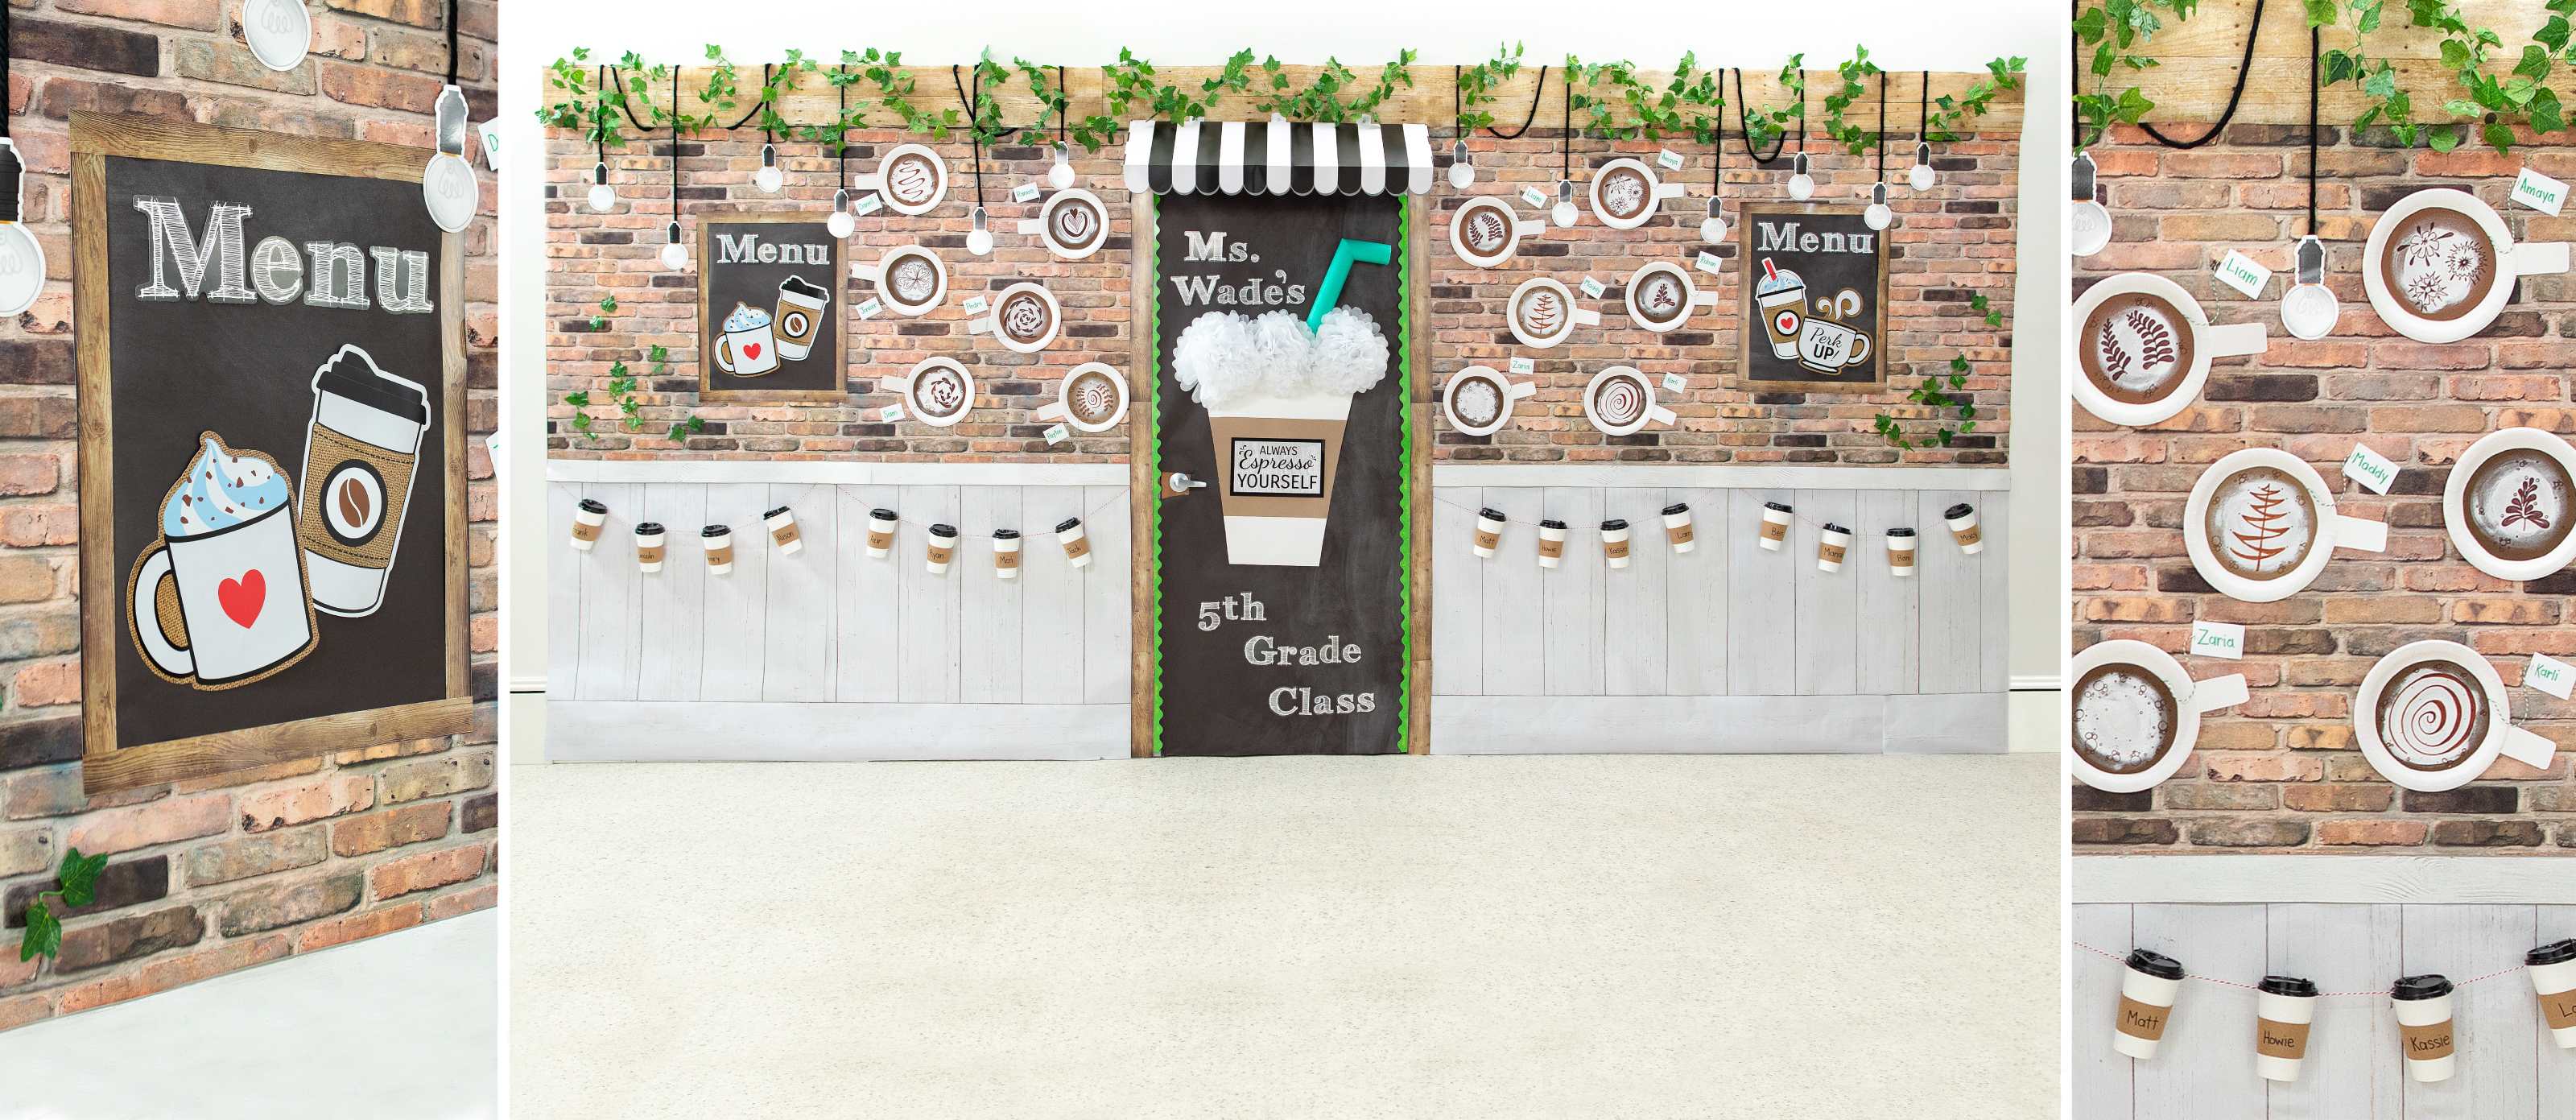
Perk up your classroom with coffee-themed classroom door décor! This DIY classroom decoration pours on all the charm for a fun look that combines a warm welcome with an opportunity for students to express-o themselves with crafts that adds to the décor. Ready to get brewing? Let's go!
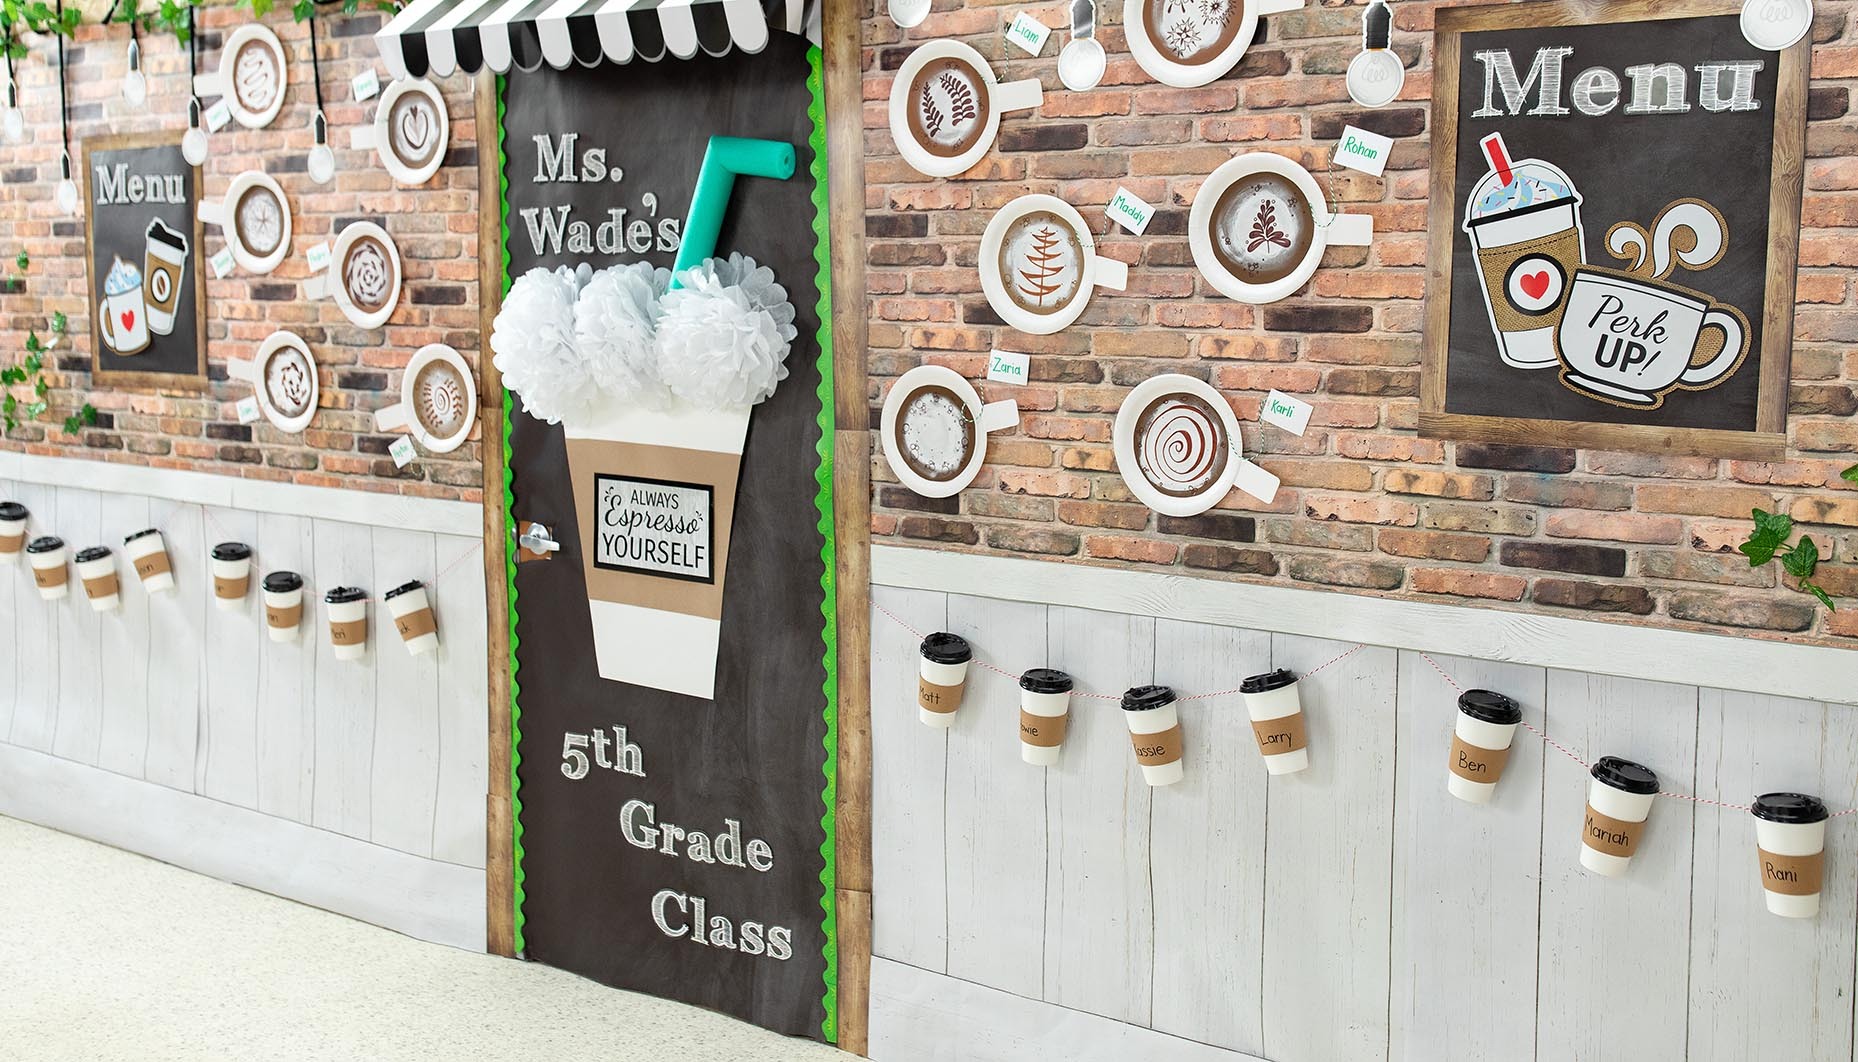
Line the bottom half of the walls with White Shiplap Paper Roll so that the boards are vertical. Line the top half of the wall with Brick Paper Roll. Cut a strip of the white paper shiplap using the printed lines as a guide. Tape the cut strip across the bottom of the wall so it looks like a single board. Use White Shiplap Bulletin Board Borders to finish off the top of the faux wainscoting.
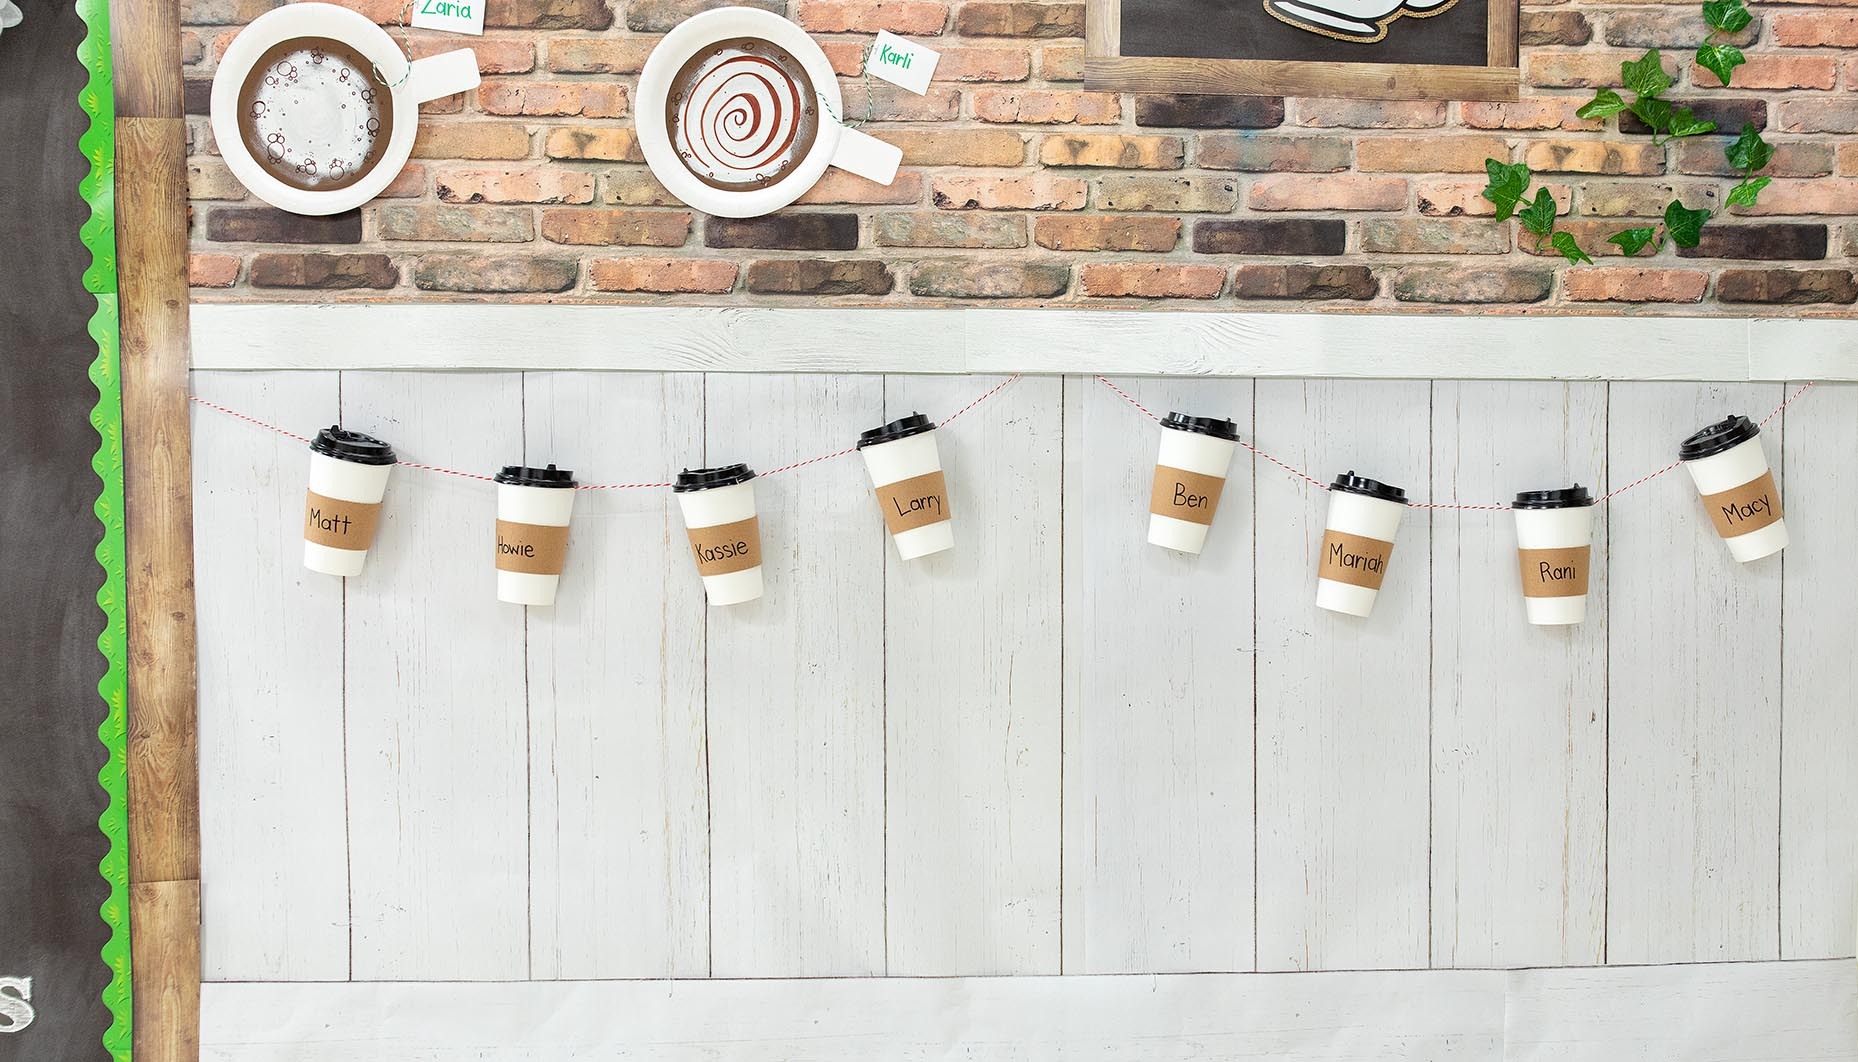

Next, create a coffee cup garland by writing each student's name onto one of the White Coffee Cups with Lids and Sleeves. Glue a length of baker's twine to the top of the cup and place the lids onto the cups. Hang the garland across the faux wainscoting.

To create a faux beam, cut strips from the Weathered Wood Paper Roll, two boards at a time. Tape the cut paper boards across the top of the brick paper us Mavalus Multi-purpose Adhesive Tape. Cut the Faux Ivy Greenery Garland into 12-18" lengths and tuck them behind the faux beam, taping them into place. Tape the Light Bulb Bulletin Board Cutouts onto the brick background at different heights. Create faux electrical cords with thick black yarn, taping and wrapping the yarn around the faux wood beam.


Now it's time to create faux chalkboards. Cut a piece of Chalkboard Paper Roll and frame it with Woodgrain Bulletin Board Borders cut in half lengthwise to create thinner strips. Repeat to make another chalkboard for the other side of the wall. Finish the faux chalkboards with cutouts from the Coffee Bulletin Board Set and Chalkboard Letter Pop Outs.

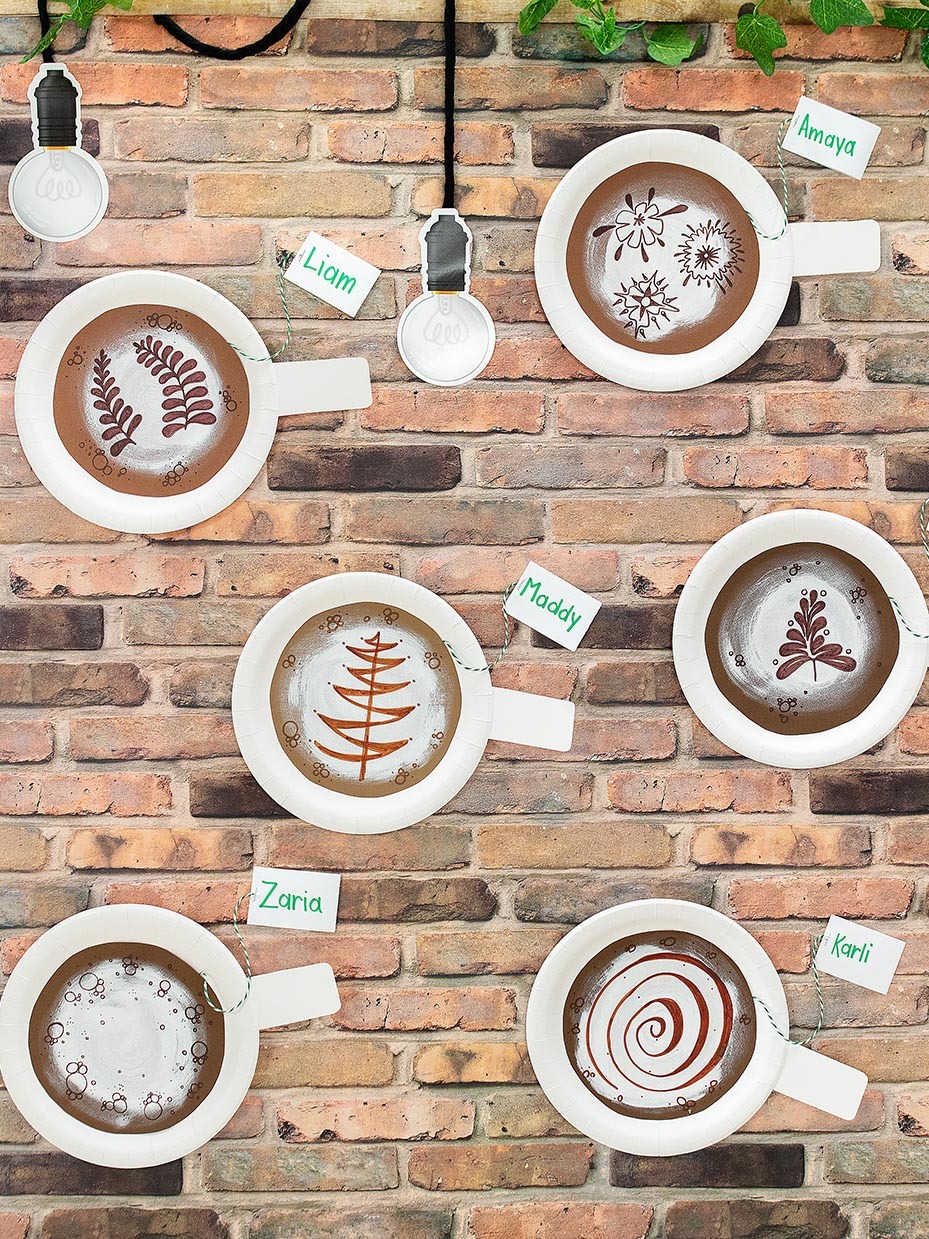
To create the Froth Art, cut a Brown Construction Paper circle to fit the inside of a White Paper Dinner Plate. Use white paint and a Dot Foam Paintbrush to drybrush 'froth' onto the top of the paper circle. Set aside to dry. Cut a small strip of white cardstock and have the students write their names onto both sides. Staple a length of Baker's Twine to the paper strip and glue the other end to the paper plate. Cut a second strip of paper and glue it to the side of the paper plate to create the mug handle. Once dry, glue the painted cardstock circle to the inside of the paper plate. Have the students draw froth art onto the paper circle using a brown marker. You can even create a lesson about symmetry by having students make both sides of their art the same. Hang the finished projects onto the brick walls.
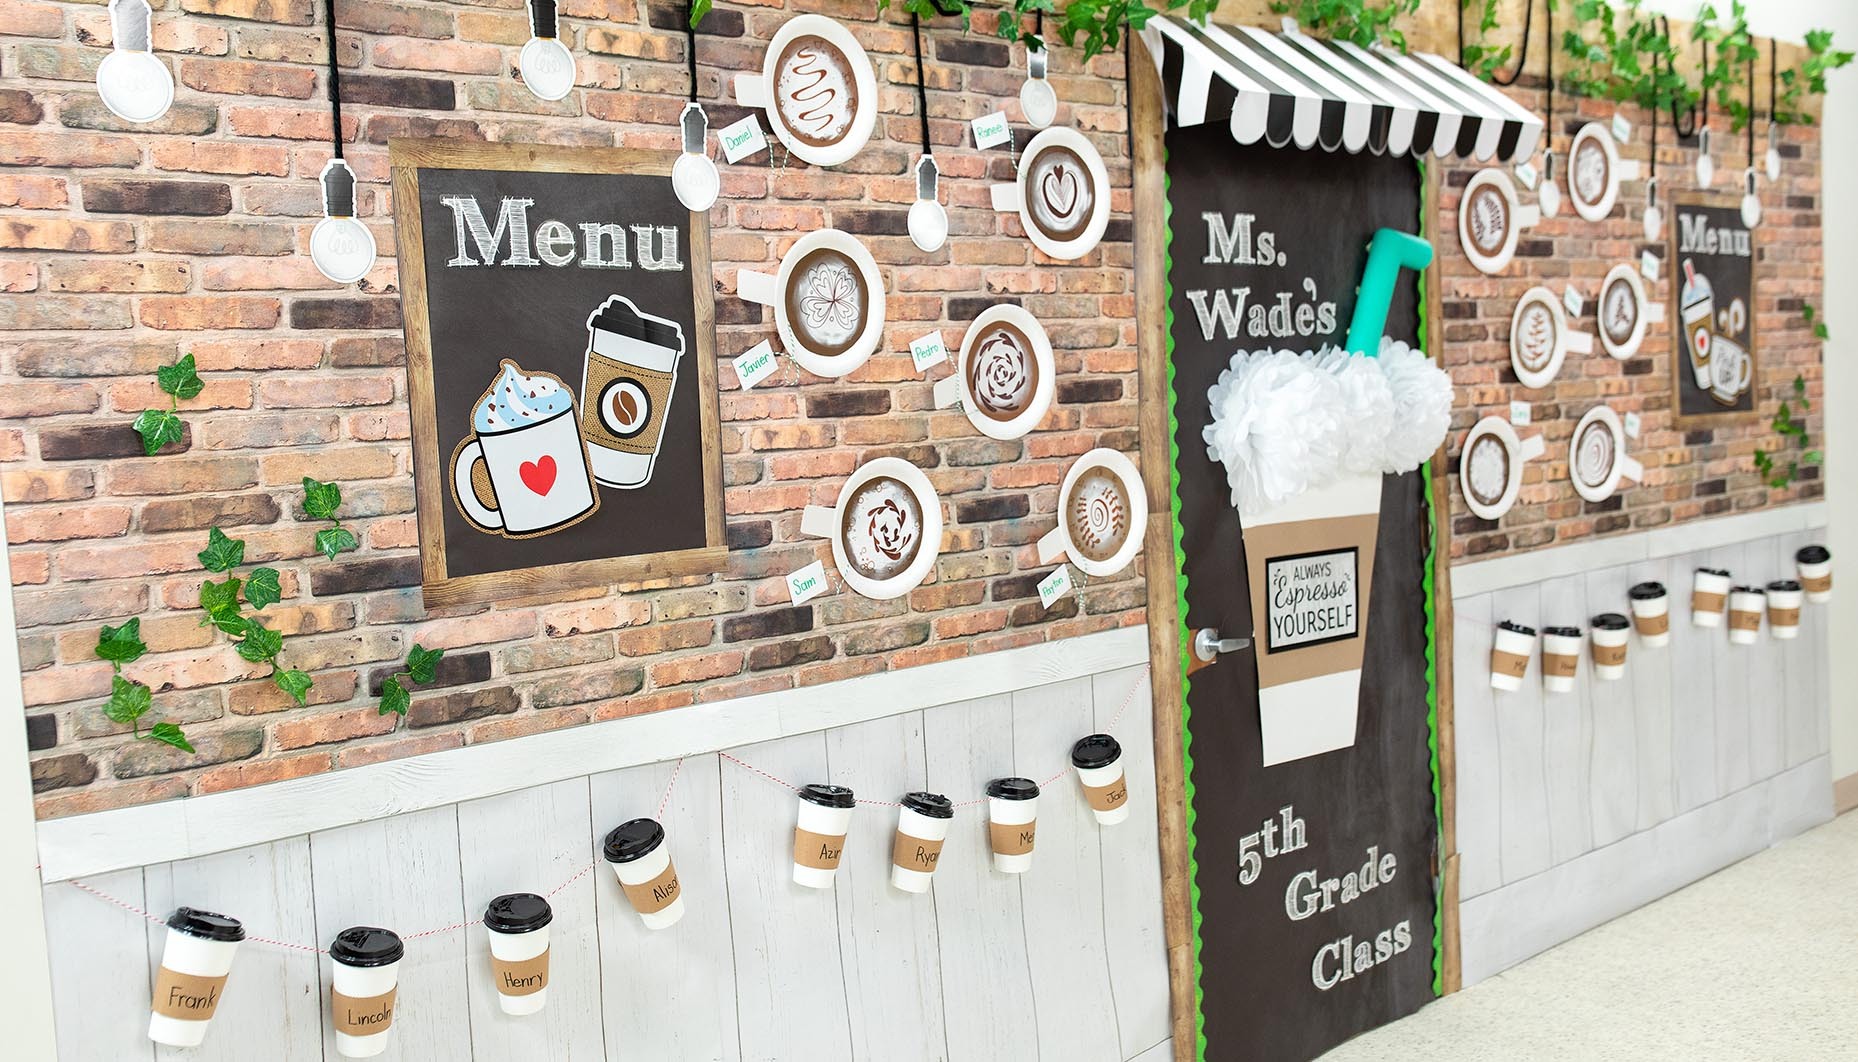
Add a few bundles of Faux Ivy leaves here and there on the brick to create a growing ivy look.

Cover the door with Chalkboard Paper Roll. Line the door with Woodgrain and Scalloped Green Bulletin Board Borders around the door.
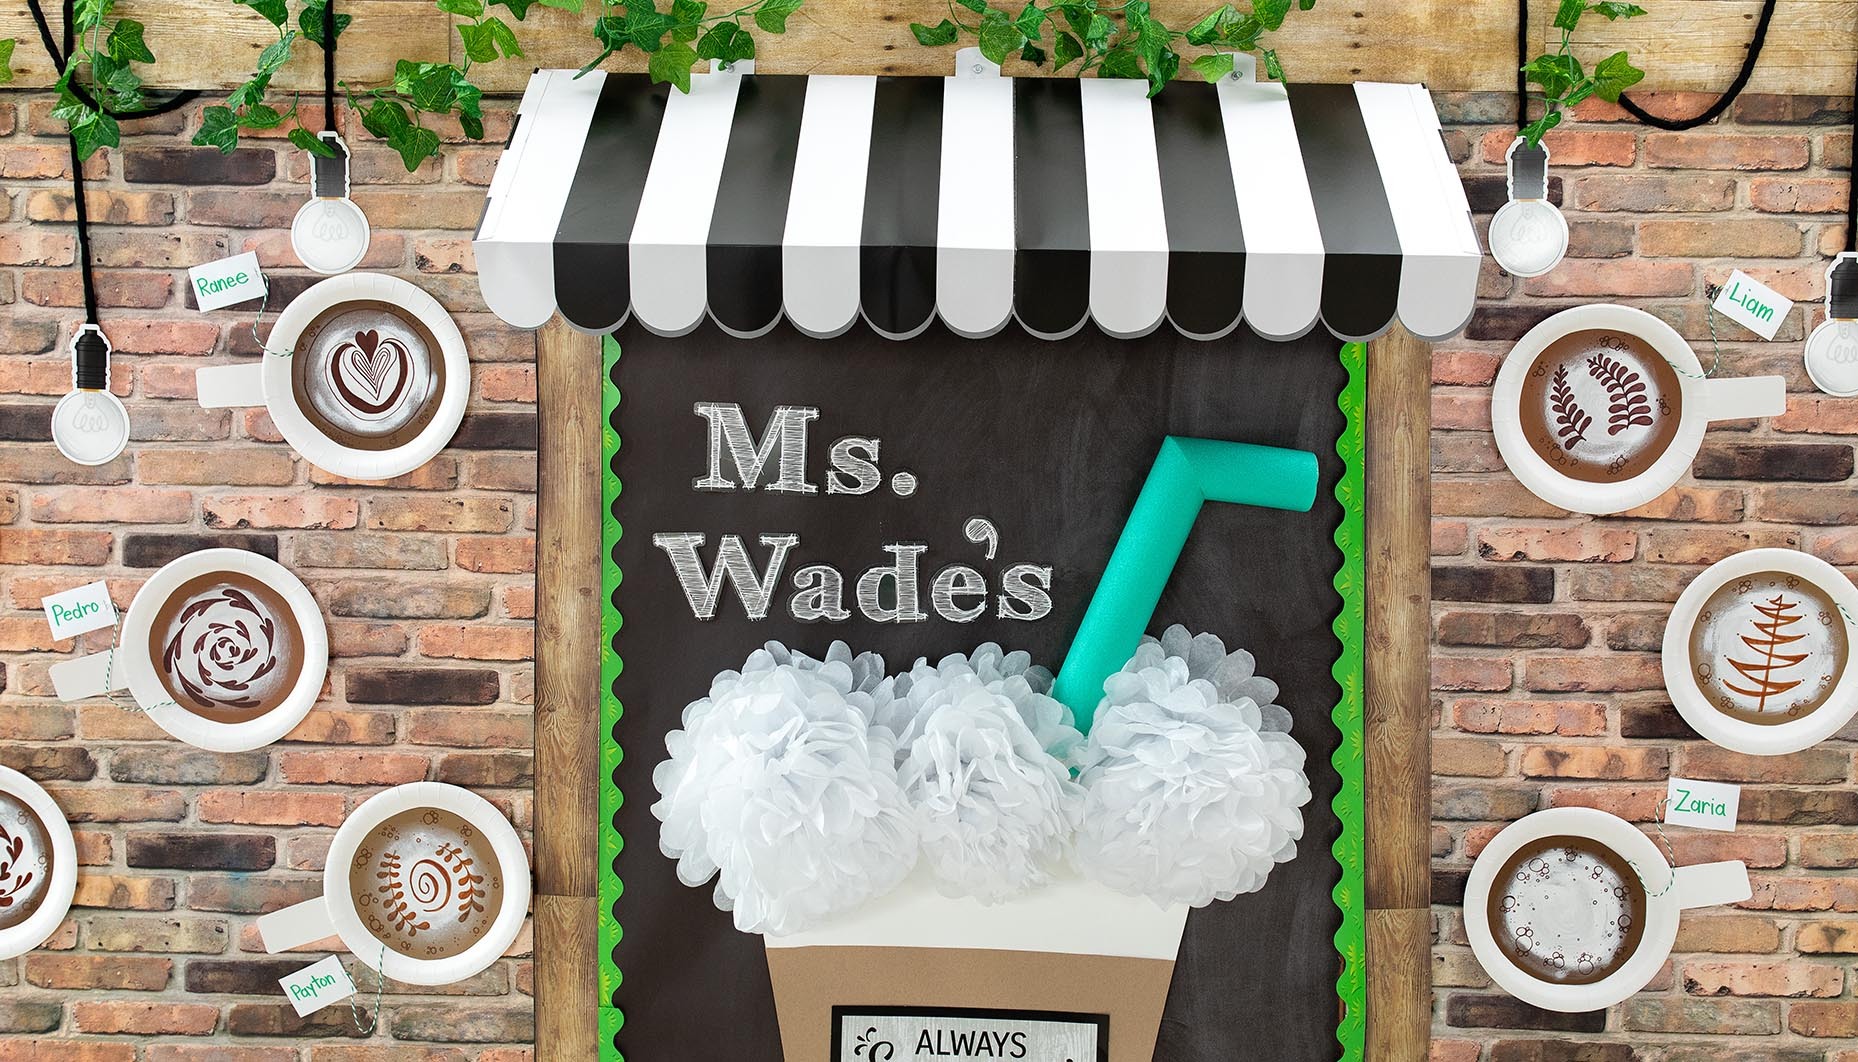
Assemble the Double-Sided Striped Window Awning with the black stripes facing out. Hang the awning above your door, but make sure your door will still open all the way once it's hung!
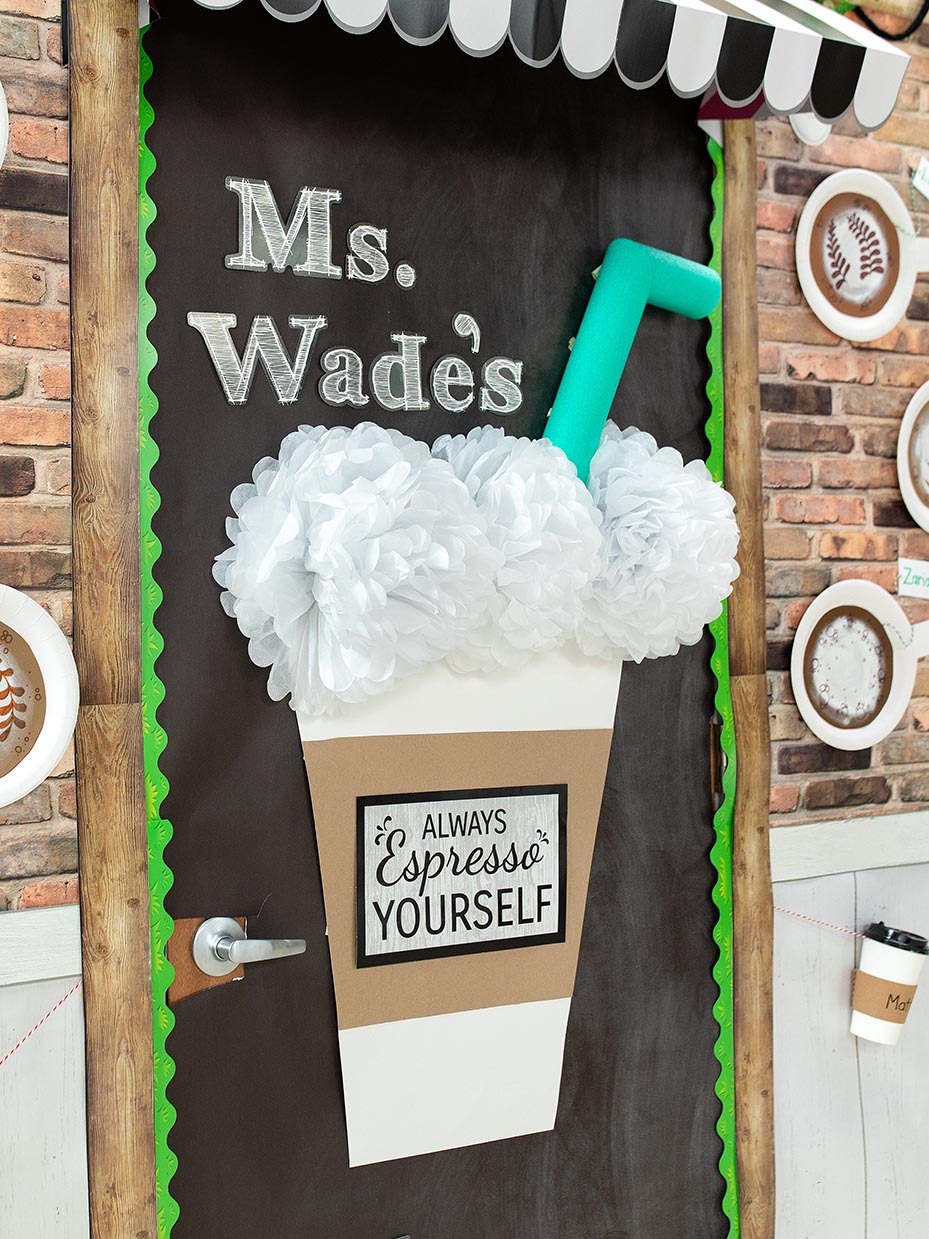
To create the 3D coffee cup, cut a coffee cup shape from white poster board. Add a thick strip of kraft paper across the front of the cup shape and add a cut out from the Coffee Bulletin Board Set. Tape the coffee cup shape to the door and top the cup with White Tissue Paper Poms to create froth. Cut a green Pool Noodle at an angle, and then cut a smaller piece also at an angle. Glue the two cut pool noodle pieces together to create a straw. Tape the straw to the door. Use Chalkboard Pop Out Letters to call out your classroom.
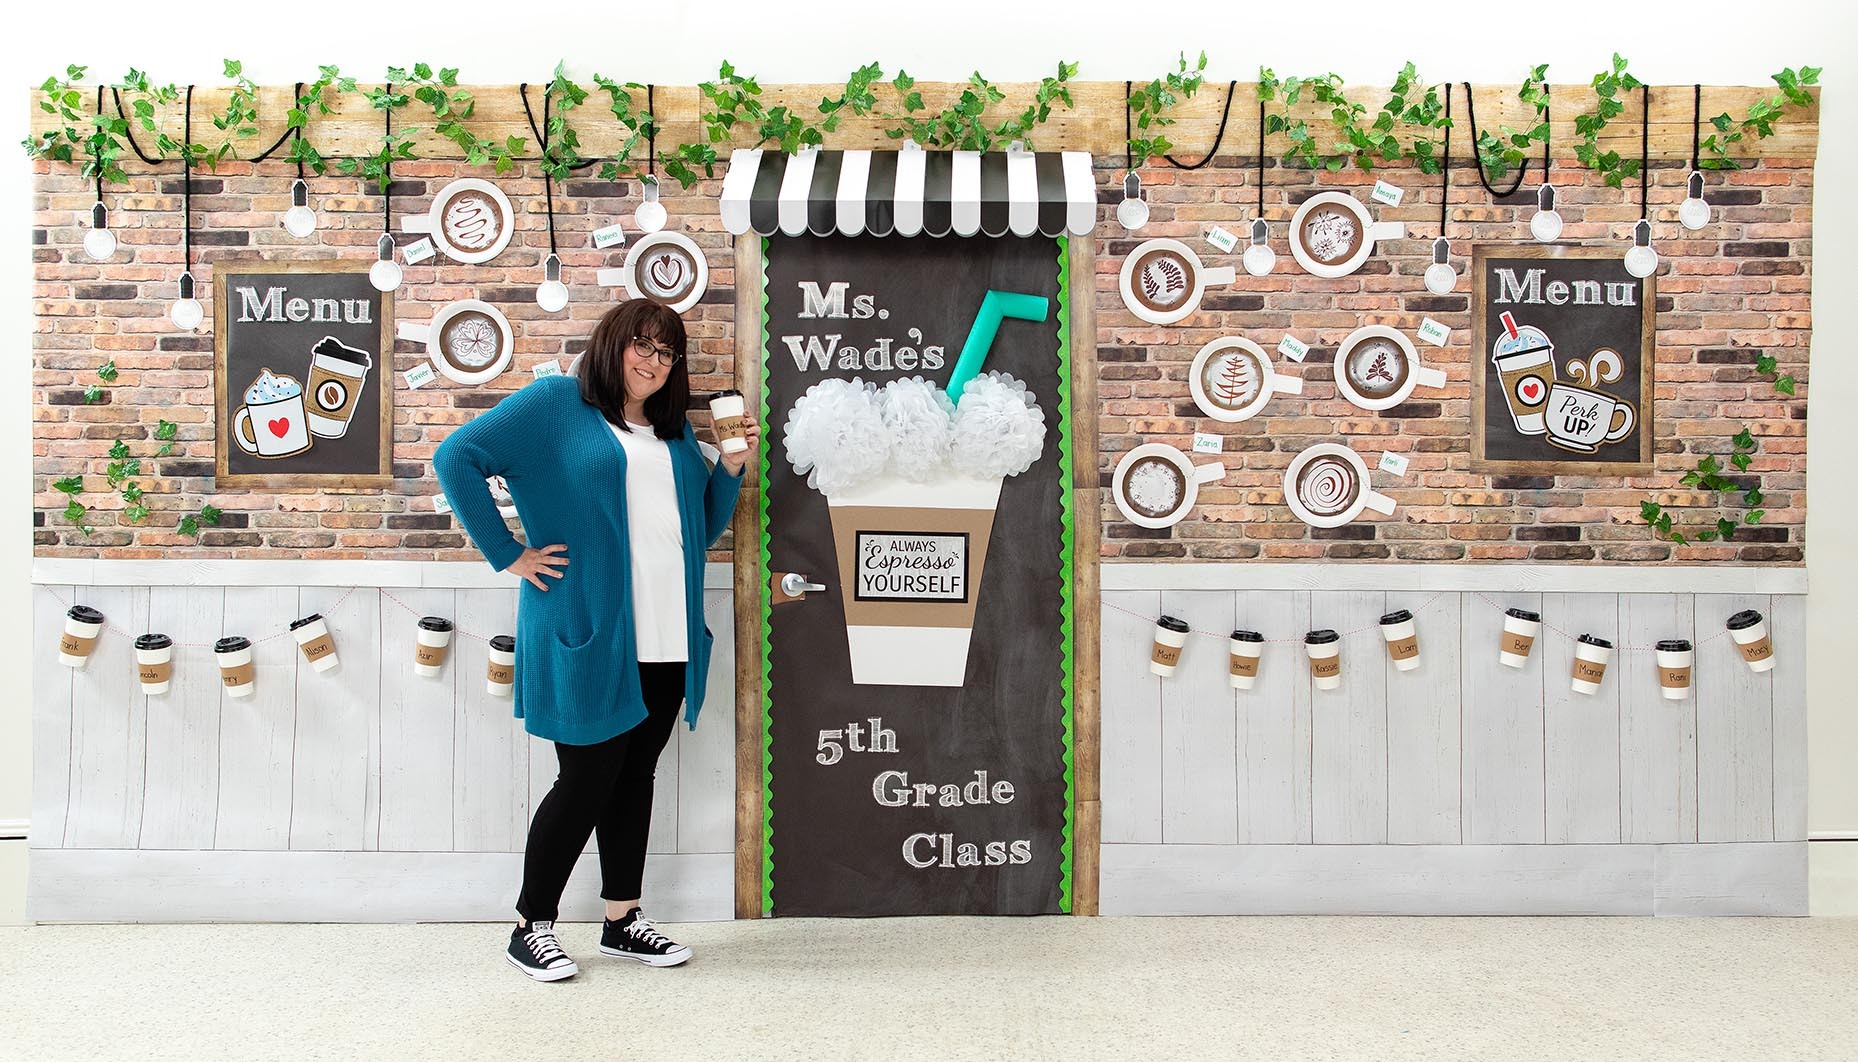
Need more classroom decor ideas? You'll find plenty classroom door decor ideas here!

